Showing posts with label Altered Art. Show all posts

Wednesday 29 November 2017

Revamp your bag by DT Khushboo

Good morning all you lovely crafters out there!

I'm Khushboo and I'm here with a new Inspiration Post today.


Often times, we love certain possessions of ours, and when they start showing signs of wear and tear, we are left with no option but to throw them out! That really breaks my heart. Recently, I was again faced with the same dilemma - when my favourite bag (which I haven't even used all that much :(!) started to lose its resin material from the sides. If I wasn't a crafter, with a very heavy heart I would have had to throw the bag away. But now that that's not the case, I know exactly how to give my bag a new life :D - all thanks to the Decoupage technique! Yep, today, I'll share with you how you can use decoupage on your bag and make it look as good as new!


Let's take a look at the pictures of my finished project first and I'll then explain how I managed to do that!


(My bag originally look like this. And all the brown piping and stitched boundaries that you see started to rip away.)


Pic credit: Pinterest


These are some of the pictures of my transformed bag. Notice how I decoupaged with designer paper napkins on the boundaries.


Materials used:

  1. Designed tissue paper
  2. Mod-Podge (or any other decoupage glue)
  3. Gesso
  4. White paint
  5. Paint brushes
  6. Tweezers
  7. Clean rag
  8. Water

Brief steps for transforming your old bag into new:

  • Wipe your bag with a clean cloth to get rid of the dust, dirt and grease.
  • Pluck out the ripped and lose hanging resin pieces on your bag (this is to enable that the part where you will stick the tissue is even and flat, no uneven texture).
  • Apply two coats of gesso and let it dry after every coat.
  • Paint the surface with white paint once the gesso is dry.
  • Rip small pieces of decoupage tissue according to the size of the surface you want to cover.
  • Start laying it down on the surface with the help of your paintbrush and decoupage glue.
  • Apply two coats of decoupage glue and let every coat dry thoroughly.
  • Finish it off with a nice clear varnish or spray.


Signing out,

Hope you guys enjoyed my creations and the tutorial. Can't wait to see how you add your own twist to this!


Above mentioned products are available at Rainbow Craftykari Store OR you can pre-order the products by sending an email at rainbowcraftykari@gmail.comThat's it from me, folks!


Khushboo R. Gandhi

Wednesday 22 November 2017

Altered Bottles by DT Anila

Hello friends!

Don't we all like to hoard things? We not only like to buy and hoard new items but also like to collect things which can be reused/upcycled in some form or the other, with the hope of giving these junk/scrap items new life sometime. 


I have a huge collection of glass bottles, cardboard/paper boxes, invitation/greeting card, tissue paper rolls and what not.


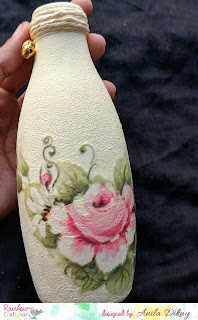
Today I am showcasing an upcycled glass bottle. This is just an inspiration for you to start using/revamping those things you have been hoarding endlessly. 


Here, I have decoupaged the (2) glass bottles to convert them into beauties to adorn your homes. They can also be given out as gifts.

Here's a look at the project -


Materials used

  • Chalk paints
  • Decoupage tissue papers
  • Sponge
  • Paper string
  • Thread and bells.


Method -
  • Firstly, remove any sticker on the bottle. Wash the bottle clean and dry it completely. 
  • Cover the bottle completely by dabbing the sponge with chalk paint over it. Let it air-dry.
  • Repeat the process to get a more uniform finish. 
  • Pick the tissue to be used and trim the design as desired. 
  • Carefully remove the backing/second ply of the tissue.
  • Apply a coat of Mod-Podge and stick the tissue over it carefully avoiding any creases. Let dry.
  • Apply a coat of Mod-Podge over the tissue paper to seal it. 
  • Tie a paper string to the neck of the bottle, covering it fully.
  • Tie a set of bells/Ghungroos with the help of a thin thread.


More pictures follow -


Hope, I could inspire you to finally start working on those things and give them a new life.

Do check out our ongoing challenge on the blog here
And do not forget to participate. 

Love,
Anila

Monday 20 November 2017

Mixed Media Wooden Piece Tutorial by DT Priya


Hello Crafty Folks,

A very good morning to all of you.I'm back with a Picture Tutorial for a Mixed media Wooden Piece. Here I have explained how I have made this piece totally out of scrap. Except for colouring and glueing you don't need any supplies to make this kind of a project.
Here is what I made....


So let's Start...


Step 1:
I had this wooden plank which is about 2.5 feet in length. You can take any base be it wooden or canvas, Procedure will be the same. I used some masking tape on corners and sides to fill the uneven parts. Also attached a hook at the back so that I can hang it on my wall.


Step 2:

I gave it a coat of white gesso.


Step3:

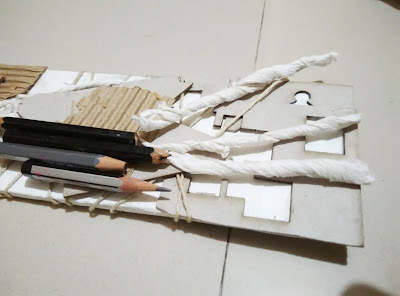
Here you can see the things I have used on the base to create textures. Some negative of chippies, Gauze cloth, Twine, some nails, buttons, tissue paper, pista shells, broken pencils, tags, broken toys etc.


I cut and glued the negative chippies on the base as shown in the picture below and also tied some twine on desired spaces.


Step 4: 

Then I arranged some gauze around the chippies and adhered some corrugated sheet here and there and also attached lace at few places.


Step 5:

Then I arranged tissue rolls, some chipboards, metal charms, tags, broken pencils and other embellishments using 3d matte gel.


Here are some close-ups of the arrangements in case you are interested.


Step 6: 

Then I gave a coat of white gesso on it after all things dried up. Also used a light coat of Decoart crackle texture paste here and there.


As you can see I arranged some broken jewellery pieces on it to add more textures and finally added a butterfly chipboard to give some height.

Step 7:

Then I started colouring this after it is fully dried. Firstly I gave a coat of Chalk paint Sailing sky and Mint green Patina Paste. Then I started dry brushing with Rust and Brass Patina paste mixed together. Also rubbed blue patina paste here and there for the effect.


Supplies Used:

Wooden PlankPapericious White gessoFinnabair Patina Effect Paste ( Mint Green, Blue, Rust, Brass)
Deco Art Crackle Paste

Rangers 3D Matte Gel

Acrylic paint Rust

Papericious ChipBoards

Corrugated sheets

Laces
Gauze


You can get all the above-mentioned products from Rainbow Craftykari Shop or can pre-order by sending an email to rainbowcraftykari@gmail.com.


Also, do not forget to participate in our ongoing challenge here and check out other gorgeous projects and tutorials from our awesome Design Team.

Hope you like my project.

Hugs,

Priya

Friday 6 October 2017

Ganesha Diwali Home Decor Piece Tutorial by GDT Vinita Jain

Hello Everyone!

Happy October!

This is a month of the festive season and Diwali is my most favorite festival, so there is no question about what I love to create with the Mixed Media projects!

You can surprise your guests and visitor this Diwali with your own handmade creation, no need to buy from the market now!

Today I want to show you my new MM project on coming festive occasion
And to inspire for this month challenge "Lights & Celebrations".


And here it goes.............!!!!!!

I converted a piece of plywood into a magical wall decor art. I coated it with Plaster of Paris with the textured look.


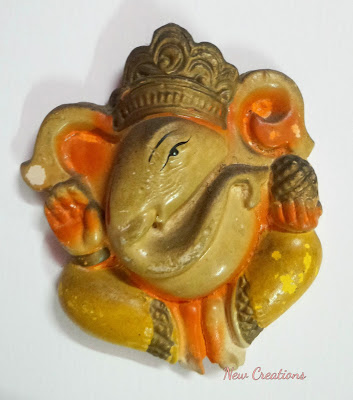
Give a new life to Lord Ganesha by using any kind of pearl colors.


Happy with the results using Fevicryl Pearl colors, Terracotta and Old gold Inka Gold!


Now time to create a background scene for Lord Ganesha.


Using air dry clay and a mould I made some embellishments to decorate and let it dry them for a full day.


Now given a coat of gesso to all of them. Don't worry about some cracks because they are very delicate, it will hide with some embellishments:) Fixed metal holders to hang the decor piece.


Applied fevicol and sealant to paste them all.


Die cut lots of different flowers and leaves out of Iris paper, perfect for flower making using Iris sheet.


Soak the flowers and leaves in the water bowl for a minute and inked them using distress inks.


Shaped them using golf groove tool and embossing pad as shown in the pic, perfect for textures and details.


Now time to create the background. Misted the piece with different color splashes. Firstly I started with turquoise color mist bottle at all 4 corners with the height of 4 or 4.5" gap. Then misted with midnight blue, not on the middle part because I wanted the Ganesha to highlighted in sunbursts color effect! Then misted with dirty pink near the pillars. After that misted with chalk ultramarine and golden canary. You will easily achieve the same results as shown in the pic.


Now rubbed all the white part using old gold and turquoise Inka gold to highlight the detailing work as shown in the pic. And applied a little bit at the surface and chippies too!


Here are some close-ups for the detailing work:


Rub some Inka gold on the metal charm OM word. Paste it on the tea holder and embellished it with some gemstones.


Now embellished the whole piece with my own handmade flowers and few rhinestones, gems. See the details in close-ups clearly!


And covered the backside with the corrugated sheet attached a heart-shaped border at the bottom.

Here is the finished project and ready to hang on the wall. I am really happy that this time I will decorate my Pooja place with my own wall decor piece!!! 😊


Isn't it gorgeous at all!!!

Hope you all enjoyed this project and try to make for yours one too to decorate your home this Diwali! Love to see what you come up with our new challenge here.


Supply list:

Plywood piece

Iris paper

Dies: Flower 2 from Joy crafts; Sunflower from Cheery Lynn; Small tattered florals from Sizzix Thinlits;

Chipboard: Papericious- patterns

Distress inks: fossilized amber, carved pumpkin, fired brick, candied apple, mermaid lagoon, twisted citron, mowed lawn, lucky clover,

Air clay dry from Sculpt Dry

Moulds: Baroque 6- Vintage art mould from IOD Prima

Gesso: Camel

Inka Gold: Turquoise, old gold

13 arts Ayeeda Mist: pastel turquoise, chalk dirty pink, chalk ultramarine

Gold alcohol splash: midnight blue, golden canary

Moda color- terracotta

Fevicryl pearl colors: pearl lemon, sparkling pearl golden green

Groove golf tool

Aleen's tacky glue

Other materials: Fevicol, Silicon glue, Different sizes and shaped rhinestones, Golden heart bead lace, A candle stand, OM metal charm, Glass pollens, colorful pollens, some mulberry flowers

All the above-used materials you can pre-order at the Rainbowcraftykari store and some are already available there!


Happy crafting!

Vinita Jain