Showing posts with label Decoupage. Show all posts

Tuesday 17 April 2018

Travel Watch Box inspiration by DT Vidhi

Hello Crafty folks,
How are you all? What’s happening?  Are you done with your planning for this summer vacation? Come summer and everyone is bitten by the wanderlust bug. As the travel is on cards, here I am, back again at Rainbow Craftykari blog with my DT Inspirational post dedicated to Travel.

Do you have any idea as to who travels the most? It's the “Postal Stamps”. Nowadays they
aren't in vogue courtesy the New Fast Technology ... Nostalgia associated with Postal
Stamps compelled me to reuse them. There is one more element closely associated
with travel I feel and it is “Time”. The trio of Travel, Postal Stamp and Time looked so disjointed. But on a closer look together they inspired me to create a Masculine Watch Box with decoupage.


Let’s hop on to the project:

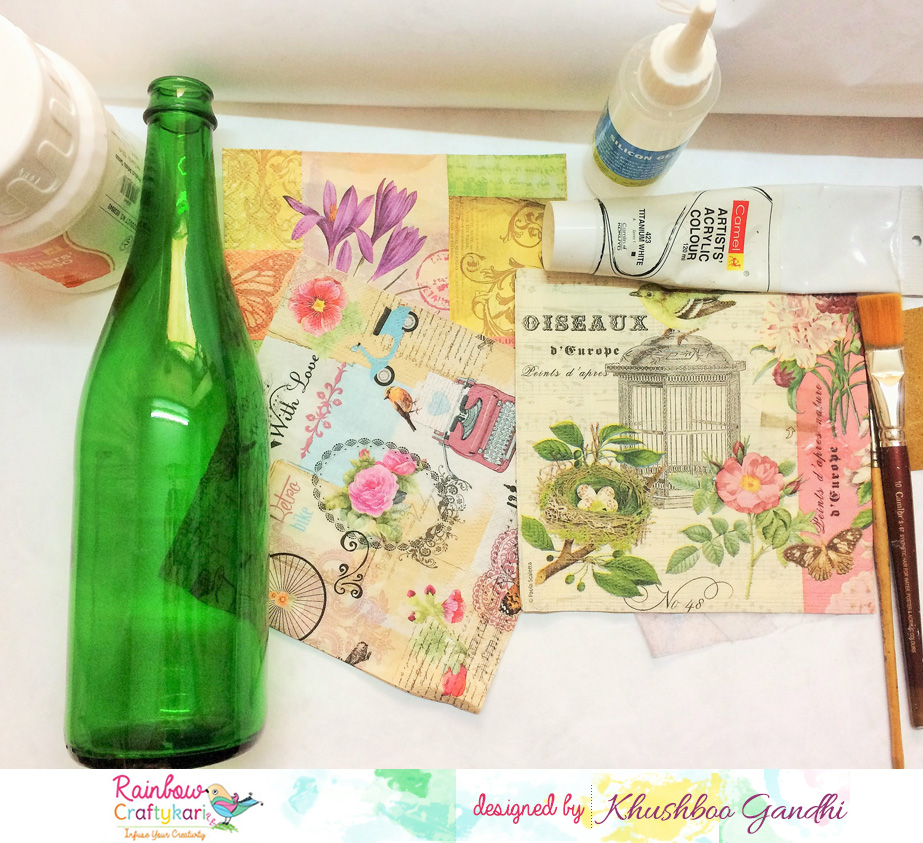
I took a raw MDF Watch Box with 5 partitions inside and gave it a coat of white
gesso to prime the entire box. Next, I painted it with Chalk paint and covered
all sides of the box. Then I distressed all my postal stamps with distress
ink for a vintage look.


After that, I started applying Postal Stamps on the top of the box with Mod Podge.
This was a random arrangement. I purposely did not cover the entire portion with stamps. I left some place on one side to add more zing to it.


On the left side of the top, I stamped some post and travel related stamps with Archival Black ink. With this addition, the lid of the box was ready.

Then I covered the three sides of boxes with decoupage paper and decoupage glue. I
chose a world map paper to match the travel theme. I distressed all the edges of the box with Vintage Photo distress ink and the box was ready!


Last and most important, I covered all the sides of the box lid with masking tape
and applied a fine layer of resin. When resin dried completely I removed the
masking tape and smoothened the edges with sand paper. 
Postal stamps, time, travel and watch box….an adorable quartet!


Most of the above listed materials are available at Rainbow Craftykari store and can
also, be pre-ordered by sending an email at rainbowcraftykari@gmail.com.

Do visit the Rainbow Craftykari store HERE

Visit our BLOG for more inspirations , tutorials and check out our ongoing challenge.

Happy Crafting

Hugs,

Wednesday 29 November 2017

Revamp your bag by DT Khushboo

Good morning all you lovely crafters out there!

I'm Khushboo and I'm here with a new Inspiration Post today.


Often times, we love certain possessions of ours, and when they start showing signs of wear and tear, we are left with no option but to throw them out! That really breaks my heart. Recently, I was again faced with the same dilemma - when my favourite bag (which I haven't even used all that much :(!) started to lose its resin material from the sides. If I wasn't a crafter, with a very heavy heart I would have had to throw the bag away. But now that that's not the case, I know exactly how to give my bag a new life :D - all thanks to the Decoupage technique! Yep, today, I'll share with you how you can use decoupage on your bag and make it look as good as new!


Let's take a look at the pictures of my finished project first and I'll then explain how I managed to do that!


(My bag originally look like this. And all the brown piping and stitched boundaries that you see started to rip away.)


Pic credit: Pinterest


These are some of the pictures of my transformed bag. Notice how I decoupaged with designer paper napkins on the boundaries.


Materials used:

  1. Designed tissue paper
  2. Mod-Podge (or any other decoupage glue)
  3. Gesso
  4. White paint
  5. Paint brushes
  6. Tweezers
  7. Clean rag
  8. Water

Brief steps for transforming your old bag into new:

  • Wipe your bag with a clean cloth to get rid of the dust, dirt and grease.
  • Pluck out the ripped and lose hanging resin pieces on your bag (this is to enable that the part where you will stick the tissue is even and flat, no uneven texture).
  • Apply two coats of gesso and let it dry after every coat.
  • Paint the surface with white paint once the gesso is dry.
  • Rip small pieces of decoupage tissue according to the size of the surface you want to cover.
  • Start laying it down on the surface with the help of your paintbrush and decoupage glue.
  • Apply two coats of decoupage glue and let every coat dry thoroughly.
  • Finish it off with a nice clear varnish or spray.


Signing out,

Hope you guys enjoyed my creations and the tutorial. Can't wait to see how you add your own twist to this!


Above mentioned products are available at Rainbow Craftykari Store OR you can pre-order the products by sending an email at rainbowcraftykari@gmail.comThat's it from me, folks!


Khushboo R. Gandhi

Wednesday 22 November 2017

Altered Bottles by DT Anila

Hello friends!

Don't we all like to hoard things? We not only like to buy and hoard new items but also like to collect things which can be reused/upcycled in some form or the other, with the hope of giving these junk/scrap items new life sometime. 


I have a huge collection of glass bottles, cardboard/paper boxes, invitation/greeting card, tissue paper rolls and what not.


Today I am showcasing an upcycled glass bottle. This is just an inspiration for you to start using/revamping those things you have been hoarding endlessly. 


Here, I have decoupaged the (2) glass bottles to convert them into beauties to adorn your homes. They can also be given out as gifts.

Here's a look at the project -


Materials used

  • Chalk paints
  • Decoupage tissue papers
  • Sponge
  • Paper string
  • Thread and bells.


Method -
  • Firstly, remove any sticker on the bottle. Wash the bottle clean and dry it completely. 
  • Cover the bottle completely by dabbing the sponge with chalk paint over it. Let it air-dry.
  • Repeat the process to get a more uniform finish. 
  • Pick the tissue to be used and trim the design as desired. 
  • Carefully remove the backing/second ply of the tissue.
  • Apply a coat of Mod-Podge and stick the tissue over it carefully avoiding any creases. Let dry.
  • Apply a coat of Mod-Podge over the tissue paper to seal it. 
  • Tie a paper string to the neck of the bottle, covering it fully.
  • Tie a set of bells/Ghungroos with the help of a thin thread.


More pictures follow -


Hope, I could inspire you to finally start working on those things and give them a new life.

Do check out our ongoing challenge on the blog here
And do not forget to participate. 

Love,
Anila

Tuesday 16 May 2017

Garden-themed Decoupage Bottle by GDT Khusboo Gandhi


Hie guys! I'm Khushboo Gandhi, and welcome to our next round of Tutorials. And especially for this, I've chosen one of the most interesting techniques: Decoupage. Today, I will teach you how to decoupage a bottle using tissue papers. 


First, you need to collect all the paraphernalia required for your project, like: a bottle, your choice of tissue papers, decoupage glue, gesso, white acrylic paint, paint brushes, glue and other embellishments (but these can be assorted later as well).


Step 1: Clean your bottle with rubbing alcohol to get rid of grease and stains. This will ensure that your bottle has a clean surface for you to work on.


Step 2: Gesso the bottle all over. Let it dry for some time. Gesso it again. Give it a few uneven coats (in case you want a textured surface).


Step 3: Choose the kind of design you want to put on your bottle. Generally, decoupage tissue papers are 2 or 3 ply i.e. they have 1 or 2 white, plain paper behind the design that you need to separate from (as can be seen in the following picture).


Step 4: Decoupage is the art of sticking design paper on the surface of a project. How much of that tissue paper you want to stick on your bottle, and how you want to place it - is entirely up to you. For my project, I wanted to wrap around one complete piece of tissue paper on the lower half of my bottle. So first take the decoupage glue and apply it with the help of a flat paint brush on the bottle. Then take your design tissue paper and lay it over the wet glue carefully and gradually. Then apply a coat of decoupage glue over the tissue again. Let it dry.


Step 5: For my project, I wanted to give it a little texture; and hence I let the creases form naturally white setting the tissue paper on my bottle. Repeat until the whole of your lower half bottle is covered with tissue (as can be seen in the picture below). 


Step 6: Now we need to cover the neck of our bottle. Here's a more detailed shot of the process. I took a small piece of my design tissue paper (butterfly motif) and spread it across a glued surface. I then applied another coat of decoupage glue over it.


Step 7: This is how it looks (see the picture below). Keep on repeating until the entire neck of the bottle is covered in tissue paper.


Step 8: Cover the white areas in-between the tissue paper pieces with a matching acrylic paint. This will give a cohesive look to your project. Let it dry.


Step 9: After half an hour, cover the whole bottle with an even coat of decoupage glue and let it dry completely. This will further seal your tissue paper layers and reduce wearing out the papers.


Step 10: Your beautifully decoupaged bottle is now ready to be embellished. Now starts the most adventurous part! Go wild! Try out different themes on your projects! For mine, I created a Garden Theme.


And Voila!!! This is how I embellished my project! Scroll on further to check out more pictures of this beautiful Garden Bottle.


Materials used:

Glass Bottle

White Gesso

Decoupage Glue

White Acrylic Paint

Design Tissue Paper

Pearl Trims

Flowers (paper/resin/acrylic)

Sentiment Stamps

Fillers

White, Green and Black Laces

3D Stickers

Dragonfly cut-out


Hope you guys enjoyed this tutorial as much as I loved making it for you! Do share your Decoupage creations along with handmade flowers - which is the theme for our new challenge at Rainbow Craftykari blog.

All the materials listed above are available at Rainbow Craftykari Store or you can pre order them by sending an email at rainbowcraftykari@gmail.com.

Warm Regards
Khushboo Gandhi
Fb Link: https://www.facebook.com/snowflakesandlilies/

Wednesday 26 April 2017

Decoupage on MDF Box with Easel Card Tutorial by DT Nikkita Sethi

Hello Crafters,

Nikkita here again on India's Best Papercrafting Blog that's Rainbow Craftykari Blog. Hope you all are doing great. Often you want to decoupage the MDF Box with pattern papers but many doubts arises, Today in our Teaching and Learning program, I'm going to share step by step tutorial Decoupage on MDF Box using Pattern Papers. Also I'm going to share one more tutorial on how to prepare an Easel card, which is going to be inside in it and it will become an Wonderful gift to present to your loved ones. It's going to be lengthy post, so sit back and grab your favorite summer drink.

Decoupage Box with Pattern Paper:

Step 1
Take MDF box of 6"x6" size. I have bought mine from Rainbow Craftykari Store. It has good finishing and of highest quality. Clean it completely using fine sand paper. Shake off the dust thoroughly.


Step 2
Apply Light Coat of Gesso to all over the box, Coat only once. Let it dry completely or Heat Dry it using heat tool.


I'm using Prima Rossibelle Pattern paper, so i have picked the color from it, then apply DecoArt Reminisce chalkboard paint using sponge or brush, chalkboard paints give a smooth and neat finish and dries quickly.


Step 3
For 6by6 inches box, have cut the pattern papers into 5.75inches leaves a 0.25 inch gap which shows the background color of the box and distressed the pattern papers with Black soot distress ink or any other ink to give a finished look.

I used mod podge to stick the papers it's a fabulous product for decoupage. Apply Mod Podge in Horizontal and Vertical way so that it get apply evenly on on base and it won't form any bubbles.

Tip: When you'll adhere the pattern paper, before give a one good coat of Mod Podge glue which is sufficient. Than take any clean rough cloth, fold into small rectangle shape and by keeping good pressure of your hand move that cloth piece on to the pattern paper, it will set  your pattern paper.
Stenciled using grey chalkboard paint and if you don't have grey use black and white acrylic paint. I have stenciled inside and outside before and after adhering the pattern papers. Heat Dry it.


For Inside have cut the pattern papers approx 7mm from all four sides. Adhere it using same technique. 


Step 4
Coming to decoration, I have colored the Simple Lattice Chippie from Papericious and other chipboard elements with DecoArt Reminisce ChalkBoard Paint using Sponge brush. To give a brushed look i have Distress them using Black Soot Distress ink. I have even use left over chippies from Simple Lattice to give a unique look. Have adhered them inside and top of the box using glossy accents.


On the top of the cover, I've placed chippies, flowers, Metal Embellishments and die-cuts from the Prima Rossibelle Collection to give symmetrical composition. After that i have adhered them with glossy accents and tacky tape.

Tip: You can take photographs of you composition, It'll help you to make the placements of your decorative products to check the correct composition, Once you're satisfy, adhere them.


Our Decoupage Box is Complete, Keep it aside. Let's move to Card now.


Easel Card Tutorial:

Step 1
Take black cardstock of around 250-300 gsm measuring 5*11inches and score on long side at 2.75" and 5.5".
Pre-fold all score lines.


Step 2
Take another piece of cardstock measuring 5x5.5" and adhere to 2.75" x 5.5" section  as shown using tacky tape,
Remove the Tape liner and adhere the 5x5.5" cardstock piece. Now the card base is ready.

Step 3
For embellishing the card I have used scraps from the collection left while making the box and have cut strips of 0.75" x 5.5" and now stick them randomly using tacky tape , now you can add a die cut and embellish it with the tags from the collection. I have added foam tape at the back to give 3D look. Take a strip of 1.75 *5 inches and add to the inside flap to make a stopper for the card to stand.


Step 4
I have added satin handmade flowers and embellished with diecut leaves using glue gun and glossy accents and added a sentiment in the inside flap to complete the card.


And now the easel card matching the mdf box is ready.


Material List for Decoupage Box
Deco art pink and grey chalkboard paints
Mod podge matte
MDF Box
Sand Paper
Stencil
Stencil brush
Papericious chippies
Prima Rossi Belle Paper Pack
Diecuts from my stash
Mulberry flowers
Black Soot Distress ink
Black gum drops


Material List for Easel card

250-300Gsm cardstock
Rossibelle pattern papers
Satin flowers
Tags from collection
Cherry Leaf Die
Tacky tape
Glossy accents
Foam tape


All the materials listed above are available at Rainbow Craftykari Store or you can pre order them by sending an email at rainbowcraftykari@gmail.com.

Hope you got inspired to create one yourself. Do join us in the ongoing challenge "Exploding Surprise". Looking forward to see your entries. Happy Crafting!!

Love & Warm Regards
Nikkita Sethi
Blooming Crafts by Nikkita