Wednesday 20 June 2018

Snail Mail Video Tutorial by DT Spardha

Hey guys!

Hope you’re enjoying the last few weeks of summer vacay.
Still super hot in Delhi, but it also means bright and shiny summer colours :)


Today I am going to share with you, one of the trending
DIYs, so much fun to make… *drumroll*… Snail Mail Folder!
I have made a tutorial video to show you how fun and easy it is to make one for yourself. And there is SO MUCH you can do


Gone are the days we used to send out mailers, although postcards are making a
comeback so *YAY*


Snail Mail Folders are basically a more elaborate version of a card you’d like
to send out. It’s got more material, pockets for secret messages and space to
add your photos to. It’s an entirely personalized folder for someone you’d like
to send out some love to.


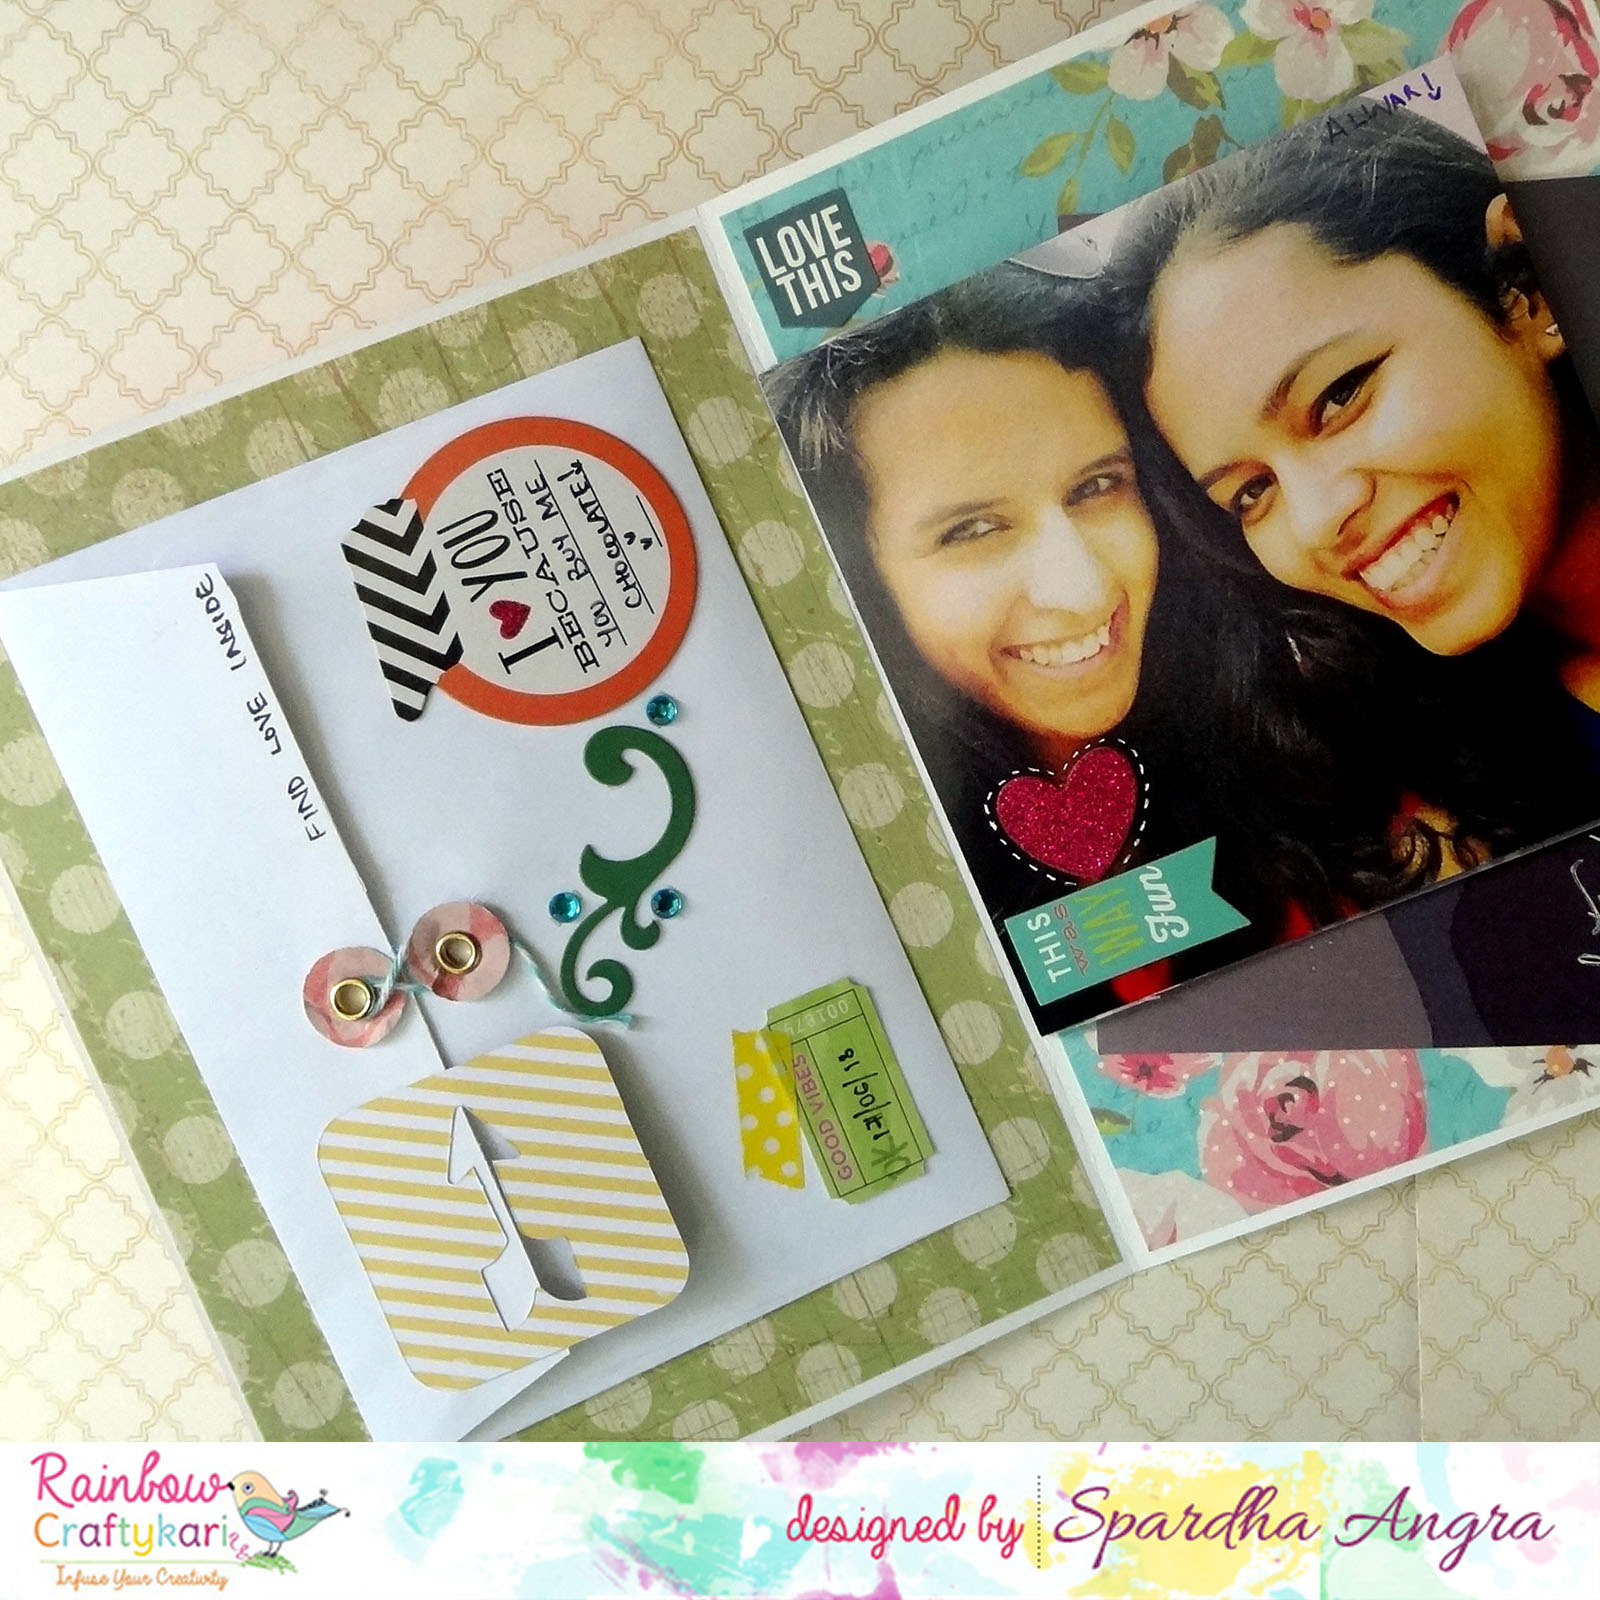
I made one using my photos with a friend, my long-distance
friend, Asha. She’s a fellow architect and post our college together, she has
moved to Germany to work *sobs*

So, this folder love goes straight to her mailbox!


I hope I have inspired you to make one for someone you love. And if you’d like
to share some love with our beautiful design team, we won’t say no! :)


Supplies List:
White Cardstock
Patterned Paper{Eno Greetings}
Vellum
C5 sized envelope
Golden eyelets
Glue Gun
Hole Punch
Eyelet setter
Bakers twine
Paper clip
Stickers
Rhinestones
Paper doileys

Above Materials are available at Rainbow Craftykari Store or you can pre-order them by sending mail at info@rainbowcraftykari.in

Don't forget to
check out our ongoing challenge. Few days left to participate in our current challenge! Grab a chance to win Goodies more than worth Rs 400/- from CrafTangles !!
Hugs
Spardha


--- Happy Crafting! ---

Tuesday 19 June 2018

Tea Coasters- DT Megha inspired by DT Priyadarshini

Hello everyone!

Hope you're having a great week and enjoying the month with rains.

I am here with a new inspiration post for Rainbow Craftykari blog. For this month's inspiration,  as you all know we have a twist in our inspiration posts, we are getting inspired by our very own Design Team.

My project is inspired by the wonderful artist, and a very calm person, Priyadarshini!
I went through her DT posts. All of these were far from my style of work, she is a brilliant paper craft crafter and artist.

Then I came across the creation that caught my attention when I saw her Tea CoastersI Love the idea of the 3D effect, the pearls on this project and got inspired by this.


I started with preparing the coasters using gold shimmer paint and let them dry. I took flower sheets meant for Sospeso and fuzzy cut them and shaped them. I adhered these flowers on the coasters and also added dimension with pearls in the centre of the flowers and the coaster stand. 


And the results are here for you to see,


Hope you get inspired by the project and go through Priyadarshini's blog whenever you can. She has some brilliant paper craft projects!

Supplies used:
  • MDF Coasters and Stand
  • Sospeso flowers prints 
  • Glue Gun
  • Pearls
  • Acrylic Gold shimmer Paint
  • Sizzors
  • Flowers shaping tools


Visit our BLOG for more inspiration, tutorials and check out our ongoing challenge.

Most of the above-listed materials are available on the Rainbow Craftykari Store and can also be pre-ordered by sending an e-mail at rainbowcraftykari@gmail.com.

Do visit the Rainbow Craftykari store HERE

Happy Rains!

Thursday 14 June 2018

Oil Painting Inspiration by DT Saloni

Greetings Everyone,

How have you been?
It's me Saloni here, Today I have created a Texture painting to share with all of you. If you've ever spread icing on a cake, you have an idea of the texture possibilities when using a palette knife to create an oil painting.

Take a look


I started the canvas with roughly designing the picture that I wanted. Once done, I started adding colours to it. There are two ways of doing it:- Either you can add texture first and then colour it or you can colour the entire canvas and add texture accordingly. Choose a palette knife based on the shape, as different shapes will create different effects. The way you hold the knife, its angle to the canvas, the amount of paint on the blade and the direction you pull it through the paint on the surface, all add different effects. It's super easy and fun and with minimum products, you can achieve great textures.


Some more close up shots:


Material used:

  • Canvas
  • Oil painting
  • painting knife
  • Painting Brush

I hope I was able to inspire you all.
Keep Checking the space for some amazing inspiration from my fellow team members.

Visit our BLOG for more inspiration, tutorials and check out our ongoing challenge.

Do visit the Rainbow Craftykari store HERE

Have a nice day!
Happy Crafting
Saloni

Wednesday 13 June 2018

Image Transfer Tutorial by DT Vidhi

Hello Friends,

How are you doing? I am back again with my tutorial post for Rainbow Craftykari blog. Recently we celebrated " World Environment Day " !!! A worldwide movement to clean up the planet and ban plastic and everywhere campaigns are going on. In India, we use a lot of plastic!!! But " Beat Plastic Pollution " campaign really raised awareness and inspired action on plastic pollution.  So here is my little contribution towards it.


Our small act has made a huge contribution to saving our planet. So I decided to stop using plastic bags now on wards. That's why I bought a cloth bag . But as a creative person we don't like anything simple and plain :)  So I thought of a makeover for this bag with the Image Transfer Technique.

Now lets create  our ECO BAG !!!

1) Step 1 - Select Image and Print !


To do the transfer , you will require an image. So first choose any print that interests you. It can be any image of self designed photo or picture or image taken from the internet. You will require a laser printout of the selected image but remember laser printout only, as an inkjet print will bleed when applying the medium. Another most important point to keep in mind is that you will need to mirror the image before printing.

Once your image print is ready, the picture will be adhered face down, and hence if it's an image with the script you can read it the right way if you ensured the mirror image print. The print needs to be on the regular printing paper and not on a thick paper. 

2) Step 2 - Adhere the print on the bag! 


As we are doing Image Transfer on light colour fabric bag so we don't have to apply any primer on its surface but if you will do any project on wood or metal or plastic then you have to apply a coat of primer or gesso.

The image has to be adhered face down. The Photo transfer medium or Mod Podge should be applied both on the part of the surface ( On the bag ) and the side of the paper that has the image (the side with the image that is going to be adhered face down ). Do not use loads of mediums. Just enough to adhere, covering all areas. Just how we do our regular decoupage.

3) Step 3 - Remove bubbles or creases!


Adhere the paper carefully , without any bubbles or creases. This is very important for a good and complete transfer. Adhere one side and pressing down , gradually move towards the other. Make sure you adhere the edges well as they tend to come off ( later at rubbing stage ) if not stuck well. But a top coat of medium is not required on paper. Remember this step otherwise it is hard to remove the paper later.

4) Step 4 - Drying time !

Once the image is adhered , you need to leave it aside for 8 to 10 hrs for good results. I prefer to leave it overnight. 

5) Step 5 - Rub the paper


Next step is very crucial and needs lots of patience ...It is removing the layers of papers to see the image transferred. Use a moist sponge and dampen the paper enough , so that you can see the image . Wait for a minute and then start rubbing out the paper gently with sponge or hand. I prefer rubbing out with my hand.

Do it in a circular motion. Remember the paper is made of layers and we are removing one layer at a time. Once you remove one layer , again slightly damp the paper and remove the next layer. Do it slowly till you see the image. I did it in small portions.

Sharing a set of various stages to explain the above. Hope this helps...Do not harshly try to remove all layers at one time.


6) Step 6 - Final image and seal it !


After you complete Step 5 this is how the image looked when transferred on the bag. Now once the image is transferred , it needs to be sealed with a coat of Photo transfer medium or Mod podge. The medium works as a sealant and dries clear.

7) Step 7 - Touch up and Highlighting !


After sealing the image , I worked around the borders of my image. There are few , minor off white patches. However, I did not want to rub further ( otherwise it will destroy the image) so I coloured it with Black Acrylic colour  to cover it. I highlighted some portions of the image with Brown ink colour and eye with blue colour. 

8) Step 8 - Stamping and decorating 
To add more interest , I used script stamp and stamped it with Archival Black ink. As the image also has some script on it. I did not want to do much on this as I love its simple outcome.


At last, I decided to decorate it with Rainbow Craftykari's new launch product... MDF embellishments. There are many different shapes in it but I preferred  a round shape which will go well with the Cameras's round shutter in the image. I coloured the circles with Brown ink and heat embossed them with clear embossing powder. Then distressed the edges with Black ink.


And it's done !!! The process looks lengthy but it is not! It just requires patience!!!


Supplies used :
  • A cloth bag 
  • A laser print
  • Image transfer or Mod Podge medium
  • Sponge
  • Water 
  • Archival Black , Blue and Brown ink 
  • Rainbow Craftykari's MDF embellishments
  • Glue
  • Black acrylic colour
  • Clear embossing powder
  • Versamark clear ink pad
Hope you like my project !!! And please take an initiative not to use Plastic anymore. Let's  make this a conscious habit and keep creating your ECO bags.


Visit our BLOG for more inspiration, tutorials and check out our ongoing challenge.

Most of the above-listed materials are available on the Rainbow Craftykari Store and can also be pre-ordered by sending an e-mail at rainbowcraftykari@gmail.com.


Do visit the Rainbow Craftykari store HERE
Thank you,