Thursday 5 April 2018

Wooden Home Decor Tray by DT Megha

Hello Crafty Folks,

A very good morning to you all. Today is my first post for the Rainbow Craftykari blog and I am excited. 

I have a Picture Tutorial of a Wooden Tray with Decoupage and Resin. I will take you through the steps of making a beautiful utility tray and, you don't need many supplies to make this kind of a project. Here is a look at what I made:


Here's a video flip through:


Step 1: 
I had this wooden tray which is approximately 14 inch in length. You can take any size tray. To begin with, arrange the butterflies on the tray and take a picture of it for reference.


Step 2:

Begin by painting the tray. For this I gave a coat of sky blue and grey chalk paint on the insides and edges of the tray. I dabbed the paint with a sponge dabber so there is a texture on the tray. One can use any paint, chalk paint dries up quickly specially in this summer season.


Step 3:
After the paints dries, further enhance the design by using a pattern stencil. With the help of a woodgrain pattern stencil and brown chalk paint, I added another element of design to the inner sides of the tray.


Step 4:
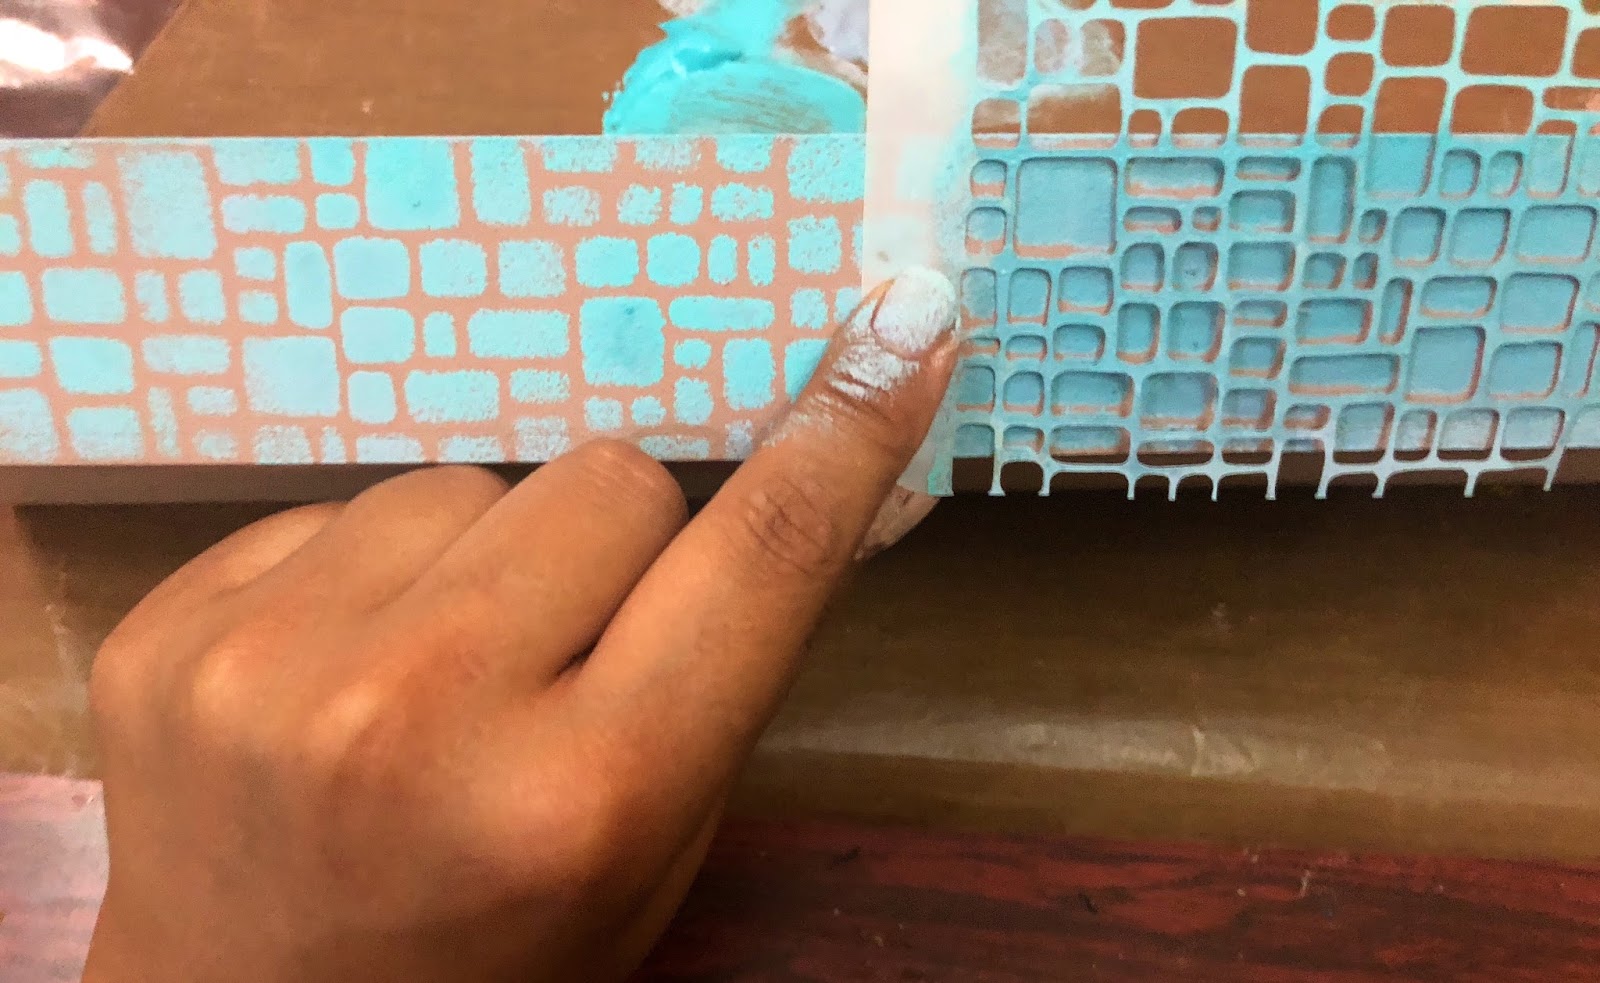
Next, paint the outside of the tray. I gave a coat of brown chalk paint on the outside of the tray and after it dried, with the help of a stone pattern stencil and sky blue and grey chalk paint, I added pattern to the outsides of the tray.


I reversed the colours which were inside the tray on the outside of the tray to maintain monotony in colour.


Step 5:
Remember the butterflies we arranged and clicked a picture, time to arrange and adhere them now, you can use any glue as long as the butterfly adheres flat on the base of the tray, apply a coat of varnish or glue which dries transparent on the base of the tray to protect the butterflies.


Step 6:
Coat the inside of the tray with resin, making it user friendly.For this, use Resin that is Clear and Hardner in 1:1 ration. Pour them in separate containers in equal amounts and the mix the Hardner into the Clear liquid with the help of a stick, please handle these with gloves on and use disposable cups.


Step 7:
Keep the tray on a flat surface and pour the contents of the cup on to the tray, with the help of a stick you can move the liquid to the corners and blow the bubbles with the help of a heat gun from a distance.
Leave for a day or over night to let it set and dry.


With that done, our tray is now ready. Here are some more pictures:


Supplies Used:

  • Wooden Tray
  • Chalk paints (sky blue, grey, brown)
  • Stencils
  • Butterfly Die-cuts
  • Decoupage Glue
  • Clear and Hardner (Resin)
  • Plastic Cups & Wooden Stick
  • Heat Gun, Sponge Dabbers, Palettes

Most of the above-listed materials are available on the Rainbow Craftykari Store and can also be pre-ordered by sending an e-mail at rainbowcraftykari@gmail.com.

Do visit the Rainbow Craftykari store HERE

Visit our BLOG for more inspiration, tutorials and check out our ongoing challenge.


Happy Creating!
Megha

Wednesday 4 April 2018

Mixed Media Globe Inspiration by DT Saloni

Hello Crafty friends,

I'm Saloni Agarwal and I am very excited to share my first DT Inspiration post for Rainbow Craftykari Blog for the month of April.

This time I have created a mixed media project and titled it "The poetry of Earth is never dead".

So, here is a look at the project:


For this , I took a globe and painted it with black heavy gesso. Once dried.,I have used modelling paste to add some texture to it and covered the entire surface again with gesso. I started adding colors once the base was completely dried.I have used metallic paints and color spray to  highlight the texture . Then I started adhering flowers and embellishments to create the layer.

Now to add more elements to it, I have added few stones ,beads & metal charm (colored with it red and white). Finally to finish the complete look , I have added the typo bulb. 

Here are some more close up shots


Materials used:
  • Globe
  • Black heavy gesso
  • Texture paste
  • Prima art alchemy waxes and patina paste
  • Prima metallic colors
  • Color sparys
  • Prima typo bulb
  • flowers
Most of the above-listed materials are available on the Rainbow Craftykari Store and can also be pre-ordered by sending an e-mail at rainbowcraftykari@gmail.com.

Do visit the Rainbow Craftykari store HERE

Visit our BLOG for more inspiration, tutorials and check out our ongoing challenge.

Hope my project inspires you!!

Happy Crafting


Tuesday 3 April 2018

Rusty Iron Mask Tutorial by DT Vidhi

Hello Crafty Friends,
How are you all, enjoying the spring or have you already started sweltering under the Sun?
Let me fetch you some breeze with my first ‘Picture Tutorial’ at Rainbow Craftykari Blog as a DT member.
Last Sunday I went with my kids to a nearby garden. As we were walking out of the garden after play time, we spotted a street side vendor selling some toys. Kids had their gala time choosing the toys for themselves. There lay a mask and it captivated me.
The crafter in me awakened and urged me to grab it. I had a thought of giving it a make over… Metal finish with Mix Media Art! Even before reaching home, my mind was searching my treasure trove for trivia and embellishments.


So here is how I made this Rusty Iron Mask...

Enjoy a video flip through and the step by step instructions below

Step1: Priming the base. It is always good to prime the base with gesso, so it holds any further mediums and colours.
I gave it a coat of Black Gesso although it was already Black. I applied it as a primer so that it holds the colours perfectly as the material is plastic.

Step2: Adding textures. Using a stencil, apply modelling paste on the mask randomly.

At some places, I applied Grainy Sand Paste and Fibre Paste to add more depth. Around the nose area, I gave an effect of little scar with the knife.

Once all the textures dry give the entire mask of another coat of black gesso.


Step3: Adding elements to the mask.
I had some leftover chipboards pieces. So I decided to put them to use, I drew some different uneven shapes on it and cut it down with scissor. At some places, I punched the holes with the help of eyelet punch. And at some places I added the eyelet rings. I gave all these pieces a coat of black gesso and once they were dry, I gave them a coat of White Crackle Paste.


Step4: Picking out embellishments.
I used different things from my treasure on the mask as a base, e.g. thread, buttons, wires, screws, broken jewellery pieces, stones, buttons, mdf steampunk gears, bottle caps, pebble stones, broken watch pieces, and broken half of spectacles! I used chipboard shapes as a last step.


If you have noticed, I made a conscious effort to select all the things that could imply masculinity on this project.
I glued all the things one by one on the base with tacky glue. I layered themon top of one another to give more depth. Since the chipboard pieces are stiff, I sprinkled a mix of water+ glycerin solution on them, to shape them as I stuck them.


Step5: Gluing and priming the embellishments.
Here are some close ups of the arrangements for your perusal. After the glue dried, I applied a think layer of black gesso on the embellishments, leaving out the gears.


Step6: Time to add colour!
Once my layers were dry, I gave a coat of Rustic Brown Acrylic Metallic Paint on the layers.

At this stage, a useful tip would be to take a little bit of the colour and to do dry brushing with it.
Second layer was a coat of Red Wine Metallic Paint and it was followed by Gold Amber for highlighting.


Step7: Enhancing the mettalic look.
I wanted my mask to have a metallic finish. For this, I rubbed waxes - Aged Brass and Brushed Iron randomly.

And with that the Rusty Iron Mask is ready!!!


Supplies Used:
  • Plastic Mask
  • Black Gesso
  • Modelling Paste
  • Grainy Sand Texture Paste and Fiber Texture Paste
  • Chipboards
  • White Crackle Paste
  • Finnabair Metalic Acrylic Paints 
  • Finnabair Waxes
  • Tacky Glue
Most of the above-listed materials are available on the Rainbow Craftykari Store and can also be pre-ordered by sending an e-mail at rainbowcraftykari@gmail.com.

Do visit the Rainbow Craftykari store HERE

Visit our BLOG for more inspiration, tutorials and check out our ongoing challenge.

Hope you guys liked it. Look forward to hear from you about your variations of this one!
Happy Crafting,

Monday 2 April 2018

RCS Challenge #9- LOVE

Hello Everyone,


Wishing you all a very Happy April and Spring Season! We are so delighted to be kickstarting a new term with a new team. Watch out for fun inspirations and tutorials.


We're also back with our challenges:)!


Here's a look at our challenge for April:


(Pic credit Vecteezy and Partially Designed by Maninder Kaur)


The theme for our challenge is LOVE, feel free to interpret it any manner and we have a colour palette to complement it. Use a minimum of three shades from the palette.  Let us know how you interpreted the challenge and also make sure to use the challenge banner(above) in your post.  


Feel free to create any crafty project be it a card, a layout, altered piece, tag, home decor art, album and anything art/craft related. Last date to submit entries is 25th April'18


One winner will receive a Gift Voucher Coupon worth Rs 450/- as well as the winners badge to flaunt on the blog. Top three entries will get to flaunt a badge on their blogs.

Any entry which doesn't follow the guidelines will be disqualified and will be removed from the participation entries


Please go through General Guidelines and Rules HERE.  


Here's a look at what our team made to inspire you to play along!


Blog Coordinator Aditi- "The secret of Art is Love." I interpreted the theme of Love as Love for Art, Craft and Journaling. I created a journal page and used all the colours on the palette. 


DT Saloni - 
Love is not all about loving others but yourself also!! You can't make anyone love you without loving yourself first! So love and be loved ...
I have created three mini easel cards for the ongoing love & colour palette challenge


DT Megha - Love is Fearless, Love is of the Heart, Love is You & Me, Love is Grand ðŸ’–
I have created a card for the ongoing love & colour palette challenge.


DT Priyadarshini - 
'When someone else's happiness is your happiness, that's love' - Lana del Ray
Since every love story is beautiful, I have a created a simple and unique scrap layout for the ongoing love & colour palette challenge


DT Spardha -
Love can be simple or layered, it's about those bright and shiny pieces of heart coming together to finally make sense. 

I've created a shaker card to go with this month's beautiful challenge colours!
"Shake it 'cos you love it!"


DT Vidhi- God placed your hand in mine. Now we walk together forever... Together is wonderful place to be !!! 
I have created this lovely tag for the ongoing love and colour palette challenge.


Look out for amazing inspirations during the month!

Link your entries below to participate in the challenge.