Heya, Today I'm showing you how to decoupage wallet using Melt Art Beeswax. I've enjoyed so much while using MeltArt Beeswax. It has specially for craft purpose, which is non-toxic and great for papers & embellishments. I want to say Thanks to Rajni Aunty :) for encouraging me to create blog post.
Got Inspire from these Videos:
Suze Weinberg Buzzing With Beeswax
http://www.youtube.com/watch?v=0P_4PzXr-38
Materials Used:
Fiskars Deckle Edge Scissors, Perfect Pearls, MeltArt Beeswax, Creaser, Curved Tip Tweezer, Spatula, Wax-Heater, Cut-Outs of Napkins, Old Books Paper, Wallet, Heat Gun.

Decoupaged the edges of wallet using left over pieces of napkins with Mod-Podge Matte glue.

Put some amount of MeltArt Beeswax granules in a wax heater
(while you're working, it would be preferably keep the wax-heater ON as the beeswax tends to cool down really fast. You can use Induction Cooker if you don't have wax-heater. )
Cut the Old book paper with Fiskars Deckle Edge Scissors. This scissor gives beautiful effect of torn paper. I just love this scissor

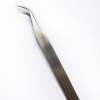
Dip the paper in a melted Beeswax using Curved-shape Tweezers and Simply put it on wallet carefully as shown in a image.
Heat the Back of Spatula with Heat Gun, and Press the waxed paper with the help of hot spatula. It will crease and settle down the paper on wallet.


Similar way dip a napkin in a wax-heater, put it on wallet and set with hot spatula. You can set it directly using heat gun and spatula
(P.S. Paper or Napkin takes time to settle down on wallet and you can use both ways to set paper on wallet)


Apply Perfect Pearls Pigment Powder of your choice on the folds and creases as shown in image to give a sparkling look to your wallet. After that cut the left-over edges with sharp edge-scissors. I have applied Mustard Seed Distress ink on the edges to give vintage look.
(I had applied two layers of Mod-Podge Glue with the gap of two hours)


I had dipped the Wooden Button in Beeswax and glued with Hot Glue Gun to hide the wallet tag. Tadaaaaaa!!! My Vintage Wallet is ready to Flaunt :) :)


Before using MeltArt Beeswax, had tried normal candle wax on napkins as well as on papers, But it didn't give that effect which this Beeswax have gave on wallet. If you have any questions regarding this Tutorial, feel free to ask me here or drop a mail at rainbowcraftykari@live.com. See ya!!!
Craft Materials Used:


wow....your wallet is turned into a beauty...looking very pretty.....thanks for sharing such a informative n detailed post.
ReplyDeleteYour wallet looks very beautiful Maninder .. And thanks for sharing the bee's wax tutorial :)
ReplyDeletewow!!
ReplyDeletewud love to try it soon...:)
Very nice info and straight to the point. I am not sure if this is actually the best place to ask but do you guys have any thoughts on where to employ some professional writers? Thx :) Cheap Deals in Melbourne
ReplyDelete