Showing posts with label India. Show all posts

Wednesday 11 September 2019

Italian Home Decoration Calambour Certificate Decouapge Course at Rainbow Craftykari Store

Hello Beautiful People,

How are you all?

I know it's been a very long time since we posted on our blog. We are going to announce a very exciting thing that,Owner of Rainbow Craftykari Store has did her Calambour Teacher Course from Bangkok at Sifa Decoupage Earlier This Year!! Yay


We are very much proud to announce the Decoupage with Calambour Certification Course, We have been getting Endless Queries for this beautiful course. Now your wait is over to learn Excellent grade of Home Decors Projects.

Here are the details:


This decoupage course is designed by Calambour Italy & SIFA Decoupage, especially for all the craft enthusiasts people. This is a very beautiful Home Decoration Course from Calambour, Italy which is perfect for beginners & intermediates. This Course consists of 6 projects required by Calambour(Italy) syllabus, which will be taught by using Calambour decoupage papers and tools onto MDF, natural pinewood & glass surfaces using various painting effects.

This course will be taught by Ms. Maninder Kaur, Calambour Italy certified decoupage teacher.
All the materials will be provided. Students who will complete all the 6 projects will be awarded a Basic Home Decoration Calambour Certificate of Completion, endorsed by Calambour Italy & Sifa Decoupage!!
Technique Covered :
- Crackle
- French Lace
- Tanning
- Distressing
- Under Glass
- Wood Grain

Schedule: The learner will be required to book a seat in advance. The group will only be consist of 3-4 people only to create quality projects and acquire intense learning.

Guidelines :

1) Students are required to complete all 6 projects to qualify for the certificate. Students will be able to bring back their finished pieces
2) All projects can be completed within 3-4 sessions. The intensive course can be arranged in 2 days for overseas students.
3) Each session is about 3-4 hours
4) Price is inclusive of all materials & Refreshments required for the workshops 
5) Students who completed all projects will be awarded a Calambour Certificate of Completion endorsed by Calambour Italy & Sifa Decoupage6) This course does not use any napkin or other papers. Original Calambour paper from Italy will be used during the class.

To Enroll for this class, click on this link: https://tinyurl.com/y59kp7cn
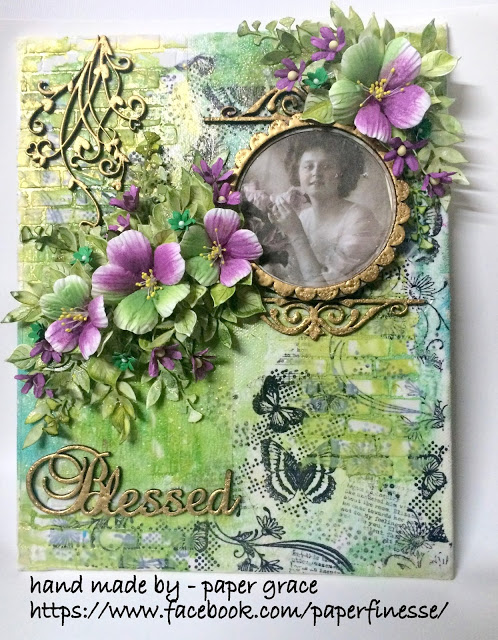

Projects**


contact us at www.facebook.com/rainbowcraftykari or drop an email at info@rainbowcraftykari.in


Tuesday 14 March 2017

Altered Household Items Tutorial by Our Guest DT Richa

A very warm good morning to you all.

Hope you all had a lovely Holi.


Today in our Teaching and Learning Program we have our Guest DT Richa with some altered items which she made using household items with Mixed Media techniques.

Over to you Richa,

Hello everyone,

This is my first post as GDT member of Rainbow Craftykari and I am really excited to be a part of this Teaching and Learning Program. I would like to thank Maninder Kaur for giving me this awesome opportunity.

Who doesn't love antique showpieces? But purchasing these can make a huge hole in your pocket. Today as a part of GDT I am going to show you how to alter old household items into antique beauties using mixed media techniques. The thing that I love about Mixed Media is that you can never go wrong with it and even if you make a mistake by chance, you can always cover it up with gesso and can start again.

Project 1: Altered Bottl
e


To make this take an old glass bottle, some tissue paper and mod podge.


Wrinkle the tissue paper and unfold it. Start covering the bottle with mod podge using simple brush or sponge brush and stick the wrinkle tissue paper as you go.


More wrinkles will ensure more texture and texture is what mixed media is all about. For more texture I have added layers of tissue paper. Don't worry if the papers tears while applying mod podge. Just add a patch of paper there and it will become unnoticeable. 


When covered the whole bottle with paper, give it a coat of mod podge.


For more texture add some cheesecloth and leave it to dry.


Add some corrugated sheets with glue. Give the whole thing a cover of black gesso or black acrylic paint and let it dry.


To add more texture you can use cotton laces. To make the front panel add a circular corrugated sheet and apply texture paste mixed with beads on the edges. To give it a more antique look add flat based pearls/thermocol balls randomly with glue.


Cover everything with black gesso/acrylic paint.


It still looked incomplete. So I decided to add a central shiny embellishment. To make this one, I took an old bottle cap and covered it with black gesso and metallic paints. Then added some silver sparkle in the central part using glue and allowed it to dry. On the sparkle added green glass stone to bring out some contrast.
Tip: Sparkles are always messy. Before playing with sparkles always cover your hands with talc powder. The sparkle won't stick to your fingers. Less mess created.


Now it's time to have some fun with metallic paints. On this project I have used golden and brick red metallic paints. To apply the paint, use dry brushing technique. In this technique, the paint brush is kept relatively dry but still holds some paint. The key is to dip the very tip of the brush into the paint and wipe or dab a little bit paint off on rag. Make sure the bristles still appear separate instead of clumped together before brushing. And then paint the surface with light handed (not much pressure) fast strokes.
Tip: If you are not comfortable with dry brushing you can always use your fingers. Pick up little pigment in between your fingers and cover the raised areas.
Add the stone embellishment to your central corrugated sheet and apply two coats of varnish to the whole bottle. Your Antique altered bottle is ready.


Project 2: Altered Pen Stand

I just couldn’t stop after altering the bottle and went on altering an old pen stand.


To alter the pen stand, follow the same steps. Cover it with mod podge, layers of tissue paper and black gesso/acrylic paint. Leave it to dry.


To embellish punch out some flowers and emboss the petals with embossing tool. 
Tip: Before embossing the petals, spray some water over them and emboss carefully so that you don't tear the paper. Misting helps in retaining the embossed shape.


Glue the flowers, cotton lace, buttons and slider of zip to the pen stand. Here I have added the button in the shape of a butterfly and have also added plastic embellishment spelling 'Dear Friend'. Cover the embellishments with black gesso/acrylic paint.


Dry Brush everything with metallic paints and apply two coats of varnish. Here is the final outcome.


Materials Used:

Glass bottle, cap, pen stand,
Buttons and zip slider,
Tissue paper,
Cheesecloth,
Corrugated sheets,
Cotton lace,
Texture paste,
Small pearls,
Flat base pearls/thermocol balls,
Glass stone,
Glitter powder,
Flower punch,
Embossing tool,
Mini mister,
Mod podge,
Black gesso/acrylic paint,
Metallic paints,
Brushes,
Glue gun/white glue.

Above listed Materials are available at Rainbow Craftykari Store or you can pre-order to them by sending an email at rainbowcraftykari@live.com.

Hope you enjoyed the tutorial and got inspired to make some antique alterations and don't forget to participate in our first monthly challenge, Revamp your Scraps' to win some exciting prizes, here is the link to the challenge post.

Regards,
Richa Maurya.

Saturday 25 February 2017

Here Comes The Surprise.....Revelation of DT Members Feb'2017

Hello Crafters,

Good Morning to you all.


Hope you all are doing fine. Today we are so much thrilled  to reveal Our DT's in our Teaching & Learning Program. They are well known in their fields and in craft Industry, Say hello to them

Here we go,

Our first DT is Nikkita Sethi


Over to you Nikkita, 

I am Nikkita Sethi from Kolkata, the city of joy. I am a fashion and accountancy graduate, now a full time craft designer.

Since school days Art and Craft have been my hobby, my passion. I am involved in this art form professionally since 2014. Nature and everyday moments are some things that really inspire my work and I am very particular about neatness and perfection.

Crafting gives me immense happiness, and using it to help people capture memories, convey love, wishes and blessings fills me with joy! :)

With Blooming Crafts, I aspire to bloom flowers of love, joy and well wishes into your world. In today's generation where birthday wishes are only a happy birthday on whatsapp, I come with an idea to change the outlook of greetings and help you gift the right gift in a personalised way of greeting cards, handcrafted gifts like frames, boxes and much more, made with love, so you can show your loved ones how much you care!

Hope you like my crafts, each made with utmost patience and attention to details. For sometimes, the gift can mean more than the occasion.
My fb link - https://www.facebook.com/bloomingcraftskolkata/

My few works,


Our second DT is Pavitra Chanchal


Hello! My name is Pavitra Chanchal . I live in New Delhi, India. I made my master's in Food and Nutrition and Nutritionist by profession. I am married and mother of 2 year old little one. Beside the little munchkin, crafting keeps me happy and busy.

My crafting journey started with scrapbooking and trying out different crafty things but one thing with that I fall in love is handmade realistic flowers, and now I am kind of addicted to create them. I currently design and teach paper crafting classes. I like to try out different techniques and create cards or projects with detailing.


I am super excited and honored to design for Rainbow Craftykari Team.


My few works,


And our final DT is Aditi Mahajan

Hello Creative People!!


My name is Aditi Mahajan and I am from Bangalore. I did Msc. in Clinical Psychology and Dip. in Special Education, has taken up arts and crafts since school days and also practiced art therapy when working with children with special needs. I've took up an art course from School of Visual Arts, New York.


Crafting, thus has been a part of daily activities mostly in the form of various altered projects, or making gifts. However, it was about a year ago I took my  hobby seriously and with my mother, I started 'Dots to Lines'. We make home decor and specialize in mixed media, decoupage and zentangling.

Our style of art and craft is a fusion of techniques and usage of vibrant colors. We aim to spread joy with our art.
My fb link - www.facebook.com/dots2lines

My few works -


A very warm welcome to all you in a team.

Our new team will going to inspire you and teach new things in coming days. The teaching and learning Program is going to Start from First week of March, Stay Tuned for more updates!!

Regards
Rainbow Craftykari Team.

Thursday 23 February 2017

Uncovering Guest DT Team Feb'2017 - Day 2

Bonjour Crafters,

A lovely Good Morning to you all.

Today we are back with few more crafters on our second day of revelation in Teaching and Learning Program. Say hello to them & Here we go....

Our Sixth Guest DT is Ria Banerjee


Over to you Ria,

Hi, I am Ria Banerjee from Kolkata, India. I am 25 years old, a teacher by profession, student and also gearing up for the research field. I own and operate a startup known as Ciar. Painting is my hobby from which I got into card making. I love clean and simple designs, which have caught my attention right from the time when I thought of card making. I love to try other styles too and altered objects. 

My blog link - mycriar.blogspot.in
My fb link - https://www.facebook.com/ria.banerjee.777

My few works - 


Our Seventh Guest DT is Mouni Koneru


Over to you Mouni,
Hi am Mounika staying in Bangalore. Doing handmade things and learning them constantly is in me from my childhood, slowly I started doing handmade gifts to my friends and family. After my marriage I came to Bangalore I was introduced to paper crafting, started my journey with scrapbooks, mixed media, cards and so on. I love to have more colours in my projects.

My few works - 


Our Eighth Guest DT is Karthikha,
 

I’m Karthikha, from Erode district in Tamilnadu. I’ve settled in Hyderabad, with my loving husband and darling daughter. I work for an MNC as a software development technical lead, and crafting is my hobby. Juggling between home, office and craft is now my hectic schedule!

I’ve been into crafting since my childhood, making simple greeting cards and trying out DIY stuff during school crafts period. I’ve always loved doing something creative and I got it from my mom, who has tried various art forms! However I’m now stuck to Paper crafts – Cards and Quilling. I entered the blog land of crafting a couple of years back and got to know a lot of tools, techniques, crafters, blogs, types of crafts and more!! And I’m still learning! I made some really good friends too!
Card making is my favorite! The happiness you see on the receiver’s eyes on being gifted a handmade card is priceless! And I feel cards make any occasion special! I love stamping, making fancy folds, reusing scraps and trying out different techniques that I learn. I also hoard wedding invitation cards and reuse them for punch outs on cards. Quilling is my next favorite craft and I love to make and wear matching jhumkas!

My few works -


 Our last but not the least Ninth Guest DT is Kriti Mishra,


Over to you Kriti,

Hi, I'm Kriti Mishra from Hyderabad. I had done my masters in Information Technology and was an Asst. Prof. at a reputed engineering collage. But left the job after my daughter Akshada was born, she is 3 years old and now she allows me to do some creative work. I can see a good artist in her also.

Right from my childhood, I'm into crafting. I always loved making handmade cards and its my passion. I'm more into scrapbooks and making mini albums. I love to use different kinds of pattern papers to enhance my creativity and to share some knowledge with other people around. Previously, I  used to make to make simple handmade cards just to gift them to my loved ones and friends, but when I joined social media there I saw a huge world of crafting.


My few works -


So, here we are finished for today but we have a surprise for you all on the third and final day. So keep watching this space.

Regards,
The Rainbow Craftykari Team.