
Heya Crafters, Today have bring an exciting post for you. This time we have focused on Distress ink Re-inkers, UTEE, Embossing Powders and on Mulberry Flowers.
The Guest DT of this Month is really love to do Quilling and Punch Craft. She is passionate about inventing new techniques everytime. She always surprise us with her cards and flowers. Her creations always carries elegance and wow factor. I'm really feeling obliged to have her as Guest DT on Rainbow Craftykari Blog. Here, I Welcome Hussena Calcuttawala (Kolkata) from Quill and Punch Works. Over to you Hussena
I wanted to take this opportunity to firstly Thank you for inviting me to be a Guest designer on Rainbow Craftykari blog .Its been such a pleasure interacting with you and working with the beautiful kit of assorted items you have sent me over. I really loved working with UTEE and Re-inkers for the first time :)
As this time's theme is all about backgrounds, embellishing and embossing, I have created 3 different items based on that and shared techniques for the same.
Supplies you will need for the smooch technique :
Supplies you will need for the smooch technique :
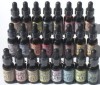
Two Distress re-inkers of your choice ( I have used Spiced Marmalade and Seedless Preserves).
Craft sheet.
Cardstock.
Mini mister containing water.

First is a card where I have made the base of my card using 2 different Re-inker's ( Seedless Preserve and Spiced Marmalade) and done the the smooching technique where you have to take 2 different color inks and randomly drop it on a craft sheet,then spray the craft sheet with water and cover the entire piece of card stock in this mixture and dry it with a heat gun or if you prefer let it air dry overnight.

Supplies for heat embossing:
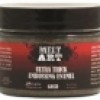
Gold UTEE (Ultra Thick Embossing Enamel).
Versamark Embossing ink pad.
Ranger Super Fine Clear embossing powder.
Versafine Onyx Black ink pad.
Stamps of your choice.

After creating the inked base, I have randomly stamped the script background and clear embossed it using Ranger's Super fine Clear embossing powder with Versafine Onyx Black ink. Then, using the Tim Holtz Harlequin background stamp from the set 'French market'. I stamped it with Versamark Embossing ink and Gold UTEE (Ultra Thick Embossing Enamel) and heat embossed it. As you can see in the picture, it gives a very good texture when embossed with UTEE as compared to when we do it with Gold
Embossing powder.

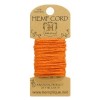
It results in a very vibrant background as seen in my card below. The Mulberry flowers, Stick Pollens and the Orange Hemp Cord by Hemptique, are all available in the Rainbow Craftykari store.

Next, I wanted to share with you a very fun technique using Shaving foam and Distress Re-inkers to create some awesome backgrounds! I have shown a small tutorial on how it is done below.
You will need the following supplies :

Gillette Shaving Foam
2 different color Distress ink Re-Inkers -I have used Seedless Preserves and Spiced Marmalade.
A paper plate.
Popsicle stick.
Wet wipes as well as paper tissues/napkins.
Spray some shaving foam on your paper plate and spread it around with your popsicle stick. Then add drops of Re-Inkers in the proportion you want. Tiny drops of the Re-inkers will go a long way.

Using the popsicle stick, stir the mixture well as shown above and once you have mixed it in the pattern you want, dip your cardstock in the foam mixture thoroughly and pull it up. Now, wipe it first using a wet wipe, this will help to spread the ink in the shaving foam further in your cardstock creating unusual patterns. Then, finally wipe it dry using a plain paper napkin or tissue.

This is the final result you will get and the fun part is that every time you do this technique you end up with different types of backgrounds.

Below, I have made an envelope from a piece of this cardstock on which I have then done Heat embossing. Here's a look at my envelope. I have heat-embossed the Hero Arts Flourish background using Ranger Gold embossing powder and Versamark Embossing ink and distressed it with Distress inks - Peacock Feathers and Scattered Straw. Then, I flicked some water droplets on this and when dried, you can see the original background I created with the shaving cream below and then used some mulberry flowers and fillers to decorate the envelope.

Now, I would like to share another short tutorial using gold UTEE and some mulberry flowers and die cuts. This techniques gives such beautiful results and I just love the way the flowers and die cuts look using this technique.
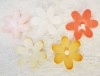
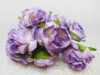
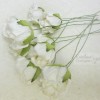
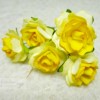
Here, I would like to mention that the Rainbow Craftykari store has a huge assortment of gorgeous Mulberry flowers in beautiful colors and shapes. Some of the dual color flowers are so pretty and I as lucky enough to get a chance to play with them, as you can see below. Most of you know that I love to make my own flowers for my projects, but seeing how beautiful and fabulous quality these mulberry flowers are from the Rainbow Craftykari store, I have used them in my card, tag as well as envelope here. I hope you do check out the wide collection of Mulberry flowers that the Rainbow Craftykari store offers.
Here, I would like to mention that the Rainbow Craftykari store has a huge assortment of gorgeous Mulberry flowers in beautiful colors and shapes. Some of the dual color flowers are so pretty and I as lucky enough to get a chance to play with them, as you can see below. Most of you know that I love to make my own flowers for my projects, but seeing how beautiful and fabulous quality these mulberry flowers are from the Rainbow Craftykari store, I have used them in my card, tag as well as envelope here. I hope you do check out the wide collection of Mulberry flowers that the Rainbow Craftykari store offers.
So here's a look at what you will need :
Versamark Embossing ink pad or VersaMarker pen.
Gold UTEE (Ultra Thick Embossing Enamel).
Mulberry flowers.

Take the mulberry flower and using the VersaMarker pen or Versamark embossing ink pad cover the edges of the flower with the embossing ink on the top, then sprinkle Utee on it covering the entire inked surface and then heat emboss it and you have a beautiful gold edged flower ready to use on any project.

And also using the same method, you can also ink any die cut and heat emboss it with UTEE to get some amazing results. Have a look below:

You get such beautiful finish with UTEE and heat embossing I really would love to try this on MDF die cuts as well ..in the meanwhile I have shared a tag below where I have used the flower and the die-cut which I have embossed with Gold UTEE. I colored the flower with seedless preserve Re-inker in a mister bottle and got such a intense shade of purple its just wow!! The background of my tag is created using the Shaving Foam Technique which I have them embossed using an embossing folder to create some texture on my tag . So here's a look at the tag :

That's It from My side I hope you like my projects and the fun tutorial I have shared and I really hope you will give them a try :)
Thank you Rainbow Craftykari Team once again for inviting me a guest designer on your blog and this wonderful opportunity to work with UTEE ,Re-inker's and the Gorgeous Mulberry flowers from your store :)
Craft Materials Used:
Others Products :
Craft Materials Used:
 |  |  |  |
 |  |  |  |
 |
Ranger distress inks, Gillette Shaving Foam, Popsicle Sticks, Cardstock, Flat Pearls, Stamps of your Choice, Martha Stewart Punches and Dies of your Choice, Wet wipes as well as paper tissues/napkins
Thank so much Hussena for the Tutorials and Creations you've shared with us. All of your Creations are Absolutely Stunning.
Superb post! Love the tutorials! And all the Projects are fantastic! Thanks for sharing!
ReplyDeleteLove all creations...and so the tutes :) Thanks for sharing !!
ReplyDeleteWOW!!! Gorgeous projects Hussena!!
ReplyDeleteSuperb post Hussena! Love all the tutorials & all the Projects are AWESOME!!
ReplyDeleteWow!!!
ReplyDeletegorgeous backgrounds Hussena.....loved all d projects :)
Great Tutorials!! TFS..
ReplyDeleteSoon gonna try it..
Oh...great...!! wht a lovely project nd thank you so much for the tutorial Hussena.....
ReplyDeleteSimply awesome tutorials!!! Wow Hussena!
ReplyDeleteWowwieee All the projects are awesome :D
ReplyDeleteFabulous as always
Superb post & projects!
ReplyDeleteIt's Always pleasure to see ur projects...awesome projects Hussena
ReplyDeleteBeautiful work & awesome tutorial 's !
ReplyDeleteExcellent post! Loved the creations TFS :D
ReplyDeleteSuperb post....loved all.....thanks for sharing .....
ReplyDeleteThank you SO SO much each and everyone of you for all the love and appreciation you have shown for my work and I really do hope, you give these tutorials a try! :)
ReplyDeleteAbsolutely stunning...love the use of the products...stunning end projects
ReplyDeletelove the tutorial, hearing for the first time to use shaving foam in crafts :). beautiful tutorials. thanks Maninder and Hussena
ReplyDeleteWow !! Many of these products are new to me..and liked the tuts a lot.The bgs look fantastic and the flower with gold edge is SUPERB !!
ReplyDeletestunning....absolutely amazing...cant take my eyes off it....<3
ReplyDeleteLovely tag ang envelope, hussena..Thanks for sharing the techniques. Going to raid my husbands shaving foam now!
ReplyDeletesuperbly gorgeous creations Hussena....very informative n detailed tutorial...thanks for sharing.
ReplyDeleteWOW...stunning ...everytime i see ur projects i just sit n drool over thm :) and thnx f r the tut...
ReplyDeleteAwesome projects! Thanks for sharing! Hugs, Elizabeth
ReplyDelete