CAS Cards-Tutorial by DT Priyanka
Hi Lovely People,
Hope you are enjoying the lovely onset of winters? Well, I am most definitely enjoying it with a hot cup of tea all snuggled up in my cosy blanket ;)
There is definitely something amazing about this season with the winter chill, celebration & wedding vibes all around which makes it a December to Remember always.. as they say, "last one but the best one" .. ;)
Without boring you anymore with my love for winters I will take you straight to today's post.
Today I am sharing two CAS cards with you (CAS: Clean & simple Cards), CAS cards are a challenge for me as much as it for most others but this time I decided to do a tutorial on it for you I hope I do justice to your expectations :)
Let's begin
Card 1:
Step 1: I started with taking a white cardstock, Base dimension: 4.5"X10" & scored it at 5" & now my card measures 4.5"X 5"
Step2: Next I stamped my images Piggy & the fence using Versa onyx ink on a separate cardstock & coloured using the DUO watercolour pencils& fussy cut them.
Step3: I adhered the fence right in the middle of the card using the double-sided foam tape & then the piggy half over it.
Step 4: Lastly, to complete the card I picked the sentiment "I miss you PIG time" & using the Versafine Onyx black ink I stamped the sentiment right below the fence.
Tada our first card is ready :D easy ain't it??? ;)
Moving onto the 2nd Card:
Step1: I again picked the cardstock in the size 4.5"x10" & scored it at 5" to make my card measuring 4.5"X5", I also cut out a cardstock in 4.25"x4.75"
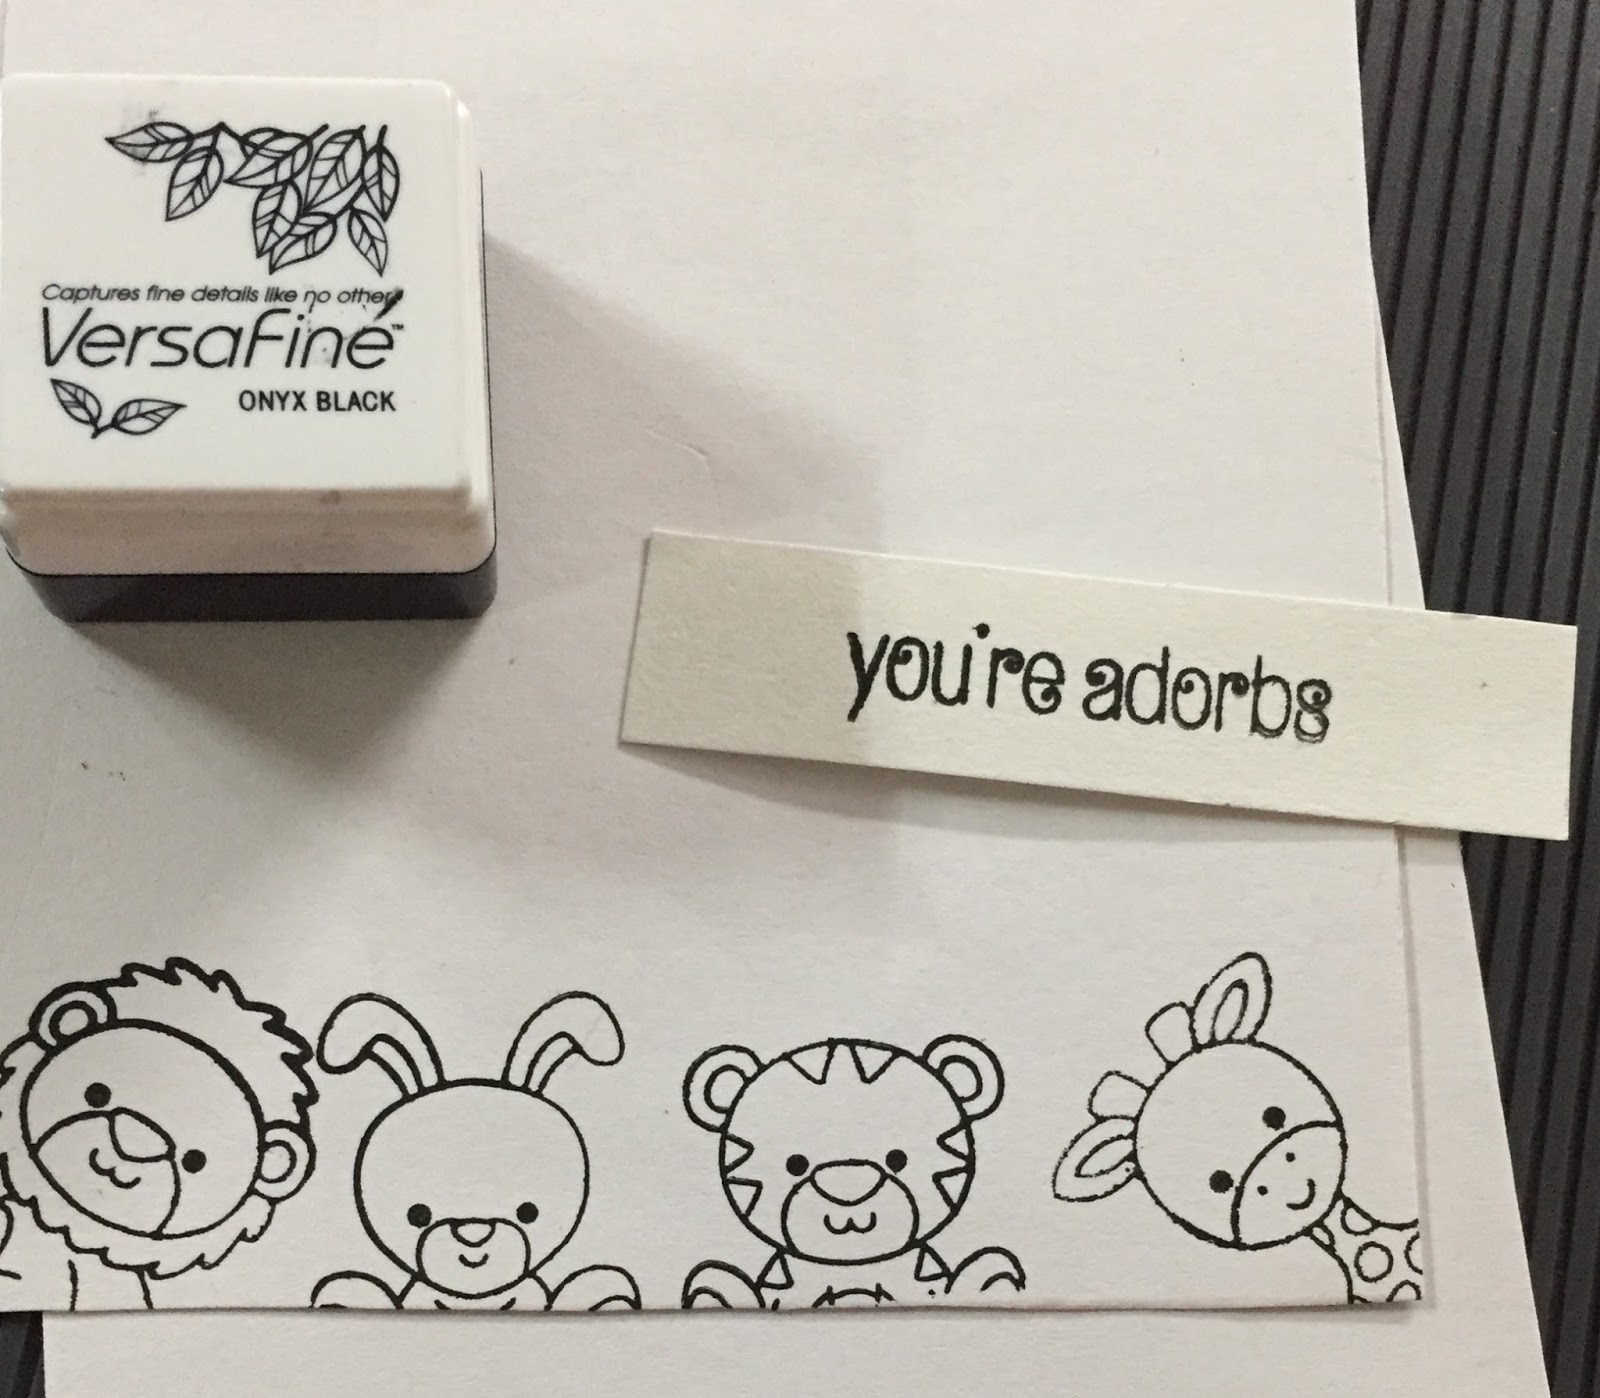
Step2: using my VersaFine Onyx Black ink I stamped images using Clearly Besotted stamp set- I stamped with the animals at the bottom, with just the faces, to give it a look of the animals peeking out and picked the sentiment from the same stamp set & stamped it on a separate tag.
Step3: Using DUO watercolour pencils I coloured the stamped images & distressed the edges of the card stock.
Step4: Using an orange gingham print washi tape I added it above the animals & adhered my stamped sentiment using the double-sided Foam tape
Step5: Lastly I adhered the cardstock to my scored & folded card & Lalala! the card is ready!
Here are some more pictures:
Materials used:
1. White Cardstock
2. Clearly besotted stamp set
3. Versafine Onyx Black ink
4. Duo watercolour pencils
5. double sided foam tape
6. WRMK score & cut
7. Tsukineko ink in dew drop size
Almost all of the material mentioned above are available at the Rainbow Craftykari store or can be pre-ordered by sending an e-mail at rainbowcraftykari@gmail.com.
Hope you enjoyed the tutorial.


Wow, It's amazing! Loved the beautiful card and the tutorial is so easy to follow!
ReplyDeleteGretta Hewson
Why not see Top Georgetown Towing service
Lovely tutorial... Beautiful card
ReplyDeleteAdorable cards Priyanka ! Enjoy your winter :)
ReplyDelete