Tuesday, 23 May 2017
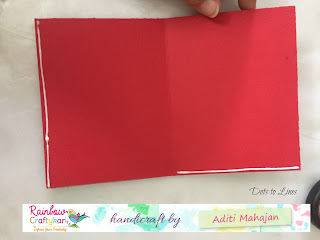
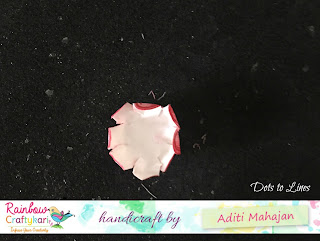
Mini Pocket Album Tutorial By DT Aditi Mahajan
Hello Everyone,
Martha Stewart Scoring Board
Regards,
Labels:
Aditi Mahajan,
Chipboards,
DT Aditi,
Flowers,
Memories,
Mini Pocket Album,
Pockets,
Tutorial
Thursday, 18 May 2017
Summer Breeze 3D Pop-up Box Album by DT Aditi Mahajan
Hello Crafters
Aditi here, Today we're at the Rainbow Craftykari Blog with some inspiration for the ongoing challenge.
If you haven't yet checked the challenge, hop on for more info- Blooms Magic
Inspired by the DCWV May Mood board, we've created a 3D Pop-up Box Album on the theme of Summer. Relax and rejuvenate in the gardens and enjoy your vacation.
The flowers have been created using a die and pattern paper. You could also use a flower punch if you have one. Using the pattern paper is simple, as you then don't have to color them and can directly shape them. The centers were filled with some liquid glitter to complete the flowers.
The box which is the album opens up to a flat single sheet and can be used both sides. I've added pockets and tags to the inside of the box.
The other elements on the top, have been stamped, die cut and colored using zig markers. I used the back of the same patterned paper for these elements.
Hope you're inspired!
Materials List
DCWV- Recollections Les Belles Fleur Stack and DIY Mini Album Project Stack (Vellum for the umbrella and pockets)
Heartfelt creations- Tree from Sugar Hollow Hangout; Flowering Dogwood Collection; Fleur Borders and Pockets Die
White cardstock
Fevicol
Distress Ink- Wild Honey
Circle Punch
Bead
Wire
Above mentioned material is available at Rainbow Craftykari Store OR you can pre-order by sending the mail at rainbowcraftykari@gmail.com
Do enter your creations in the challenge and good luck!
Regards,
Aditi
Dots To Lines
Wednesday, 17 May 2017
Shabby Chic Card with Handmade Flowers By GDT Kriti
Namaste Everyone!!
It's Kriti here sharing a Mixed Media card with some handmade flowers. This is an inspiration for our ongoing challenge Blooms Magic. A Sneak peak
I have used Fairyland collection from Papericious. These papers are gorgeous with lots of flowers, fairies, butterflies and few sheets of die- cuts and sentiments.
I took an ivory cardstock of size 6" x 4.5 ". Then took two beautiful contrast papers from the pack, distressed the edges and layered onto the cardstock. After that fussy cut some butterflies, leaves, flower and a fairy. Also put a sentiment from the sheet matching the theme of the card.
Now the best part, I made some handmade flowers also to embellish the card. Have a look...
I have a tutorial for you all for these simple yet elegant flowers.
Tutorial for Flower
1.Cut a circle from a paper. starting at the outside edge, cut a spiral towards the centre. Slightly zig- zag the edges will create a more natural looking flower.
2. Beginning from the outside, tightly wrap the paper, rolling towards the centre.
3. Next release the coil so that it will grow.
4. When you get to the end, you will have a little round part.Put a little glue on it and press to adhere the coiled paper. Aren't these paper roses are cute.
I made these to embellish my card but they can be used for so many things! Also cut two leaves with Prima dies to make these flowers a complete look.
Here is the final card
Some close-ups
Materials Used:
Papericious Paper Pack - Fairyland
Cardstock- Ivory and Green
Tonic Studios Tim Holtz Scissors
Hot Glue Gun
Distressing Tool
Prima leaf dies
Jute cord - Ivory
I hope you like my card...will meet you all soon with a new project....Do join us in the current challenge The Blooms Magic.
All the materials listed above are available at Rainbow Craftykari Store or you can pre-order them by sending an email at rainbowcraftykari@gmail.com
Happy Crafting!
Kriti Mishra
Handcrafted Expressions by Kriti
Labels:
3D,
Butterflies,
GDT Kriti,
Greeting Card,
Handmade Flowers,
Inspiration,
Mixed Media Card
Tuesday, 16 May 2017
Garden-themed Decoupage Bottle by GDT Khusboo Gandhi
Hie guys! I'm Khushboo Gandhi, and welcome to our next round of Tutorials. And especially for this, I've chosen one of the most interesting techniques: Decoupage. Today, I will teach you how to decoupage a bottle using tissue papers.
First, you need to collect all the paraphernalia required for your project, like: a bottle, your choice of tissue papers, decoupage glue, gesso, white acrylic paint, paint brushes, glue and other embellishments (but these can be assorted later as well).
Step 1: Clean your bottle with rubbing alcohol to get rid of grease and stains. This will ensure that your bottle has a clean surface for you to work on.
Step 2: Gesso the bottle all over. Let it dry for some time. Gesso it again. Give it a few uneven coats (in case you want a textured surface).
Step 3: Choose the kind of design you want to put on your bottle. Generally, decoupage tissue papers are 2 or 3 ply i.e. they have 1 or 2 white, plain paper behind the design that you need to separate from (as can be seen in the following picture).
Step 4: Decoupage is the art of sticking design paper on the surface of a project. How much of that tissue paper you want to stick on your bottle, and how you want to place it - is entirely up to you. For my project, I wanted to wrap around one complete piece of tissue paper on the lower half of my bottle. So first take the decoupage glue and apply it with the help of a flat paint brush on the bottle. Then take your design tissue paper and lay it over the wet glue carefully and gradually. Then apply a coat of decoupage glue over the tissue again. Let it dry.
Step 5: For my project, I wanted to give it a little texture; and hence I let the creases form naturally white setting the tissue paper on my bottle. Repeat until the whole of your lower half bottle is covered with tissue (as can be seen in the picture below).
Step 6: Now we need to cover the neck of our bottle. Here's a more detailed shot of the process. I took a small piece of my design tissue paper (butterfly motif) and spread it across a glued surface. I then applied another coat of decoupage glue over it.
Step 7: This is how it looks (see the picture below). Keep on repeating until the entire neck of the bottle is covered in tissue paper.
Step 8: Cover the white areas in-between the tissue paper pieces with a matching acrylic paint. This will give a cohesive look to your project. Let it dry.
Step 9: After half an hour, cover the whole bottle with an even coat of decoupage glue and let it dry completely. This will further seal your tissue paper layers and reduce wearing out the papers.
Step 10: Your beautifully decoupaged bottle is now ready to be embellished. Now starts the most adventurous part! Go wild! Try out different themes on your projects! For mine, I created a Garden Theme.
And Voila!!! This is how I embellished my project! Scroll on further to check out more pictures of this beautiful Garden Bottle.
Materials used:
Glass Bottle
White Gesso
Decoupage Glue
White Acrylic Paint
Design Tissue Paper
Pearl Trims
Flowers (paper/resin/acrylic)
Sentiment Stamps
Fillers
White, Green and Black Laces
3D Stickers
Dragonfly cut-out
Hope you guys enjoyed this tutorial as much as I loved making it for you! Do share your Decoupage creations along with handmade flowers - which is the theme for our new challenge at Rainbow Craftykari blog.
All the materials listed above are available at Rainbow Craftykari Store or you can pre order them by sending an email at rainbowcraftykari@gmail.com.
Warm Regards
Khushboo Gandhi
Fb Link: https://www.facebook.com/snowflakesandlilies/
Labels:
Creativity,
Decoupage,
Decoupage Bottle,
Garden,
GDT Khushboo,
Rainbow Craftykari,
Tutorial
Subscribe to:
Posts (Atom)