Tuesday, 12 June 2018

Dream Catcher- DT Priyadarshini inspired by DT Vidhi

Hello Everyone,

First of all i would like to share that our Rainbow Craftykari Blog has been chosen in TOP 100 Scrapbooking blogs over the web!!
https://blog.feedspot.com/scrapbooking_blogs/

We can't express how much overwhelmed we are, this happen all because of your support and love. Thank you so much everyone for showering unconditional love and support. Keep visiting at our blog and get inspired every day!

Moving on to my today's inspiration post. I have taken inspiration from our design team member and my friend Vidhi Jadeja. She is an amazing crafter and you must check her BLOG


For today's post, I have made a dream catcher using an old embroidery hoop and used foamiran flowers. 


I was inspired by one of her cards made for the team last month. Check out that card HERE.

Materials required:

1. Embroidery hoop - 2 different sizes (can be made with one hoop)
2. Jute twine/cord (multicolour)
3. Hot glue gun
4. White pearls and colour beads
5. Feathers
6. MDF butterfly
7. Fabric glue/ white glue
8. Foamiran
    a) Flowers
    b) Leaves
    c) Pollens
    d) Styrofoam buds
    e) Iron box to heat the flowers


How I made: 

1. I took two different sizes of embroidery hoops and started wrapping them using jute twine/cord. I used fabric glue to stick the end of the twine to the hoop. (can use a drop of hot glue to secure the end of the twines)

2. Take twine and add pearls and beads and tie feathers to the end and secure with a drop of hot glue gun so the feathers don't fall off. 

3. Add these to the hoop using a hot glue gun. 

4. Made 3 roses using foamiran (yellow, pink, blue) and small flowers and leaves. Used hot glue to add them to the hoop. 

5. Added MDF butterfly with hot glue to the dream catcher.


Do visit the Rainbow Craftykari store HERE

Visit our BLOG for more inspiration, tutorials and check out our ongoing challenge.

Above-listed materials are available on the Rainbow Craftykari Store and can also be pre-ordered by sending an e-mail at rainbowcraftykari@gmail.com.

Happy crafting!
Priyadarshini
Saturday, 9 June 2018

Shabby Chic Tin Tutorial by Blog Coordinator Aditi

Hello Everyone,

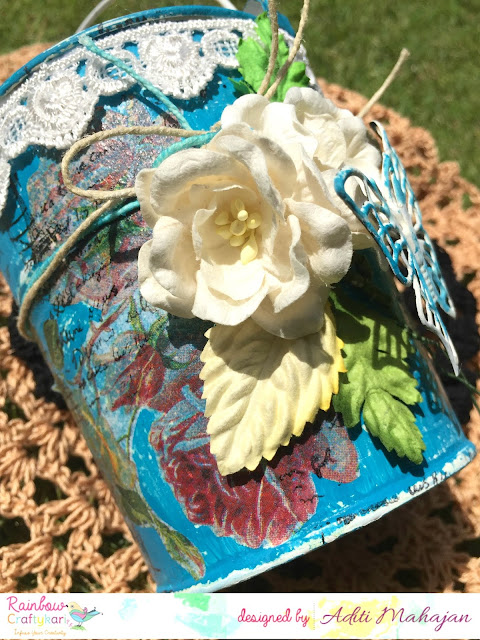
Hope you are all doing good and looking forward to the weekend! Today I'm back with a pictorial tutorial for you all. I have altered a metal tin in a shabby chic style. With simple elements, it's a decorative tin, that can be used as a pen stand, or organiser.

Here's a look at it:


Let's begin the tutorial:

Step 1: Here's a look at the tin first. It's metal and white in colour. 


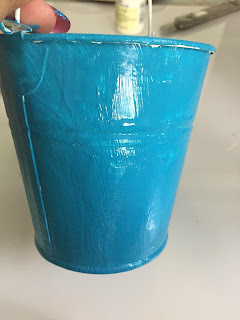
Step 2: First, give the entire tin a coat of the Folkart Home Decor Chalk Paint. I have given it two coats for a thicker finish,


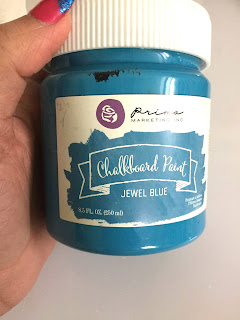
Step 3: Next, give it a coat of Prima Marketing Chalkboard Paint. This third coat is a darker contrasting colour.


Step 4: Using sandpaper, scrub the entire surface. This will give us a shabby look. 


Step 5: Pick a tissue paper and fussy cut elements to decorate the tin.


Step 6: Ensure to remove the two layers of the tissue paper before adhering it. 

Step 7: Use mod podge and stick down these on the tin randomly.


Step 8: Use some stamps and Black ink and randomly stamp.


Step 9: Pick elements/embellishments to decorate the tin. I have used jute cord, lace, flowers, a metal butterfly (painted using the two paints used above).


Step 10: Glue everything together and your tin is ready,


Supplies:
  • Metal Tin
  • Metal Butterfly
  • Folkart Home Decor Chalk Paint- Satin Finish
  • Prima Marketing Chalkboard Paint Jewel Blue
  • Decoupage Napkin
  • Mod Podge
  • Papericious Jute Cord
  • Lace
  • Flowers
  • Leaves
  • Sandpaper
Do visit the Rainbow Craftykari store HERE
Visit our BLOG for more inspiration, tutorials and check out our ongoing challenge.

Above-listed materials are available on the Rainbow Craftykari Store and can also be pre-ordered by sending an e-mail at rainbowcraftykari@gmail.com.

Happy crafting!
Aditi

Wednesday, 6 June 2018

RCS Challenge #10 Winners


Hello Everyone,

Today we're here to announce our May Challenge Winners. 

We've had so many gorgeous, and we love your interpretation of the challenge! We loved to see different interpretations of the layout and how you all were inspired.

We love all the entries, and it's always hard to choose a few. However, some things have to be done...

Let's move on to the announcement!!

The top three in no particular order are

Palchin Creations


We loved this project! The colours and elements look amazing. The overall composition works brilliantly. 


We love the CAS look on this card and the inspiration drawn from the layout!


The journal page is vibrant and fun! Love how the colours from the layout were used on this one!

Top three, do grab your badges from the blog and flaunt them!


Now onto our winner!! 


Ishani


The card is fantastic! Love how she was inspired by the sunset hues and black die-cuts from the layout and created this card! She sure has nailed the sunset on her card!

Kindly grab your badge from the blog and flaunt it.

Winner kindly e-mail us at rainbowcraftykari@gmail.com with the subject Challenge #10 Be Inspired Winner to claim your prize. 


Tag- DT Spardha inspired by DT Megha

Hey guys!

Hope you're having a great week and a *hot hot* month. 

I am here today with an inspiration post.


This time, we have a twist in our inspiration posts. We'll be getting inspired by our very own Design Team. And why shouldn't we, they are AWESOME!

My project is inspired by the wonderful artist, and an even more amazing person, Megha!

I went through all her posts, and like any sane person {not} broke down her style into mixed media, grunge and layers. All of these were far from my style of work. Then I hit the jackpot when I saw her Christmas Tag. Hint - It's got OWLS on it!


I loved the colours and the owls and the pearls on this project. I started with preparing the base using paint sprays and blending them together. Later on stamping the script stamp. Halfway through the project, I realised I don't own another owl stamp beside a graduation-themed one. So I used a paper clip for it!

I have also added the dimension with modelling paste, later on, painted over.


And the results are here for you to see!

Hope you liked the project and honestly guys, just go through her blog whenever you have an artist's block. She has some brilliant projects over there!

Supplies used:
  • Brown Cardstock
  • Script stamp
  • Black ink pad
  • Modelling Paste
  • Acrylic paints
  • Paper flowers
  • Paperclip
  • Alphabet stickers
  • Pearls
  • Rhinestones
  • Paper Twine
Do visit the Rainbow Craftykari store HERE
Visit our BLOG for more inspiration, tutorials and check out our ongoing challenge.

Most of the above-listed materials are available on the Rainbow Craftykari Store and can also be pre-ordered by sending an e-mail at rainbowcraftykari@gmail.com.

Do visit the Rainbow Craftykari store HERE


--- Happy Summers! ---
Spardha