Showing posts with label Altered Art. Show all posts

Saturday 9 June 2018

Shabby Chic Tin Tutorial by Blog Coordinator Aditi

Hello Everyone,

Hope you are all doing good and looking forward to the weekend! Today I'm back with a pictorial tutorial for you all. I have altered a metal tin in a shabby chic style. With simple elements, it's a decorative tin, that can be used as a pen stand, or organiser.

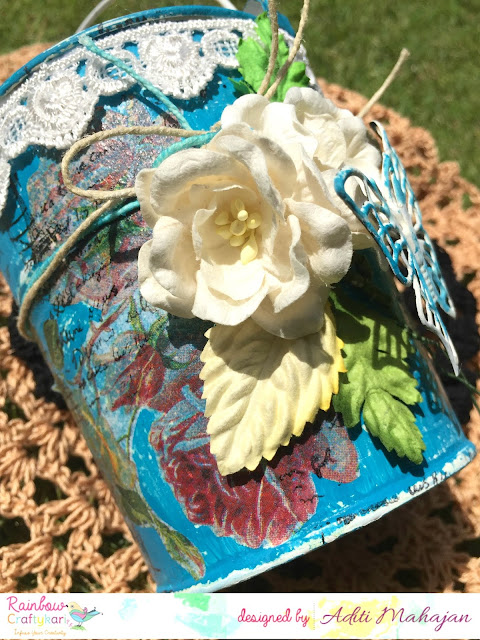
Here's a look at it:


Let's begin the tutorial:

Step 1: Here's a look at the tin first. It's metal and white in colour. 


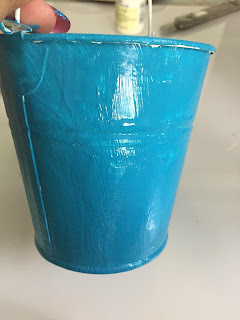
Step 2: First, give the entire tin a coat of the Folkart Home Decor Chalk Paint. I have given it two coats for a thicker finish,


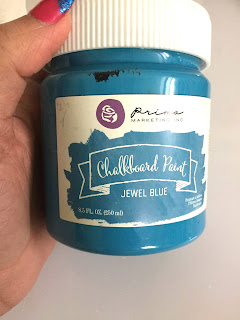
Step 3: Next, give it a coat of Prima Marketing Chalkboard Paint. This third coat is a darker contrasting colour.


Step 4: Using sandpaper, scrub the entire surface. This will give us a shabby look. 


Step 5: Pick a tissue paper and fussy cut elements to decorate the tin.


Step 6: Ensure to remove the two layers of the tissue paper before adhering it. 

Step 7: Use mod podge and stick down these on the tin randomly.


Step 8: Use some stamps and Black ink and randomly stamp.


Step 9: Pick elements/embellishments to decorate the tin. I have used jute cord, lace, flowers, a metal butterfly (painted using the two paints used above).


Step 10: Glue everything together and your tin is ready,


Supplies:
  • Metal Tin
  • Metal Butterfly
  • Folkart Home Decor Chalk Paint- Satin Finish
  • Prima Marketing Chalkboard Paint Jewel Blue
  • Decoupage Napkin
  • Mod Podge
  • Papericious Jute Cord
  • Lace
  • Flowers
  • Leaves
  • Sandpaper
Do visit the Rainbow Craftykari store HERE
Visit our BLOG for more inspiration, tutorials and check out our ongoing challenge.

Above-listed materials are available on the Rainbow Craftykari Store and can also be pre-ordered by sending an e-mail at rainbowcraftykari@gmail.com.

Happy crafting!
Aditi

Tuesday 5 June 2018

Paper Bag Tutorial by DT Megha


Hello Everyone,

Today I am here with a tutorial post on creating a Journal Page on a brown paper bag.
I love Art Journalling, this is one art form which I enjoy thoroughly. 

It’s a place to record your thoughts, memories, and emotions through images, art and words. The number one rule about Art Journaling is that there are No Rules. :)

So let's start,

Step 1: We will convert this simple brown paper bag, don't be afraid of all the print we'll cover it all up like it was never there.

  
Step 2: I am going to cover my paper with white gesso, here I am covering the print on the bag and also preparing the background and priming the surface for the sprays and colours.


Step 3: Before the gesso dries I am going to tear pieces of Tim Holtz tissue paper and randomly place them on the bag, as the bag is still wet with gesso the tissue will adhere well.


Step 4: I am going ahead and heat setting this and dry this with a heat gun.


Step 5: I am taking some American Crafts twine for texture and interest and again randomly placing it on my bag. 


Step 6: I am going to adhere this with the help of white gesso so that I can help the twine to stick and also prime the twine to accept the colour sprays.


Step 7: Next, I am taking a geometric shape stencil and run modelling paste through it, in this case, triangles. I am going to use a generous amount of paste so that my triangles stand out.


Step 8: I am making sure all of the gesso and modelling paste is nice and dry so that we can spray away the colours without any fear. :)


Step 9: I'll be using 13 @rts Sprays, the idea here is to go from brightest to darkest to create depth. Make sure to shake your sprays before use so the pigments mix well.
I will be spraying water on the bag in intervals to help the pigment to flow and move around.

I am going to start spraying from the left and the right sides and tilt my bag toward the middle so that I can allow the colours to flow by themselves. I am starting with the brightest colours, Yellow Lemon and Yellow Amber.

I am going to dry this with a heat gun a little bit and spray again with same colours to build the colours and then dry again with the heat gun.


Step 10: Now I will take the dark colours, the beautiful Lilac and Chalk Grey sprays.

I sprayed the Lilac randomly and heat set it a bit and then I am opening my Chalk grey spray and dropping the colour in places here and there with the help of the tube.  This amazingly mixes and spreads into the page. I am going to heat set between the layers and application of the sprays.


Step 11: Time for embellishments. I am going to use some sparkly paper butterflies and flower corners and dark black flowers, I choose these to go with my title. 


Step 12:  I stamped my sentiment with black archival ink.


Step 13: I took some black and white acrylic paints and splattered all over the page, this gives me a certain amount of joy :) I heat set the black splatter and then did the white splatters and heat set again.


Step 14: To add more dimension and interest to the bag I am putting in white and black Nuvo drops in random places.


Step 15: I want to add more dimension and interest to my bag, I am going to use the newly launched MDF embellishments from Rainbow Craftykari- Triangles. 
Im simply painting them with black matte paint and adhering them on the bag.


Step 16: I splattered the bag once again heavily with white paint and applied black soot distress ink on the edges to frame the bag. 


We are done without Journal page on a brown bag and Gift Bag!

Here's a video flip through


Here are some pictures of the bag,


Supplies used:
  • Brown Paper Bag
  • Ranger Tim Holtz Tissue
  • Modelling Paste 
  • White Gesso 
  • Stencil
  • Matt Medium, Liquid Glue
  • American Crafters twine
  • Flowers & Butterflies Paper embellishments 
  • any inspirational word Stamps
  • Black Archival Ink
  • Rainbow Craftykari MDF Triangles
  • 13 Arts Colour Sprays 
  • Nuvo Drops- Black and White
  • White and Black Acrylic Paint
  • Black Soot Distress Ink
  • Heat Gun
Do visit the Rainbow Craftykari store HERE
Visit our BLOG for more inspiration, tutorials and check out our ongoing challenge.
Happy Crafting!


Most of the above-listed materials are available on the Rainbow Craftykari Store and can also be pre-ordered by sending an e-mail at rainbowcraftykari@gmail.com.


Wednesday 30 May 2018

Altered Palette Tutorial by DT Vidhi

Hello friends,

How are you all? I am enjoying my little summer vacation!!! It's too hot here in India. But I am still enjoying my break. I am back with another Tutorial post for Rainbow Craftykari blog.

This time, I've created an Old Vintage Shadow Box from a used artist palette. I love old and a vintage look on projects and that's why this was fun to create it.


So here is how I made this Shadow box.
Enjoy a video flip through and step by step instructions below  

Step 1 :  First step is to prime the base.

It is always good to prime the base with gesso, so it holds any further mediums and colours.


I gave it a coat of Black Gesso and covered the entire surface. The palette is made out of plastic and this gesso primes it well for further textures and mediums. 


Step 2 :  Adding textures. Apply white Crackle texture paste on the pallet randomly as shown in the image.


For fine cracks, let it dry naturally. Once you let it dry for a few hours, you'll see the cracks appear. Next, I applied a thin layer of rust paste watered down, onto the texture. This enhances the cracks.


Step 3 :  Roughly placing elements on the pallet.
I picked different things from my treasure, to go with my vintage shadow box.
After picking it out the elements, I roughly placed them on the palette and played with the arrangement. 


Step 4 :  Add colours and textures to the elements.
I selected different types of materials of elements. Some are plastic, metal, fibers etc.  Before placing them, it is important to colour them to match the vintage look. I used the same rust pastes and painted the elements.


Step 5 :  Gluing and Priming the elements. 
One by one I placed all the elements in the colour pallet  and added some used fabric pieces, threads, beads and mini/mega stones to give more depth to the project.


Step 6 :  Time to add the coffee splash.
In the end, I splashed some coffee stains on the entire project to enhance the vintage look. 


Step 7: Final touches.

For more depth, I sprinkled Lindy's magical shakers at a few places and added Tim Holtz Word Sticker to give it more meaning. 


And with that my Vintage shadow box is ready !!!


Supplies Used :
  • Black Gesso
  • Finnabair Rust Paste set
  • White Crackle texture paste
  • Glue - Heavy body gel
  • Tim Holtz sticker set
  • Lindy's magical shakers
  • Coffee powder
Most of the above-listed materials are available on the Rainbow Craftykari Store and can also be pre-ordered by sending an e-mail at rainbowcraftykari@gmail.com.
Do visit the Rainbow Craftykari store HERE

Visit our BLOG for more inspiration and tutorials.

Hope you guys liked it. Looking forward to seeing your variation of this one!

Happy Crafting,