
Hello Everyone,
Today I am here with a tutorial post on creating a Journal Page on a brown paper bag.
I love Art Journalling, this is one art form which I enjoy thoroughly.
It’s a place to record your thoughts, memories, and emotions through images, art and words. The number one rule about Art Journaling is that there are No Rules. :)
So let's start,
Step 1: We will convert this simple brown paper bag, don't be afraid of all the print we'll cover it all up like it was never there.

Step 2: I am going to cover my paper with white gesso, here I am covering the print on the bag and also preparing the background and priming the surface for the sprays and colours.

Step 3: Before the gesso dries I am going to tear pieces of Tim Holtz tissue paper and randomly place them on the bag, as the bag is still wet with gesso the tissue will adhere well.


Step 4: I am going ahead and heat setting this and dry this with a heat gun.

Step 5: I am taking some American Crafts twine for texture and interest and again randomly placing it on my bag.

Step 6: I am going to adhere this with the help of white gesso so that I can help the twine to stick and also prime the twine to accept the colour sprays.

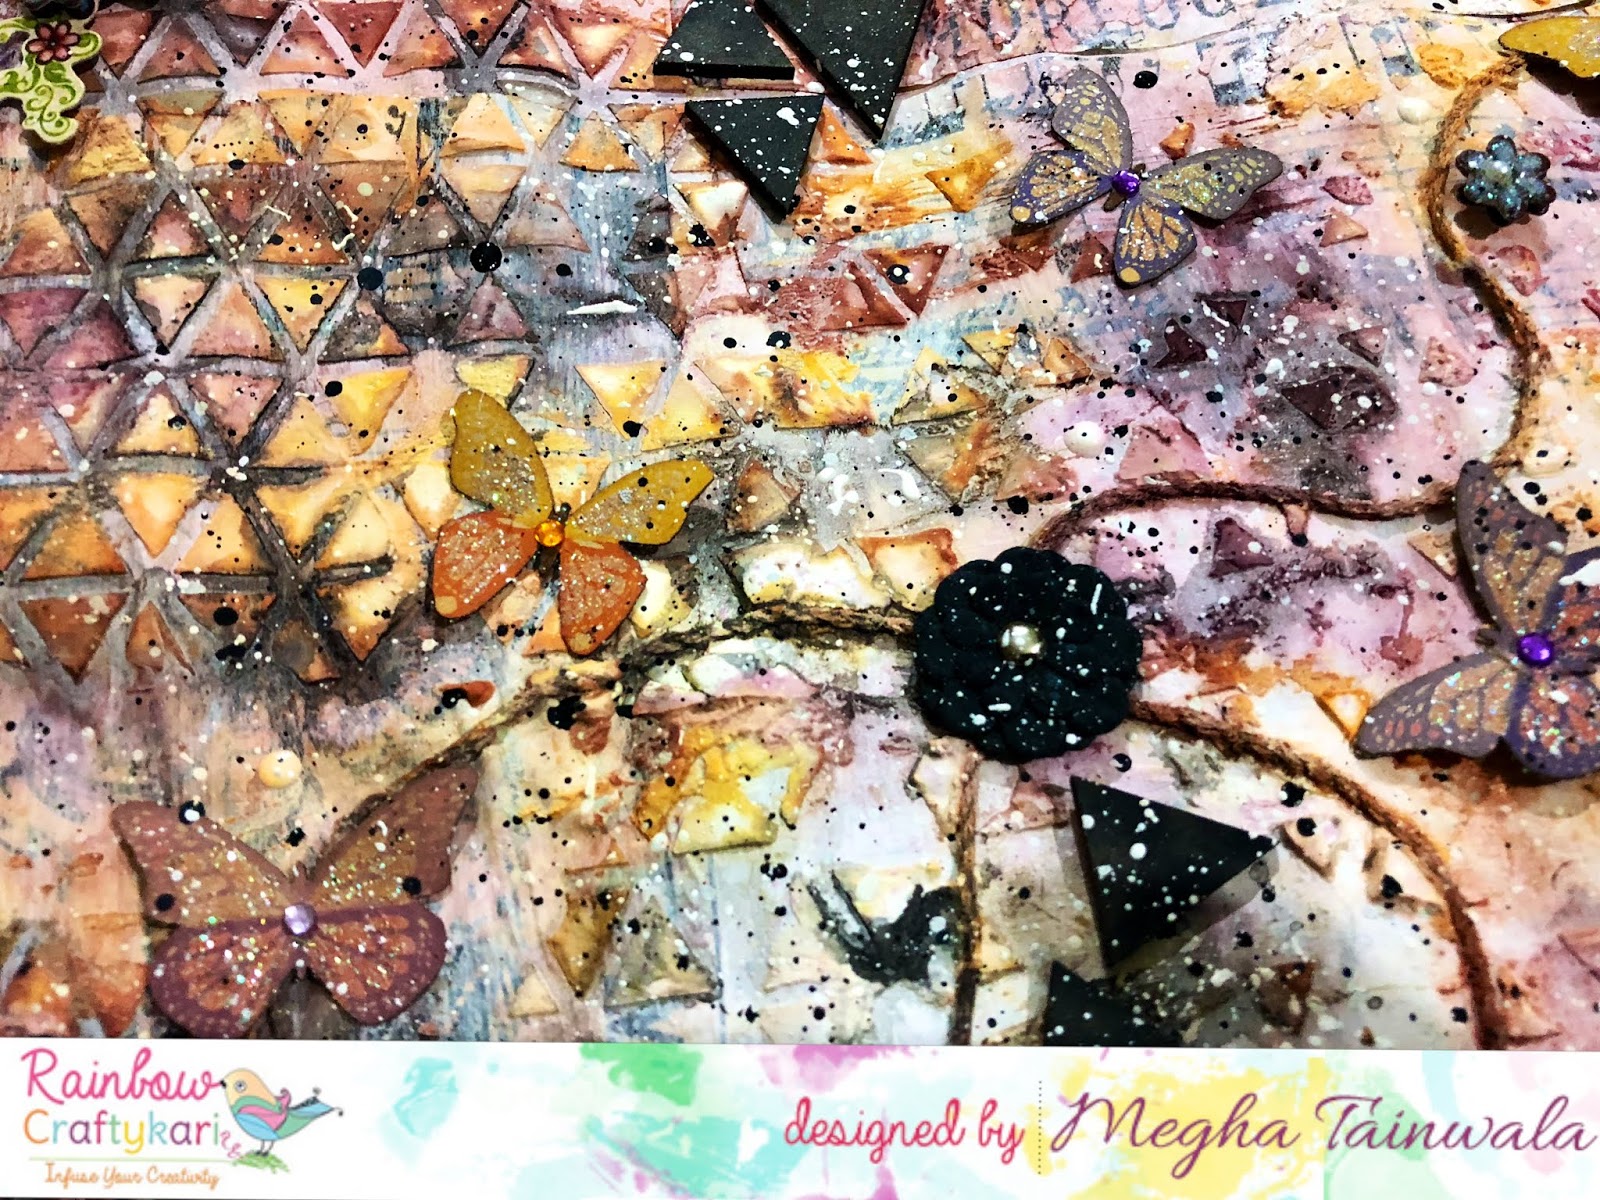
Step 7: Next, I am taking a geometric shape stencil and run modelling paste through it, in this case, triangles. I am going to use a generous amount of paste so that my triangles stand out.

Step 8: I am making sure all of the gesso and modelling paste is nice and dry so that we can spray away the colours without any fear. :)

Step 9: I'll be using 13 @rts Sprays, the idea here is to go from brightest to darkest to create depth. Make sure to shake your sprays before use so the pigments mix well.
I will be spraying water on the bag in intervals to help the pigment to flow and move around.
I am going to start spraying from the left and the right sides and tilt my bag toward the middle so that I can allow the colours to flow by themselves. I am starting with the brightest colours, Yellow Lemon and Yellow Amber.
I am going to dry this with a heat gun a little bit and spray again with same colours to build the colours and then dry again with the heat gun.

Step 10: Now I will take the dark colours, the beautiful Lilac and Chalk Grey sprays.
I sprayed the Lilac randomly and heat set it a bit and then I am opening my Chalk grey spray and dropping the colour in places here and there with the help of the tube. This amazingly mixes and spreads into the page. I am going to heat set between the layers and application of the sprays.

Step 11: Time for embellishments. I am going to use some sparkly paper butterflies and flower corners and dark black flowers, I choose these to go with my title.

Step 12: I stamped my sentiment with black archival ink.

Step 13: I took some black and white acrylic paints and splattered all over the page, this gives me a certain amount of joy :) I heat set the black splatter and then did the white splatters and heat set again.

Step 14: To add more dimension and interest to the bag I am putting in white and black Nuvo drops in random places.

Step 15: I want to add more dimension and interest to my bag, I am going to use the newly launched MDF embellishments from Rainbow Craftykari- Triangles.
Im simply painting them with black matte paint and adhering them on the bag.

Step 16: I splattered the bag once again heavily with white paint and applied black soot distress ink on the edges to frame the bag.

We are done without Journal page on a brown bag and Gift Bag!
Here's a video flip through
Here are some pictures of the bag,


Supplies used:
- Brown Paper Bag
- Ranger Tim Holtz Tissue
- Modelling Paste
- White Gesso
- Stencil
- Matt Medium, Liquid Glue
- American Crafters twine
- Flowers & Butterflies Paper embellishments
- any inspirational word Stamps
- Black Archival Ink
- Rainbow Craftykari MDF Triangles
- 13 Arts Colour Sprays
- Nuvo Drops- Black and White
- White and Black Acrylic Paint
- Black Soot Distress Ink
- Heat Gun
Do visit the Rainbow Craftykari store HERE
Visit our BLOG for more inspiration, tutorials and check out our ongoing challenge.
Happy Crafting!
Visit our BLOG for more inspiration, tutorials and check out our ongoing challenge.
Happy Crafting!
Most of the above-listed materials are available on the Rainbow Craftykari Store and can also be pre-ordered by sending an e-mail at rainbowcraftykari@gmail.com.