Showing posts with label Inspiration. Show all posts

Friday 8 September 2017

Art Tiles by DT Khushboo

Good morning crafters!

How are you today? This is Khushboo here, back with another round of Inspiration Post at Rainbow Craftykari.


Often times we strive to create our projects that look different from others. All in an attempt to maintain uniqueness. But with a pre-defined set of embellishments available in the market, our projects end up with similar elements. What fun it would be if we could create our own embellishments?


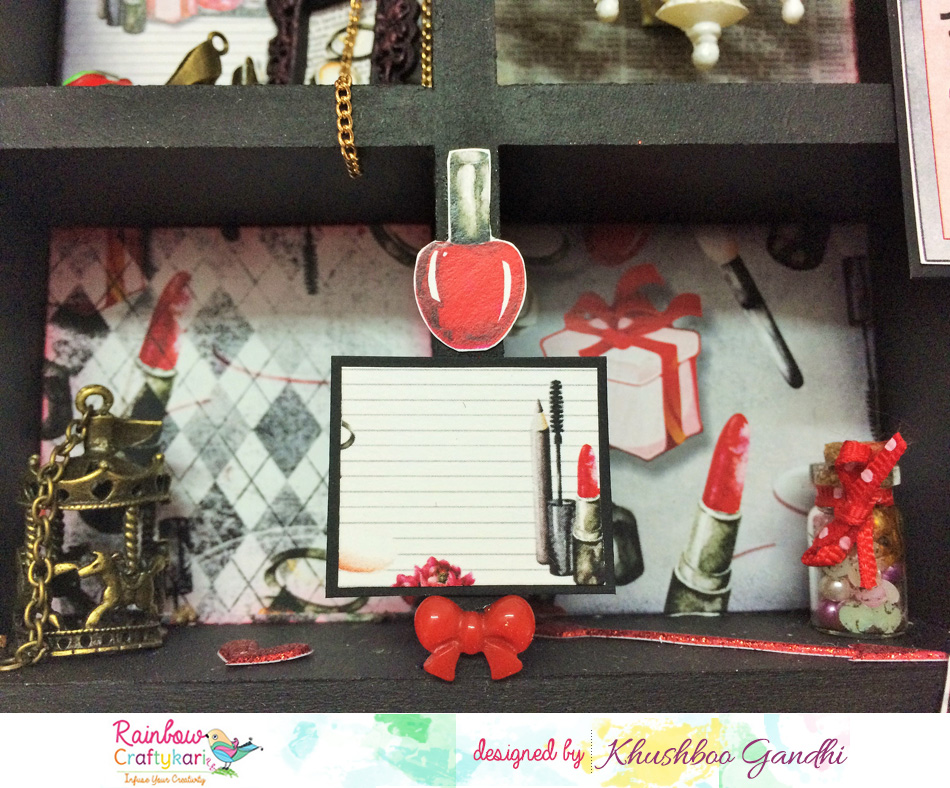
This post is all about creating your own 'Art Tiles' that are not limited by colours, styles or materials!


Let's take a look at some of the art tiles that I created, and then move on to a brief on how I made them!


Brief Steps for creating 'Art Tiles':

Take your medium weight chipboard and cut it into a square (1x1 inch) and rectangle pieces (1.5x1 inch). Gesso some of the pieces with white and/or black gesso.Cut and stick some pattern paper of the same size as your chipboard pieces - these will be your base before you start stamping.


Collect a variety of intricate stamps and start stamping randomly on your pieces. It could be any motif - butterflies, scripts, flowers, etc. Don't forget to stamp sentiments on some of your tiles too! 


Take some coordinating distress inks and ink up the hell outa these tiles! Throw in some color, make the stamps pop!

To add some mystery and class, distress the sides of the tile with Black Soot Distress Ink or Black Archival Ink. It absolutely brings out the beauty of every element on your tile!


You can leave some tiles plain, or you can add rhinestones, flowers and glitters on some - like I've done.


Now comes the fun part - Glossy Accents! Lay your tile on a flat surface and cover it entirely with Glossy Accents. Don't be a miser! Use the GA luxuriously - coz once it dries, it'll give a glassy/raised/embossed effect to the whole tile.


Let it dry completely for a few hours - and voila! Your tiles are set to be added to your projects!


Materials used:

  • Chipboard
  • Gesso
  • Glossy Accents
  • Acetate
  • Stamps
  • Sentiment stamps
  • Black Archival Ink
  • Distress Ink
  • Rhinestones
  • Flowers
  • Glitter
  • Pattern Paper
  • Chain
  • Glue

Hope you guys enjoyed my creations. Can't wait to see how you add your own twist to this!

Above mentioned products are available at Rainbow Craftykari Store OR you can pre-order the products by sending email at rainbowcraftykari@gmail.com

Don't forget to participate in our ongoing challenge. Link your projects here


That's it from me, folks!

Signing out,
Khushboo R. Gandhi

Monday 4 September 2017

Love- Photo Frame by DT Mounika

Hello everyone,

I am Mounika and I am so happy to be on Rainbow Craftykari Blog with my Inspiration Post.


Everyone loves to treasure memories in a special way, and if those memories are with our kids they are all the more special! To treasure such special memories with my son who will turn 3 this August, I  made this frame.


To begin with, using Papericious black gesso I primed the frame. I then traced down the shape of the frame on a piece of pattern papers and cut it. I have used the Aazealian paper stack from Papericious's latest collection. I then stuck down the pattern paper and cut down the extras. To add some texture I used a bubble stencil with texture paste. Once it was dry I took small pattern papers and roughly arranged them. Once I was happy with the arrangement, I glued everything down. For the embellishments, I used a chipboard heart coloured using blue and yellow chalk paint. On the yellow hearts, I added glitter.


The main focal flower was made using Heartfelt Creations Arianna Blooms stamp and then shaped, the "love" sentiment embellishment was coloured using Prima Art Alchemy waxes. I used the same on the frame as well to highlight the texture at places. 


Here are some close ups:


Materials used:

  • MDF frame
  • Papericious- Black Gesso
  • Papericious- Aazealian Paper Pack
  • Chipboard elements
  • Prima Art Alchemy Waxes
  • Fine Glitter
  • Mulberry flowers
  • Fillers
  • White glue
  • Chalk paints
  • Bubble stencil
  • Texture paste
  • Brushes
  • Microbeads
  • MDF embellishments


All the products used available at the Rainbow Craftykari store or you can  pre-order them by sending an e-mail at rainbowcraftykari@gmail.com

Don't forget to participate in our ongoing challenge. Link your projects here.

Hope you're inspired to create!


Happy crafting
Mounika

Monday 28 August 2017

"This is my Dream" by DT Kriti Mishra

Namaste Friends!!

I am Kriti and I am back with a new project and this is an inspiration post. A layout with some bright colours titled "This is my dream". A dream leads to hope, this is a dream of a wish to come true and all we have is hope.

The lines which I have used are from a song....these lines focus on the motivation and hope we get while dreaming.

Here's the project:


 Some close-ups:


Here's a brief about this project:

To start with, I have taken a wooden plank (Size is 10" x 8") and affixed a few chipboard rectangular pieces on the right-hand side to make a wall and gauge on the left-hand side. Then covered the entire surface with gesso.

Next, I have used a bubble stencil to make the background more interesting using modelling paste and covered the entire surface with gesso again. Next, I have added this beautiful Dreamcatcher chipboard and few beads and again covered the surface with gesso.

After that, I used spray colours i.e., yellow, orange and red(Spray some water too to let them run). I then used gold, copper and black colour to highlight the textures. I then used few stamps, text, brick and music notations to make it more interesting.

Lastly, I embellished it with some coloured gauge, flowers, and a beautiful song lyrics.


Supply List
  • A wooden plank
  • Rectangular chipboard pieces(small)
  • Gauge
  • Dram catcher Chipboard (Papericious)
  • Beads
  • Gesso (Papericious)
  • Bubble Stencil
  • Text, bricks and music notation stamps
  • Black Archival ink
  • Heating tool
  • Spray/Acrylic colours (Red, Yellow, Orange, gold, copper, black)
  • Water mister
  • Handmade mulberry flowers
  • Paper smooches Leaf die
  • Big shot
Above mentioned products are available at Rainbow Craftykari Store or you can pre-order the products by sending e-mail at rainbowcraftykari@gmail.com

Thank you for stopping by!!
Hope you got inspired by my work!


Kriti Mishra

Wednesday 23 August 2017

Elegantly Chic Shadow Box by DT Khushboo

Bonjour Crafters!

This is Khushboo here, back with an Inspiration Post this time. I often do colorful projects and work with color schemes. But for my latest project, I chose a different route. I've created a gorgeous 'Elegantly Chic Shadow Box' in a purely Black-and-Red relationship.


Setting up a shadow box, and further yet, creatively embellishing it is a lot of fun! It brings out the kid in me if nothing else. To arrange every single box/space is very cool! You can spin a different story in every space and yet make it all very cohesive on the whole.


My inspiration for this Shadow Box was Papericious' beautiful paper pack called 'Mi Estilio' - very stylish and extremely elegant. So once I knew what my central theme for the shadow box would be, I started collecting all my related embellishments and creative ideas. The result is as follows:


A Brief for creating this 'Elegantly Chic Shadow Box':

Shadow boxes come in different shapes and sizes, and with randomly sized inside spaces too. Select the one that appeals to you and get started.Cover the entire shadow box with 2 coats of black gesso (since I'm going with a black-and-red theme). Let it dry thoroughly between and after every coat.


Now color the whole box with black acrylic paint and let it dry completely.
Measure the inside box length and width and cut up your pattern paper accordingly.
Ink up the edges of the pattern paper with black and/or red distress inks and start gluing them down however you find them the most complementing.
Don't forget the sides of the shadow box. I've cut strips of pattern paper with random lengths and stuck them. They look dreamy!


Since my theme is 'Elegant and chic', I've embellished my shadow box with all royal-looking stuff like a chair, chandelier, photo frames, etc.
Papericious paper pack also has some beautiful shapes and motifs related to the theme like nail paint bottles, quotes, compact, lipstick, mascara, etc. I've used some of them here - on the front panel.


Finally, I've added glitter stickers like hearts and arrows on the floor of every space so as to not make it gaudy and yet maintain the elan. 


Materials used:

  • Shadow Box 
  • Black gesso 
  • Black acrylic paint
  • Papericious Paper Pack
  • Black cardstock
  • Metal embellishments
  • Resin embellishments
  • Papericious clock embellishments
  • Glitter stickers
  • Metal chain
  • Paper flowers
  • Flower pot
  • Fillers

Hope you guys enjoyed my creations and the tutorial. Can't wait to see how you add your own twist to this!

Don't forget to participate in our ongoing challenge Rainbow Friendship. Link your projects here.

Above mentioned products are available at Rainbow Craftykari Store OR you can pre-order the products by sending email at rainbowcraftykari@gmail.com

That's it from me, folks!

Friday 18 August 2017

Altered MDF Box by DT Priyanka Thukral

Hello Everyone, :)


I am at Rainbow Craftykari Blog today to share my very first inspiration post as the DT member for Rainbow Craftykari. I am Elated..!! and I hope to stand up to the expectations laid down on me.


Today I have an Altered MDF wooden box to share as a part of my inspiration project.
Altered MDF projects have been my favorites since forever & no wonder I begin my term with one of these.


Here is the complete picture of my project


For this project, I picked up a hexagonal MDF box (another current favourite of mine.. :P ) I began with painting the base with gesso which works as a primer (tip: Gesso creates a coat on the base of the wooden material that holds the paint otherwise the wood absorbs the colour).


Next, I painted the box with blue acrylic colour. I chose coordinating patterned papers from Eno Greetings paper pack, cut them to the desired size & distressed them on the edges. For the cover, I cut the paper from one end to the centre point & rolled the two sides on the opposite sides.

On the exposed part of the base, I added glitter using stickles in the coordinating colour & a word tile over it. On the other part, I added a resin oval frame & sequins in the middle of it & adorned it with the resin flowers & bows.
On the sides, I again used stickles in the same colour to give an embossed look (I love how they look like tiny droplets resting on the edge) & added rhinestones to lift up the whole look.

and tada..!! the box is done... :)

The box is perfect to gift a watch to someone or keep it on your dresser as a jewellery box, can be used in multipurpose ways.

Check out some more close up pictures


Supplies Used: 

  • Mdf hexagonal shaped box
  • Gesso by Camel
  • Blue Acrylic paint by Fevicryl
  • Eno Greetings- Pattern Papers
  • Word Tile
  • Resin frame - Oval
  • Resin flowers
  • Bow
  • Stickles(aqua colour)
  • Rhinestones
  • Distress Ink
  • Glossy Accents

Above-mentioned products are available at Rainbow Craftykari store or you can also pre-order by sending an email at rainbowcraftykari@gmail.com

Don't forget to participate in our ongoing challenge Rainbow Friendship. Link your projects here.

Hope you liked my project!


Priyanka Thukral