
Hello Crafty friends,
Happy Guru Nanak Dev Ji Gurpurab to Everyone and Very Good Morning to all.
Today in our Teaching and Learning Program we have Archana Thani as our Guest DT. She's a banker by profession and has been into various styles of Art and Crafts from young.
She will gonna teach us MM Doodling card, so sit back and enjoy the step by step tutorial from her.
Over to you Archana,
So doodling is something that everyone has done and definitely can do. There is no definition to it, the scribble can be just with lines, and simple repetitive designs.
So let's get started.


Regards
Arachana Thani
Happy Guru Nanak Dev Ji Gurpurab to Everyone and Very Good Morning to all.
Today in our Teaching and Learning Program we have Archana Thani as our Guest DT. She's a banker by profession and has been into various styles of Art and Crafts from young.
She will gonna teach us MM Doodling card, so sit back and enjoy the step by step tutorial from her.
Over to you Archana,
Hi
all
With Fall being the season, I have come up with a Fall theme mixed media card with some doodling
Doodling as the Google definition goes is just to scribble absent minded.
Very true to it we
have all done this at some point in our life. During our boring lectures,
scribbling in our rough books etcWith Fall being the season, I have come up with a Fall theme mixed media card with some doodling
Doodling as the Google definition goes is just to scribble absent minded.
So doodling is something that everyone has done and definitely can do. There is no definition to it, the scribble can be just with lines, and simple repetitive designs.
So let's get started.
Step
1
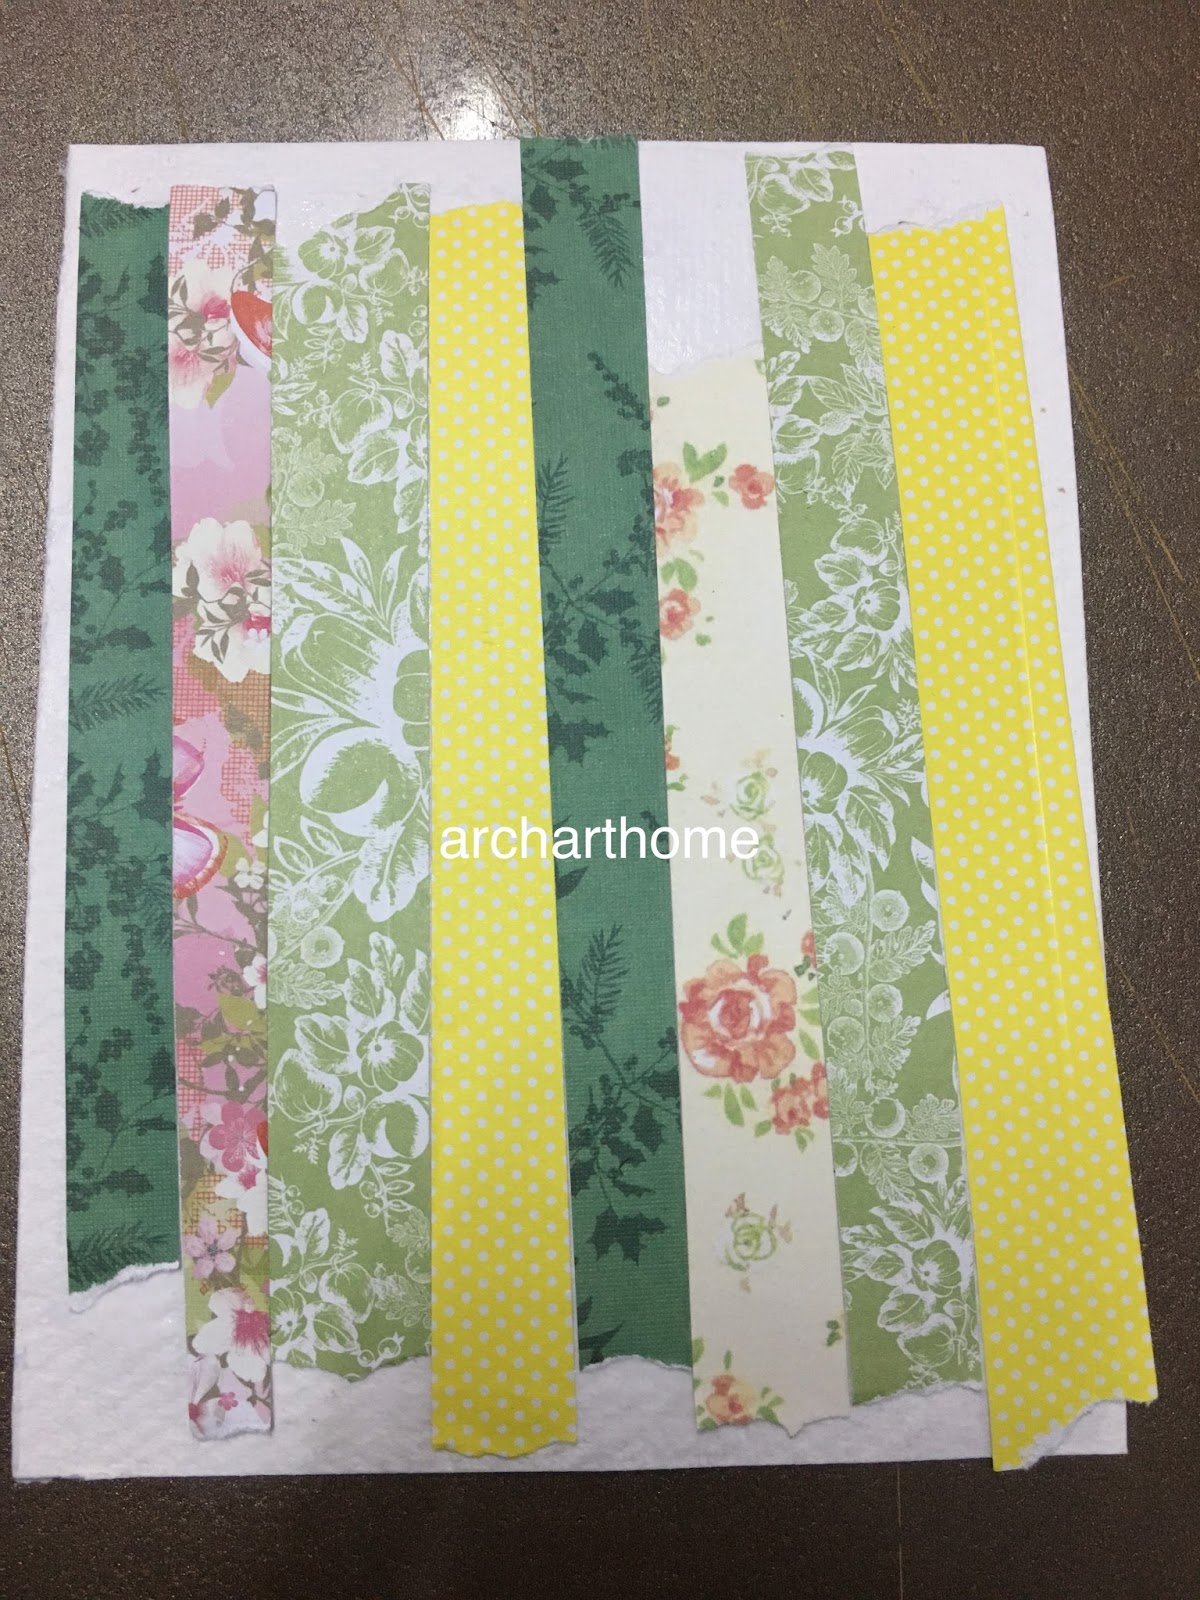
I have taken strips of various pattern paper of ¼ inch and torn them roughly on the edges. Stick the strips on your white card stock. See to it the card is of high gsm so when we apply layers of paint they don’t turn in.
I have taken strips of various pattern paper of ¼ inch and torn them roughly on the edges. Stick the strips on your white card stock. See to it the card is of high gsm so when we apply layers of paint they don’t turn in.
Step
2
Distress the card with colors of fall like green, yellow and brown. I have used green ink in the middle and graded with Yellow on the corners. Lastly inked the edges of the card with sunset orange and brown.Then I have stenciled a few patches (Honey comb stencil) with deep brown.
Distress the card with colors of fall like green, yellow and brown. I have used green ink in the middle and graded with Yellow on the corners. Lastly inked the edges of the card with sunset orange and brown.Then I have stenciled a few patches (Honey comb stencil) with deep brown.
Step
3.
Now the base card is ready.
Next I have started with a outline of a pattern of Maple leaf and filled it with repetitive designs. It’s a free hand drawing; however you can also trace a leaf pattern and fill with doodling. The second leaf I have filled with lines, pattern of the lines give dimension to the leaf. Once the doodling is complete, with a Black Brush pen highlight by thickening the image.


Then
have doodles simple lines, circles and leaves on the bottom of the card.
Step
4
On a white card , I drew a small circle and doodled it with leaves and a few flowers. Then using a used blending foam (you can use the same foam used for stenciling in step 2) very lightly ink on the card and fussy cut.
I cut the circle into half and stuck them with a foam tape on two sides of the card.
Step
5
With 3D outlines have given a few highlights on the card.
With 3D outlines have given a few highlights on the card.
Step
6
On a separate white card stock stamped the sentiment and fussy cut. Lightly inked the edges of the sentiment with Yellow and Orange. With a normal punch machine made a punch hole on one corner of the card, In a jump ring added two leaf embellishment and attached to the card. Stick the sentiment with a double tape. Please be careful not to punch a hole at the edge of the sentiment as this might tear and fall if very close to the end.
On a separate white card stock stamped the sentiment and fussy cut. Lightly inked the edges of the sentiment with Yellow and Orange. With a normal punch machine made a punch hole on one corner of the card, In a jump ring added two leaf embellishment and attached to the card. Stick the sentiment with a double tape. Please be careful not to punch a hole at the edge of the sentiment as this might tear and fall if very close to the end.


Finally
stick it to the base card stock. It’s a edge to edge card so both the mixed
media card and the base card are of the same size.
The
card is ready


Have a Happy season of fall :) If any doubt please feel free to ask.
Material used
Base card stock of 6 x 4 inch
White card stock of 6x4 inch (something thick)
Strips of pattern paper (1/4 inch each)
Inks
Doodling pen ( I have used Luxor black ink )
A black brush pen to give thickness to the doodling can also use normal pen
3D outlines
Stencil
Glue
Embellishments
Sentiment
Base card stock of 6 x 4 inch
White card stock of 6x4 inch (something thick)
Strips of pattern paper (1/4 inch each)
Inks
Doodling pen ( I have used Luxor black ink )
A black brush pen to give thickness to the doodling can also use normal pen
3D outlines
Stencil
Glue
Embellishments
Sentiment
Above listed Materials are available at Rainbow Craftykari Store or you can pre-order.
Arachana Thani


