Monday 30 April 2018

RCS Challenge #9 Love & Color Palette Winners

Hello Everyone,


Today we're here to announce our April Challenge Winners. Before we go into the announcement, we have another fun contest for you all.


We've had so many gorgeous, and we love your interpretation of the challenge! We loved to see different interpretations of the board.


We love all the entries, and it's always hard to choose a few. However, some things have to be done...


Let's move on to the announcement!!


The top two in no particular order are

1. Vinita Jain


We loved the take on the challenge colour palette and how all elements come together on the card.


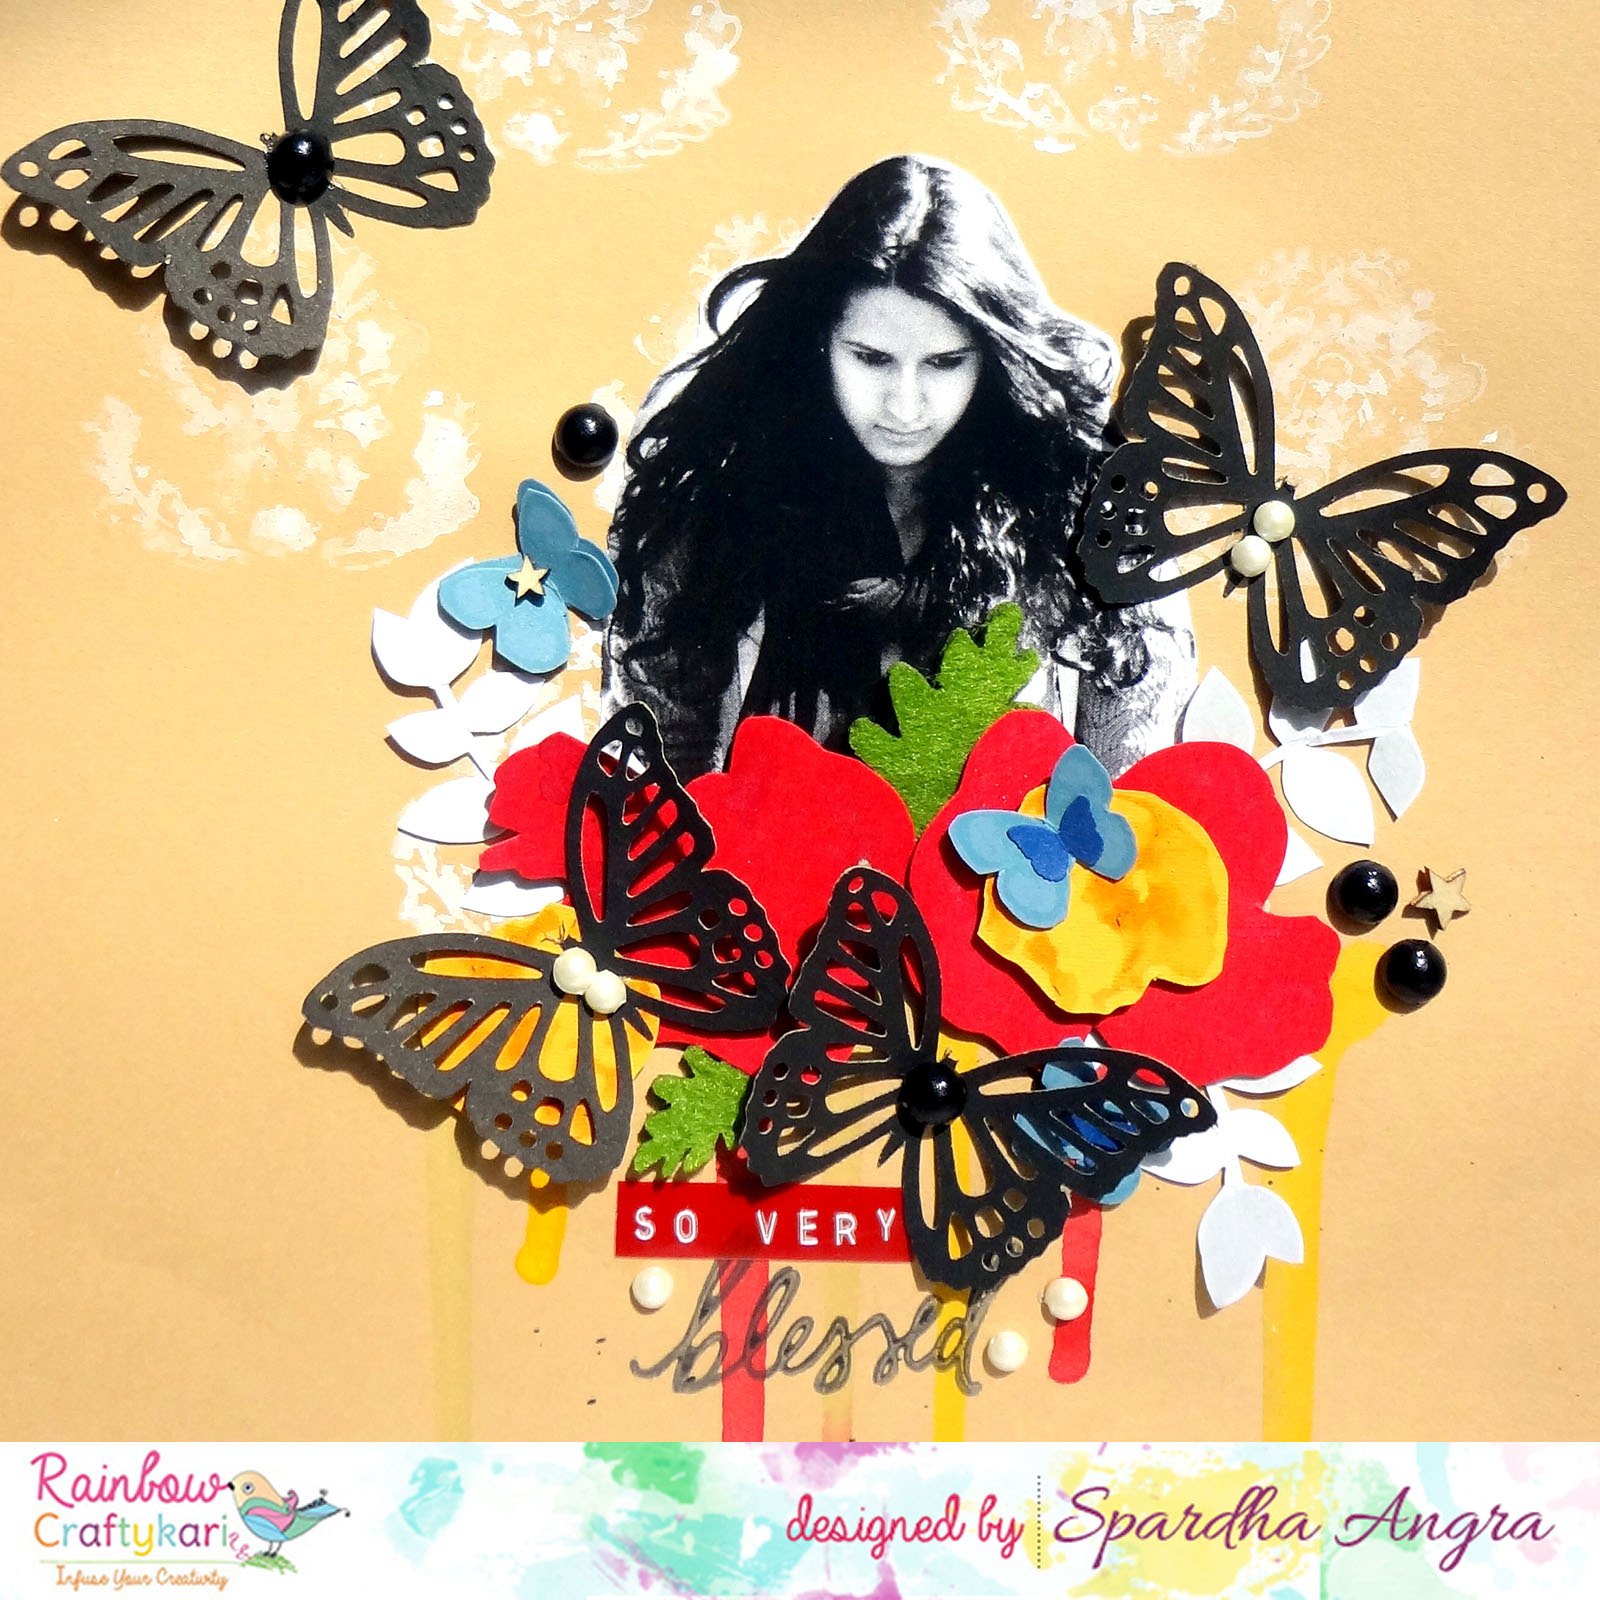
The mixed media layout is fabulous with all the various elements. 


Top two, do grab your badges from the blog and flaunt them!


Now onto our winner!! 


Craftomania


The color play on this layout is fabulous! The lace, flowers, and all the elements look splendid!


Kindly grab your badge from the blog and flaunt it.

Winner kindly email us at rainbowcraftykari@gmail.com with the subject Challenge #9 Love Winner to claim your prize. 

Wednesday 25 April 2018

Tea Coasters Inspiration by DT Priyadarshini

Hello everyone,

I am here with a new inspiration post for Rainbow Craftykari blog. For this month's inspiration, I am making 2 different types of tea coasters and I will be sharing the technique with you. 

TEA COASTER 1: Rhinestone Technique


How to make them:
1. Paint MDF coasters with desired colours and allow to dry
2. Start with applying glue on all sides and stick gold ball chain
3. Stick rhinestones/Kundan stones as per choice leaving enough space for the cup and allow to dry completely
4. Apply a coat of clear varnish to seal (on both sides of the coaster) and let it dry
5. Once dry, the coaster is ready to use.

Materials used:
  • MDF coasters
  • Paint
  • Rhinestone/Kundan stones
  • Gold ball chain
  • Glue
  • Clear Varnish


TEA COASTER 2: Heat Embossing Technique


How to make them:
1. Paint the coasters with desired colours and let them dry for 24 hours
2. Select stamp and use Mini Misti or Misti for stamping (Acrylic block can also be used)    
3. Rub anti-static powder tool 
4. Warm the heat gun
5. Use versamark ink to stamp on the coaster
6. Use embossing powder, I used white here and use the heat gun for embossing.
7. Let it cool for 20 mins and then apply a thin coat of clear varnish and dry for 24 hours
8. Coasters are ready to use


Materials used:
  • MDF coasters
  • Embossing powder - White
  • Mama elephant Stamps - Cup of wishes (any stamp can be used)
  • Mini Misti Stamping tool
  • Heat gun
  • Versamark ink
  • Anti-static powder tool
  • Clear Varnish
  • Paint

Tips for Heat embossing:

1. Use of Misti: Some stamps do not stamp well and may require repeated stamping. Since we are using MDF here, to avoid errors while stamping its best to use Misti.

2. Use of anti-static powder tool: Embossing powders are sticky and tend to stick to the entire MDF. The powder prevents embossing powder from sticky all over the MDF and only to the stamped parts

3. Warming heat gun prior to use- embosses quickly. 

4. Embossing powder: If there are no colour or white powders available to you, you can stamp with colour ink and again stamp with versamark and use clear embossing powder

Must have embossing powders - gold, silver, clear - regular & gloss, white. For black use Versafine Black Onyx Ink and emboss with clear powder. 


I enjoyed making these tea coasters and hope you all try them out. 


Most of the above-listed materials are available on the Rainbow Craftykari Store and can also be pre-ordered by sending an e-mail at rainbowcraftykari@gmail.com.

Do visit the Rainbow Craftykari store HERE

Visit our BLOG for more inspiration, tutorials and check out our ongoing challenge.

Happy crafting


Priyadarshini 

Tuesday 24 April 2018

Scrapbook Layout Video Tutorial by DT Spardha

Hello guys!

Hope you are having an amazing month!

Continuing the happy spirit of Spring, today I have a scrapbooking layout tutorial for you. I love making scrapbook layouts especially using different mediums cohesively. 


So today I present to you a video tutorial on stamping and layering. I've used three different kinds of paints and a variety of stamping ink for this project. Checkout the tutorial https://goo.gl/tjYre8


If you're wondering how to DIY your own mists, CLICK HERE to read the blog post where I made them. If not, you can definitely go buy some great inks HERE!


I am glad the grungy look did not overpower the bright colours of spring *YAY*

On a side note - If any of you are wondering who the *pretty girl* is, it's me! *sobering up now*

Supplies Used:
  • Paper - Kraft Cardstock, Coloured Paper Scraps
  • Paints - Poster Paint, Acrylic Paints, Chalk Paint
  • Ink Pads - Blue and Green
  • Stamps - Bold Flowers {Fiskars}, Studio G, Ink n Layer {Prima} and Daydreamer {Kaiserkraft}
  • Tools - Scissors, Glue, Heat Gun, Digital Die Cutting Machine, Butterfly Punch {Martha Stewart} and Label Maker {Dymo}
  • Embellishments - Pearls and MDF star confetti 
Most of the above-listed materials are available on the Rainbow Craftykari Store and can also be pre-ordered by sending an e-mail at rainbowcraftykari@gmail.com.

Do visit the Rainbow Craftykari store HERE

Visit our BLOG for more inspiration, tutorials and check out our ongoing challenge.


Happy Crafting!

Thursday 19 April 2018

Victorian Effect Jewellery Box Inspiration by DT Megha

Hello everyone,
Hope you've kickstarted your Summer with some juicy mangoes and buttermilk to beat the heat!

Today I am here with my first DT Inspiration post for you through Rainbow Craftykari. I have also incorporated the 'Love' theme for April Challenge in my creation.

I have altered a jewellery box which makes a  great gift for near and loved ones. I personally have decided to gift this to my aunt who 'Loves" jewellery ;)!
To alter this, I decided to use techniques of mixed media. Here's a look at the altered project:


To make this begin by choosing any jewellery box, could be from your mother's or one of your own. Next, prime it and lay elements which you would like and take a picture, to refer later. Next, apply modelling paste through a stencil which will depict grandness. Pick your colours, I choose blues and yellows and covered the top and sides of the box. Next, I prepare the elements, here I gold embossed the chipboard frame (from Rainbow Craftykari), and the chipboard swirls with clear embossing powder. I used patina pastes and altered the metal butterfly. 


Keeping the Victorian lady as my focal point, I adhered all elements, along with a corrugated sheet to add texture, flowers, a vase, a skeleton leaf behind the frame to add detail and some art stones and glitter sprinkles. Lastly, I used waxes to bring out the details on the elements and added splatters with white paint.


Like you see, this is quick and easy to make so you can alter these and these would make perfect gifts for ladies.


Here are some more pictures:


Supplies used:
  • Jewellery box
  • Modelling Paste, White Gesso, Stencil, Embossing Powders
  • Matt Medium, Corrugated Sheet, Skeleton Leaf
  • Flowers, Metal/plastic Charms, 
  • Glitter Sprinkles
  • Rainbow Craftykari Chipborads
  • 13 Arts Colour Sprays
  • Finnabair Waxes, Patina Pastes, Art Stones
  • Liquid Glue, Heat Gun

Most of the above-listed materials are available on the Rainbow Craftykari Store and can also be pre-ordered by sending an e-mail at rainbowcraftykari@gmail.com.

Do visit the Rainbow Craftykari store HERE

Hope you're inspired to create yours! Do participate in our ongoing challenge.

Happy Crafting!

Megha