Showing posts with label Blog Coordinator. Show all posts

Tuesday, 3 July 2018

Farewell to the Summer 2018 RCS DT Team


Hello Everyone,

We are bidding adieu to our Design Team Members and wishing them all the best for their future!

The past three months flew by and our team came up with great posts for you all! We would like to thank each member for contributing to the blog with such great ideas and tutorials!

Their works are as follow:

Blog Coordinator Aditi


https://rainbowcraftykari.blogspot.com/search/label/Blog%20Coordinator


DT Priyadarshini


https://rainbowcraftykari.blogspot.com/search/label/DT%20Priyadarshini


DT Saloni


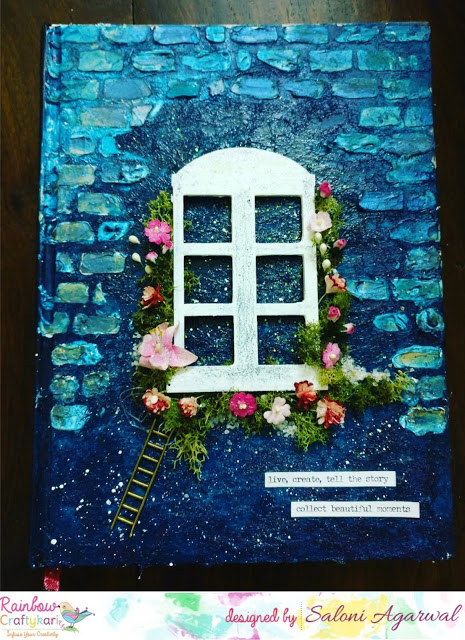
https://rainbowcraftykari.blogspot.com/search/label/DT%20Saloni


DT Vidhi Jadeja


https://rainbowcraftykari.blogspot.com/search/label/DT%20Vidhi


DT Megha Tainwala


https://rainbowcraftykari.blogspot.com/search/label/DT%20Megha


DT Spardha Angra


https://rainbowcraftykari.blogspot.com/search/label/DT%20Spardha


The NEXT DT season will be coming up soon !! Keep watching our updates at  FB.com/rainbowcraftykari and rainbowcrafykari.in

Saturday, 9 June 2018

Shabby Chic Tin Tutorial by Blog Coordinator Aditi

Hello Everyone,

Hope you are all doing good and looking forward to the weekend! Today I'm back with a pictorial tutorial for you all. I have altered a metal tin in a shabby chic style. With simple elements, it's a decorative tin, that can be used as a pen stand, or organiser.

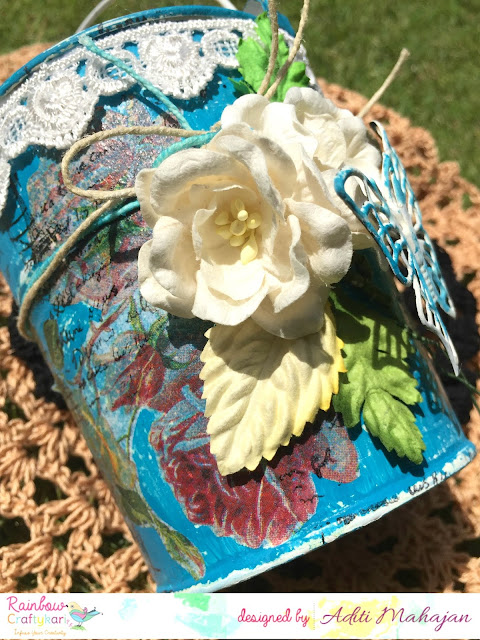
Here's a look at it:


Let's begin the tutorial:

Step 1: Here's a look at the tin first. It's metal and white in colour. 


Step 2: First, give the entire tin a coat of the Folkart Home Decor Chalk Paint. I have given it two coats for a thicker finish,


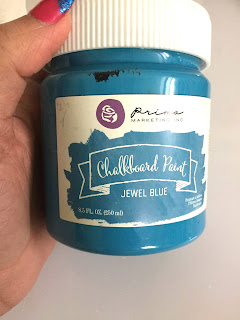
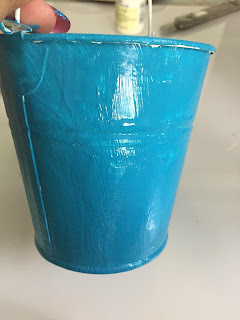
Step 3: Next, give it a coat of Prima Marketing Chalkboard Paint. This third coat is a darker contrasting colour.


Step 4: Using sandpaper, scrub the entire surface. This will give us a shabby look. 


Step 5: Pick a tissue paper and fussy cut elements to decorate the tin.


Step 6: Ensure to remove the two layers of the tissue paper before adhering it. 

Step 7: Use mod podge and stick down these on the tin randomly.


Step 8: Use some stamps and Black ink and randomly stamp.


Step 9: Pick elements/embellishments to decorate the tin. I have used jute cord, lace, flowers, a metal butterfly (painted using the two paints used above).


Step 10: Glue everything together and your tin is ready,


Supplies:
  • Metal Tin
  • Metal Butterfly
  • Folkart Home Decor Chalk Paint- Satin Finish
  • Prima Marketing Chalkboard Paint Jewel Blue
  • Decoupage Napkin
  • Mod Podge
  • Papericious Jute Cord
  • Lace
  • Flowers
  • Leaves
  • Sandpaper
Do visit the Rainbow Craftykari store HERE
Visit our BLOG for more inspiration, tutorials and check out our ongoing challenge.

Above-listed materials are available on the Rainbow Craftykari Store and can also be pre-ordered by sending an e-mail at rainbowcraftykari@gmail.com.

Happy crafting!
Aditi

Friday, 1 June 2018

RCS Challenge #11 Back To School + Blog HOP

Hello everyone,

Wishing you all a very Happy June! With the new month, we have a fun new challenge! This month apart from the challenge, we also have a fun blog hop for you all!

Here's a look at the challenge first:


The challenge is all about creating any project on the theme of 'Back to School' with a twist of incorporating any school stationery in it! Feel free to create any crafty project be it a card, a layout, altered piece, tag, home decor art, album and anything art/craft related. The last date to submit entries is 25th June'18

One winner will win a goodie bag filled with CraftTangles supplies worth Rs. 400 (shipping free) as well as the winner's badge to flaunt on the blog. Top three entries will get to flaunt a badge on their blogs.  

Any entry which doesn't follow the guidelines will be disqualified and will be removed from the participation entries

Please go through the General Guidelines and Rules HERE.

Now coming onto the blog hop fun! Our team has created fantastic projects for you'll to be inspired from! Below is the Blog hop list, click and visit their blogs. To enter for the prize, leave a comment on all the team member's blogs as well as on the Rainbow Craftykari blog June Challenge Post. Additionally, subscribe to the Rainbow Craftykari Youtube Channel and follow/subscribe me (choose, one social media personal).
As simple as that!
Here's the list:

Rainbow Craftykari Challenge Post- ****YOU ARE HERE****

Blog Coordinator- Aditi MahajanToday I have created a simple yet colour messy layout! The word School takes me back to Primary Colours and artistic mess! I was also inspired by our DT Spardha's style of keeping the layout simple using minimal embellishments.


DT Megha TainwalaThese are fun and easy ways of giving your notebook and pencils a makeover, so easy and customizable that your kid could also have some fun going back to school.


DT PriyadarshiniEducation is the most powerful weapon which can change the world'- Nelson Mandela.

New academic year with more challenges and lots to learn, I made a door hanger 'My Study Time'


DT Saloni- Everyone's school days have the memories they can cherish and treasure for life. When I think about School, it reminds me of all the fun I had.. We used to play our own created games and draw for fun. Similarly, I wanted to create something which can also be fun.  So I have created two different cards trying to incorporate few elements which will remind us of our school days. 


DT SpardhaGet nostalgic and back to school for June!
Here's to the best years of our life, learning and becoming the beautiful little individuals we are now.


DT VidhiToday I have created a small 6 by 6 Photo Folio inspired by the 'Back to School' theme. As a school stationery, I used Paper Pin or U pin as the closure to the Folio. This folio is inspired by all things school and all the elements take me back to my school days.


Two winners will be announced on 8th June on the Blog and on Rainbow Craftykari's Facebook Page. Winners stand a chance to win a gift voucher to the Rainbow Craftykari Store. 


Tuesday, 15 May 2018

Zen-tangling- Inspiration Post by Blog Coordinator Aditi

Hello everyone,

Today, I have a very interesting post for you all. In art and craft, there is so much to be inspired from. In fact, in daily life, look around you and there is so much to take from the world. This inspiration then motivates us to achieve greater heights, and be better human beings.

With this in mind, I thought of inspiring you all with Zentangling or Zen Doodling. This is a fun, relaxing and calming way of creating beautiful images by drawing certain structured patterns. Simple dots, lines, curves, put together form these patterns called 'tangles'. There is a lot more to this, and you can always read up online about it. 

To begin with, I'm sharing a few simple patterns and steps of drawing them.


Usually, these are drawn on small pieces of paper called 'tiles', that can be later assembled into mosaics. However, there are no limits in creativity. Hence, you can go beyond these tiles and tangle anywhere. To begin putting the patterns together, we begin with strings. Random lines, to divide an area into segments. Here I have drawn an ambiguous shape and then draw a few lines as my string. I have then drawn the patterns show above in each of these segments. See how the square grid is manipulated to fit in the required segment. 


In this way, you can learn more patterns and create more designs. Below are a few samples of tiles with intricate patterns. Notice, how I've also introduced and played with colours.


This form has many therapeutic benefits as well. It is believed to have a positive influence on creativity, self-image, focus and problem-solving. Do read about it, and incorporate it into your daily activities as a 10-minute routine. 

Materials:
  • Uniball Pens
  • Paper- watercolour if using colours like in the last tile; Ordinary Cardstock for the rest.
  • Fine Tip Markers
Most of the above -listed materials are available on the Rainbow Craftykari Store and can also be pre-ordered by sending an email at rainbowcraftykari@gmail.com.

Visit our BLOG for more inspiration, tutorials and check out our ongoing challenge.

Hope you're inspired!