Showing posts with label Decoupage. Show all posts

Monday, 8 March 2021

"YOU" Art Journal by Priya & "Amazing Grace" Plaque by Rupneet

Hello Friends,

This is Priya Mishra here from Sanskruti Arts & Crafts at Rainbow Craftykari Blog. Wishing you all a very happy Women's Day. I'm so happy and excited to join in this Women's day Insta hop and Blog Hop and Linky Party. Thank you to all the sponsors who have sponsored this beautiful hop !! For the next stop kindly click on this link

https://women-beyoutifullyyou.blogspot.com/2021/03/3rd-international-womens-day-blog-hop.html


My project is called -  YOU and I have added a quote "No one is you, and that is your superpower" 
When a woman stands for herself, she automatically stands up for all women. Before encouraging others, you should look within and find that support and confidence that defines you as a woman.
Keeping in this thought, to encourage the all the women out there, I've created an Art Journal Page today...


For making this Art journal page, first I created the background. Layered some papers, Tim Holtz die cuts and roughly dry brushed with white gesso. Created a little texture with some stenciling and stamping. Colored with chalk paint in shade of pink.

Then added some metal charms and wooden die cut for some added layers. Used a black marker to create some extra interest.


Finally added a Tim Holtz doll and sprinkled some black gesso and pink chalk paint all around. I added a sentiment " No one is you and that is your super power". Here are some more close ups of my project.


Now Over to another beautiful Artist, who has created inspiring project on this occasion. Over to You Rupneet

Thank you and Warm Regards
Priya Mishra
Sanskruti Arts & Craft


                  ***************************************************************


Hello Crafty Peeps

Rupneet here From SylviazArt at the Rainbow Craftykari Blog. Wishing you all lovely women out there  a very happy Women's Day. I'm glad to join in this Women's day Blog Hop and Linky Party. Thank you to all the sponsors who have graciously sponsored this beautiful hop. For next stop click on this link:
https://women-beyoutifullyyou.blogspot.com/2021/03/3rd-international-womens-day-blog-hop.html


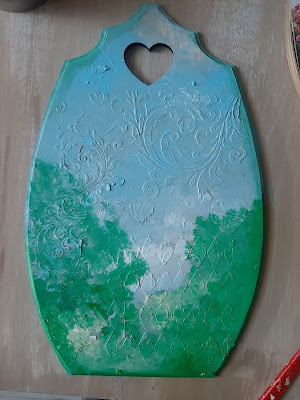
Today's artwork' theme is encouragement and what better a way to present it for the womens day... so chose this Plaque , which is primed and sanded well


Over this plaque I chose to give a textured background using a texture paste through a beautiful filigree stencil... once the texture is dried, I colored the background....


And thereafter I chose a beautiful image from newspaper image, a icecream tub lid and some flora to embellish...

I primed the plastic lid with gesso and decoupaged the image using modge podge and blended the colors over the corners, and after the image on the plastic lid dried, I chose to stick it to the middle of the Plaque, such pretty landscape image goes well with the background,  isn't it....

To embellish It further,  i use some flowers around the lid and stick them using a hot glue gun and a quote saying "you are amazing " comes on top of the Plaque which its look enhances making it look as one piece. 


I enjoyed working on this colorful make and loved its cheerful vibe... hope you enjoyed the process with me..

Thanks for reading through!

Rupneet
Creative Head
Team Sylviaz

Tuesday, 12 May 2020

Brush Blending on Pinewood Plank Tutorial | Maninder Kaur | Rainbow Craftykari

Hello Everyone,

Rainbow Craftykari Present An in-depth Brush Blending Technique Tutorial onto Wooden Plank by Maninder Kaur, Calambour Italy Certified Decoupage Teacher.

RCS is known for Providing and Sharing Highest Quality of Tutorial Videos, through which countless people have learned intensive projects!!

This tutorial explained the Brush Blending Technique step by step, which you can apply at any surface, not only this, the tutorial has covered a whole project from beginning till the end induced with various tips & tricks. Check out the tutorial video below:


Materials List is mentioned here:
https://youtu.be/3eYd-Mv9m5A

You can drop us a message at www.facebook.com/rainbowcraftykari or send an E-Mail at info@rainbowcraftykari.in

Wednesday, 11 September 2019

Italian Home Decoration Calambour Certificate Decouapge Course at Rainbow Craftykari Store

Hello Beautiful People,

How are you all?

I know it's been a very long time since we posted on our blog. We are going to announce a very exciting thing that,Owner of Rainbow Craftykari Store has did her Calambour Teacher Course from Bangkok at Sifa Decoupage Earlier This Year!! Yay


We are very much proud to announce the Decoupage with Calambour Certification Course, We have been getting Endless Queries for this beautiful course. Now your wait is over to learn Excellent grade of Home Decors Projects.

Here are the details:


This decoupage course is designed by Calambour Italy & SIFA Decoupage, especially for all the craft enthusiasts people. This is a very beautiful Home Decoration Course from Calambour, Italy which is perfect for beginners & intermediates. This Course consists of 6 projects required by Calambour(Italy) syllabus, which will be taught by using Calambour decoupage papers and tools onto MDF, natural pinewood & glass surfaces using various painting effects.

This course will be taught by Ms. Maninder Kaur, Calambour Italy certified decoupage teacher.
All the materials will be provided. Students who will complete all the 6 projects will be awarded a Basic Home Decoration Calambour Certificate of Completion, endorsed by Calambour Italy & Sifa Decoupage!!
Technique Covered :
- Crackle
- French Lace
- Tanning
- Distressing
- Under Glass
- Wood Grain

Schedule: The learner will be required to book a seat in advance. The group will only be consist of 3-4 people only to create quality projects and acquire intense learning.

Guidelines :

1) Students are required to complete all 6 projects to qualify for the certificate. Students will be able to bring back their finished pieces
2) All projects can be completed within 3-4 sessions. The intensive course can be arranged in 2 days for overseas students.
3) Each session is about 3-4 hours
4) Price is inclusive of all materials & Refreshments required for the workshops 
5) Students who completed all projects will be awarded a Calambour Certificate of Completion endorsed by Calambour Italy & Sifa Decoupage6) This course does not use any napkin or other papers. Original Calambour paper from Italy will be used during the class.

To Enroll for this class, click on this link: https://tinyurl.com/y59kp7cn


Projects**


contact us at www.facebook.com/rainbowcraftykari or drop an email at info@rainbowcraftykari.in


Saturday, 9 June 2018

Shabby Chic Tin Tutorial by Blog Coordinator Aditi

Hello Everyone,

Hope you are all doing good and looking forward to the weekend! Today I'm back with a pictorial tutorial for you all. I have altered a metal tin in a shabby chic style. With simple elements, it's a decorative tin, that can be used as a pen stand, or organiser.

Here's a look at it:


Let's begin the tutorial:

Step 1: Here's a look at the tin first. It's metal and white in colour. 


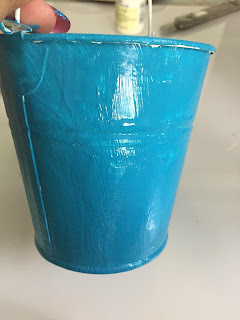
Step 2: First, give the entire tin a coat of the Folkart Home Decor Chalk Paint. I have given it two coats for a thicker finish,


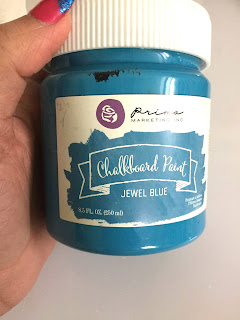
Step 3: Next, give it a coat of Prima Marketing Chalkboard Paint. This third coat is a darker contrasting colour.


Step 4: Using sandpaper, scrub the entire surface. This will give us a shabby look. 


Step 5: Pick a tissue paper and fussy cut elements to decorate the tin.


Step 6: Ensure to remove the two layers of the tissue paper before adhering it. 

Step 7: Use mod podge and stick down these on the tin randomly.


Step 8: Use some stamps and Black ink and randomly stamp.


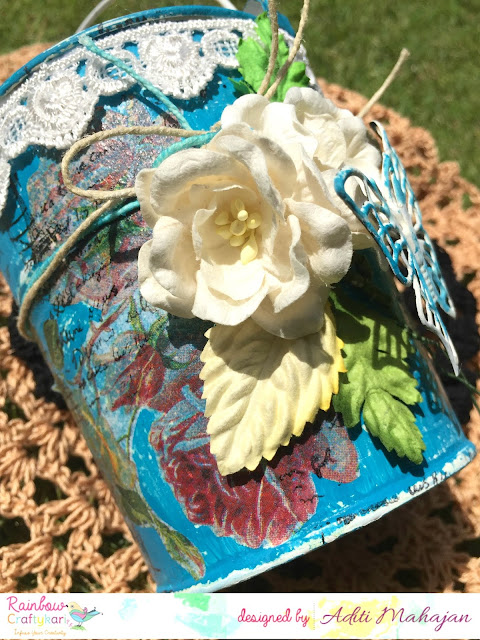
Step 9: Pick elements/embellishments to decorate the tin. I have used jute cord, lace, flowers, a metal butterfly (painted using the two paints used above).


Step 10: Glue everything together and your tin is ready,


Supplies:
  • Metal Tin
  • Metal Butterfly
  • Folkart Home Decor Chalk Paint- Satin Finish
  • Prima Marketing Chalkboard Paint Jewel Blue
  • Decoupage Napkin
  • Mod Podge
  • Papericious Jute Cord
  • Lace
  • Flowers
  • Leaves
  • Sandpaper
Do visit the Rainbow Craftykari store HERE
Visit our BLOG for more inspiration, tutorials and check out our ongoing challenge.

Above-listed materials are available on the Rainbow Craftykari Store and can also be pre-ordered by sending an e-mail at rainbowcraftykari@gmail.com.

Happy crafting!
Aditi