Friday 28 April 2017

Watercolor Cards Tutorial by GDT Ria Banerjee

Hello all,

Ria on this side. Today, I have brought some watercolor cards for you people. I know sometimes people find it hard to do CAS cards. I have tried to explain everything step by step so that your inspirations can leave us in awe.

Project 1: Bleaching Watercolor

This is a technique which many of you may be afraid of attempting, but trust me this is super fun. (Check the Materials Pic below)


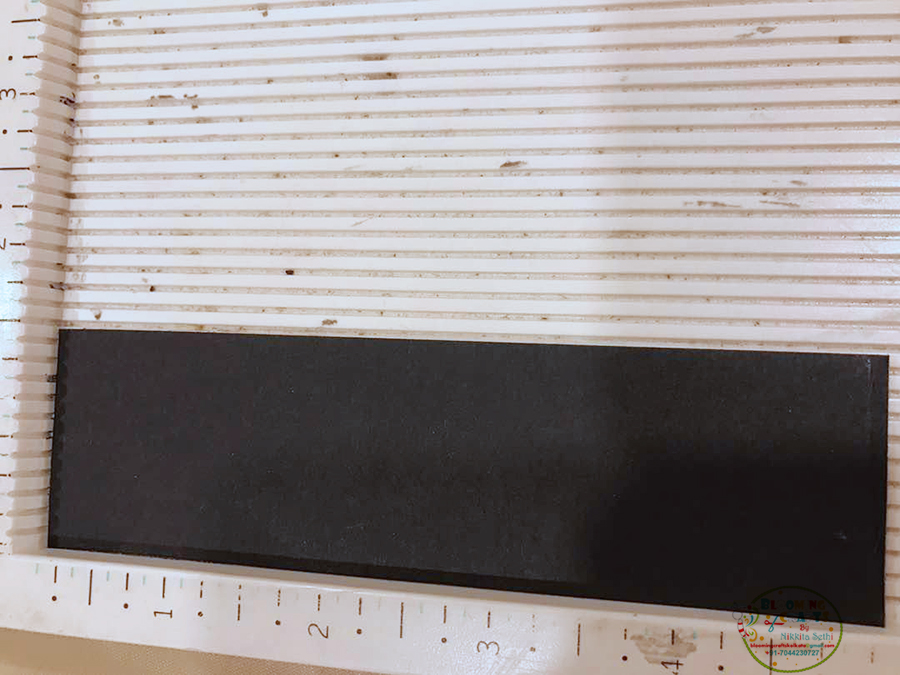
Cut a cardstock diagonally and ink with distress inks. Dark colors are preferable.

Let it dry or heat dry it.
 

Apply anti-static powder on it.

Now choose any stamp that has some good outlines. Here, I have taken Renee Leaves by Winnie and Walter. Stamp it with Versamark and apply clear embossing powder. Heat dry it completely using Heat Tool.

Take a pinch of bleaching powder with a little amount of water and apply it inside the stamped outlines with the help of a brush.


Give some time the bleaching powder to react.
After that, Paste the cardstock with the bleached background on to a blank white notecard
 

I have finished the card with die cuts and sentiments from Sizzix Thinlits and Adorable Elephant by MFT respectively.


Here is another project inspired by the same technique.


PROJECT 2 : Watercolor and Embossing Folder


For this card,


I took the Geometric Embossing Folder and embossed the cardstock with the same in a bigshot machine.


Take a cardstock and color it with distress ink with some water. You can give an ombre look of any color. I have used three colors, Wilted violet, Blue sketch and Ocean reef/Mermaid lagoon as shown in the pic


I have colored the elephant with Artistry ink Aged stucco. I have dabbed some ink from the inkpad on the craft table, with the help of water and brush I have colored the image. One tip I would like to give that you have to be quick when coloring with distress inks as they leave some lines when get dried. The stamping has to be with Archival ink to prevent Blotting.


I have taken Gina Marie Circular Die to cut the panel. Preserve the cut out to use it for another card.
Then paste the embossed cardstock on to a blank white notecard using any white glue of your choice.
In the end, I have stamped some more images, colored and fussy cut from Adorable Elephants from MFT. Adhered them on to the panel with the sentiment from the same set.


Materials Used:


• White cardstock (Brustro WaterColor - 200gsm)
• Distress inks ( Bluesketch, Wilted Violet, Mermaid Lagoon)
• WOW Clear embossing powder- Semi Dull
• Paintbrushes
• Glitter paper- Silver
• Sizzix thinlit die- Wishes
• Adorable Elephants by MFT
• Enamel Dots ( black and blue)
• Geometric Embossing folders by We R Memory keepers
• Gina Marie stitched circle die set
• Glossy Accent by Ranger
• Ranger White Embossing Powder

All the materials listed above are available at Rainbow Craftykari Store or you can pre order them by sending an email at rainbowcraftykari@gmail.com.

Hope you got inspired to create one yourself. Do join us in the ongoing challenge "Exploding Surprise". Looking forward to see your entries. Happy Crafting!!

Love
Ria
https://www.facebook.com/criar80/

Wednesday 26 April 2017

Decoupage on MDF Box with Easel Card Tutorial by DT Nikkita Sethi

Hello Crafters,

Nikkita here again on India's Best Papercrafting Blog that's Rainbow Craftykari Blog. Hope you all are doing great. Often you want to decoupage the MDF Box with pattern papers but many doubts arises, Today in our Teaching and Learning program, I'm going to share step by step tutorial Decoupage on MDF Box using Pattern Papers. Also I'm going to share one more tutorial on how to prepare an Easel card, which is going to be inside in it and it will become an Wonderful gift to present to your loved ones. It's going to be lengthy post, so sit back and grab your favorite summer drink.

Decoupage Box with Pattern Paper:

Step 1
Take MDF box of 6"x6" size. I have bought mine from Rainbow Craftykari Store. It has good finishing and of highest quality. Clean it completely using fine sand paper. Shake off the dust thoroughly.


Step 2
Apply Light Coat of Gesso to all over the box, Coat only once. Let it dry completely or Heat Dry it using heat tool.


I'm using Prima Rossibelle Pattern paper, so i have picked the color from it, then apply DecoArt Reminisce chalkboard paint using sponge or brush, chalkboard paints give a smooth and neat finish and dries quickly.


Step 3
For 6by6 inches box, have cut the pattern papers into 5.75inches leaves a 0.25 inch gap which shows the background color of the box and distressed the pattern papers with Black soot distress ink or any other ink to give a finished look.

I used mod podge to stick the papers it's a fabulous product for decoupage. Apply Mod Podge in Horizontal and Vertical way so that it get apply evenly on on base and it won't form any bubbles.

Tip: When you'll adhere the pattern paper, before give a one good coat of Mod Podge glue which is sufficient. Than take any clean rough cloth, fold into small rectangle shape and by keeping good pressure of your hand move that cloth piece on to the pattern paper, it will set  your pattern paper.
Stenciled using grey chalkboard paint and if you don't have grey use black and white acrylic paint. I have stenciled inside and outside before and after adhering the pattern papers. Heat Dry it.


For Inside have cut the pattern papers approx 7mm from all four sides. Adhere it using same technique. 


Step 4
Coming to decoration, I have colored the Simple Lattice Chippie from Papericious and other chipboard elements with DecoArt Reminisce ChalkBoard Paint using Sponge brush. To give a brushed look i have Distress them using Black Soot Distress ink. I have even use left over chippies from Simple Lattice to give a unique look. Have adhered them inside and top of the box using glossy accents.


On the top of the cover, I've placed chippies, flowers, Metal Embellishments and die-cuts from the Prima Rossibelle Collection to give symmetrical composition. After that i have adhered them with glossy accents and tacky tape.

Tip: You can take photographs of you composition, It'll help you to make the placements of your decorative products to check the correct composition, Once you're satisfy, adhere them.


Our Decoupage Box is Complete, Keep it aside. Let's move to Card now.


Easel Card Tutorial:

Step 1
Take black cardstock of around 250-300 gsm measuring 5*11inches and score on long side at 2.75" and 5.5".
Pre-fold all score lines.


Step 2
Take another piece of cardstock measuring 5x5.5" and adhere to 2.75" x 5.5" section  as shown using tacky tape,
Remove the Tape liner and adhere the 5x5.5" cardstock piece. Now the card base is ready.

Step 3
For embellishing the card I have used scraps from the collection left while making the box and have cut strips of 0.75" x 5.5" and now stick them randomly using tacky tape , now you can add a die cut and embellish it with the tags from the collection. I have added foam tape at the back to give 3D look. Take a strip of 1.75 *5 inches and add to the inside flap to make a stopper for the card to stand.


Step 4
I have added satin handmade flowers and embellished with diecut leaves using glue gun and glossy accents and added a sentiment in the inside flap to complete the card.


And now the easel card matching the mdf box is ready.


Material List for Decoupage Box
Deco art pink and grey chalkboard paints
Mod podge matte
MDF Box
Sand Paper
Stencil
Stencil brush
Papericious chippies
Prima Rossi Belle Paper Pack
Diecuts from my stash
Mulberry flowers
Black Soot Distress ink
Black gum drops


Material List for Easel card

250-300Gsm cardstock
Rossibelle pattern papers
Satin flowers
Tags from collection
Cherry Leaf Die
Tacky tape
Glossy accents
Foam tape


All the materials listed above are available at Rainbow Craftykari Store or you can pre order them by sending an email at rainbowcraftykari@gmail.com.

Hope you got inspired to create one yourself. Do join us in the ongoing challenge "Exploding Surprise". Looking forward to see your entries. Happy Crafting!!

Love & Warm Regards
Nikkita Sethi
Blooming Crafts by Nikkita

Thursday 20 April 2017

Shaker Blooming Explosion Box by GDT Richa Maurya

Good morning Crafters!!

Today I am here to bring you some more inspiration for our ongoing challenge “Exploding Surprise”. Do check out the rules and guidelines for the challenge here.

I created this explosion box using Papericious “If Only” Collection. This explosion box can be a present for anyone you love. I have kept the theme floral and have added lots of flowers and butterflies.

First I created two layers and added pattern papers with distressed edges according to the color palette of the challenge.

On the first layer, I have added paper doilies and some simple punched out flowers. Photos can be added later. On the inner layers, I have added Scalloped circles from same paper pack and have stamped some love sentiments. Finally I have decorated these with some roses and leaves.

For the central 3D piece, I created a bed of handmade roses with butterflies popping out. The butterflies have been stamped on blue colored paper, fuzzy cut and attached using acetate strips. The bed has been created using a used-up tape roll covered with green glittery tape and decorated with leaves and pearls. Finally,I have added some diamond dust to give the blooms some sparkle.

On the lid, I have added a shaker element over a distressed paper doily and have decorated it with flowers and butterflies.


Materials Used:
Black Cardstock
Papericious If Only Paper Pack
Large Flower Punch-for making the roses
Paper Doilies
Acetate sheet
Butterfly stamp
Distress Inks
Diamond Dust
Craft scissors
White Glue
Double sided tape

All the materials listed above are available at Rainbow Craftykari Store or you can pre order them by sending an email at rainbowcraftykari@gmail.com.

Hope you got inspired to create one yourself. Do join us in the ongoing challenge. Looking forward to see your entries. Happy Crafting!!

Regards,
Richa Maurya
http://apaper-palette.blogsot.in

Wednesday 19 April 2017

Contrast Between Basic Mixed Media Mediums by DT Pavitra Chanchal

Hello My Dear Friends


Pavitra here, I am back with you guys and believe me, I am super excited and happy to be here!!!Lately I started doing lots of mixed media projects and there is so much that can be done. I love to work with different mediums and today I would like to share my bit of knowledge with you guys about the basic mixed media mediums.


Gesso – is the first and for most important medium that I start to play with when I start working on any projects. Gesso works as a primer for the surfaces and prepares the surface or the background for the next step without bleeding through. In simple work it let the sprays, inks, paints or crayon does the job in better way.


Depending upon the consistency there are light gesso or heavy gesso that available in the market. Further there are three variants of gesso available – white gesso, black gesso and clear gesso. One can choose from white or black gesso depending upon the final look one is aiming for.

Clear gesso is good to use on any image, pattern or sketch, so that a part of it remains visible while working with sprays, ink or paints.

There are many brands available I am naming few of them here – Prima marketing, Liquitex, DecoArt, Dustic Attic, Sakura etc.There is so much that can be done with gesso like priming the surface ( below pic)


Preparing the embellishments for coloring (below pic)


Gesso can also be used for stamping, it creates a resist effect as shown in below pic.

Modeling paste - is thick, dimensional paste, which can be worked with texture tool, spatula or stencil for creating various interesting textures. It dries permanent and somewhat semitransparent after drying. I usually first make the textures on base which i want to create and than after i apply paints on the textures. It can be sprayed with colors after drying. By mixing with pigments, inks or sprays one can create custom pastes out of it.

The best tool to apply modelling paste is Plastic Palette Knife as its very easy to apply with, its flexible to use and you can use the knife in any direction while working on Stencils or at any base. The cardstock i work with for Modelling paste is 270 GSM to 300 GSM as it gives good weight to hold the modelling paste.

Modelling Paste works great as an adhesive for embellishments. Few of the brand available in the market – dustic attic, liquitex , prima , golden etc.


In the above image, in first row, I applied modeling paste with Plastic Palette Knife;
Second row, I mixed it with distress ink and applied with texture tool;
In the last I applied modeling paste through stencil using Palette Knife.

Texture Paste - is as name suggests, It adds dimensional textures to painting or to mixed media art. It is like modeling paste. Texture paste is bit heavy than paints and modelling paste. With Texture paste you can create Impasto effects on the projects. Even one can shape or sculpt the texture paste in any way before drying using the palette knife. With using different texture tools, one can achieve unique textures on variety of the surfaces. 

Texture paste can also be mixed with paints, pigments or colors for creating custom pastes. In the market there are various brands available one of them is from Ranger’s and its comes in three different variants depending upon the final finish –


Texture paste (transparent gloss) – this one dries transparent with glossy finish


Texture paste (transparent matte) – this one also dries transparent with matte finish


Texture paste – this dries white with opaque finish.


Further texture paste also comes up with various other finishes such a crackle paste, graphite paste; sand paste etc.

The different brands available in the market prima marketing, dream weaver , ranger’s etc.


Sand paste through stencil


Texture crackle paste white and texture crackle paste mixed with distress ink (above pic)
Tip:
I first pressed the distress ink pad on the craft sheet and than mixed it with texture paste.

By using the above mentioned uses and products I've created a tag, have a look


If you have any queries feel free to write me comments here.

All the Materials can be purchased from our Rainbow Craftykari Store or Pre-order us by sending mail at rainbowcraftykari@gmail.com


Supplies used –

Gesso

Modeling paste

Prima sand paste

Prima texture crackle paint white

Distress sprays – chipped sapphire , cracked pistachio , salty ocean , moved lawn

Inka gold

Distress ink – vintage photo

MDF

Tim holtz stencils – brick & floral

Thank you so much

Pavitra