Hello Crafty Friends
Good Morning.
Priya here today with my Inspiration post for the month of September. This is a mixed media altered project again...Ya, I love them.
I have seen many altered palettes... but all of them are wooden or MDF, so I thought why not to alter a real palette...that I use or no longer use.
So, here's how it looked after all the hard work...
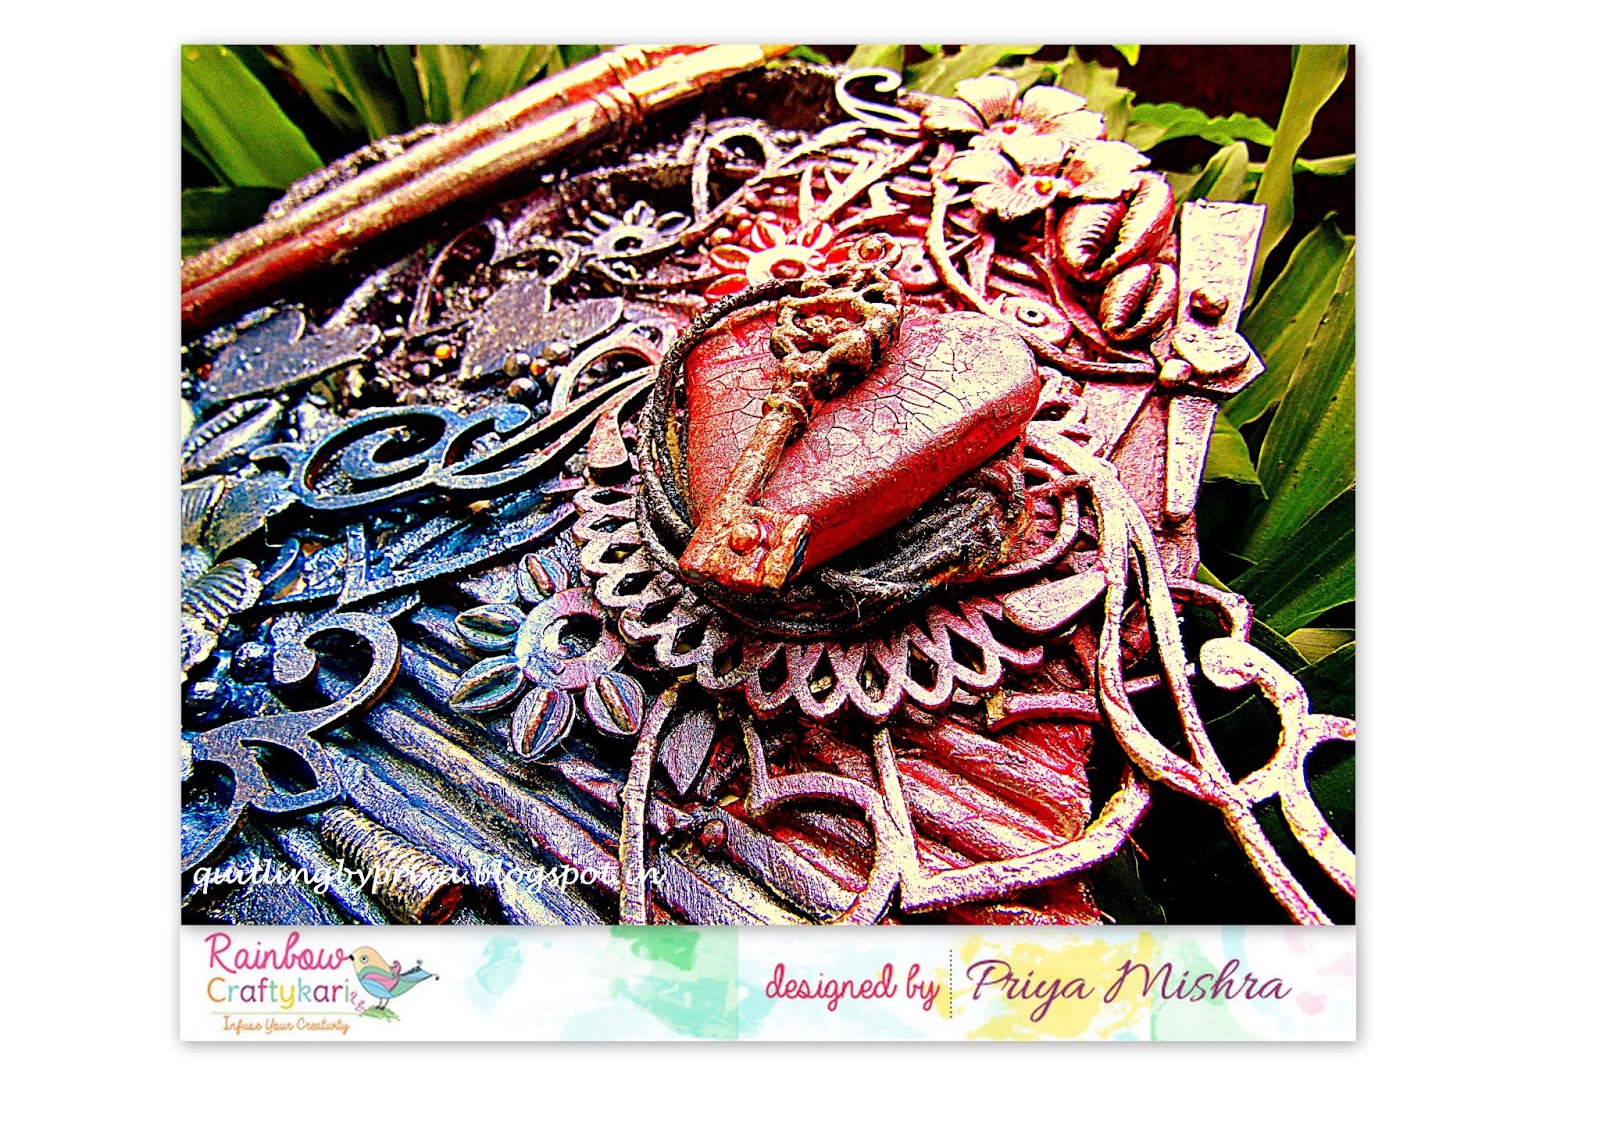
For this I sanded the palette a bit then added 2 coats of heavy gesso. I layered gauze cloth on one side and corrugated sheet on the other side of this. Then I added some stones, Chipboards, sea shells, Metal and resin embellishments to create layers. Then I started coloring. I used metallic paints here in shades of purple, pink and blue.
Finally after it dried completely, I adhered two paint brushes on one side of it.
Here are some more close up shots
Supplies used:
Any Color Palette ( Here I used Round one)
Art Basic Heavy Gesso White
Corrugated sheet
Gauze
Papericious Chip Boards
Art Stones
Buttons
Metal Charms
Sea Shells
Painy Brushes
Metallic Paints
You can find all the above mentioned products at http://shop.rainbowcraftykari.in/ or preorder by email to rainbowcraftykari@gmail.com
Hope you like my project.
Do not forget to participate in our ongoing challenge Here
Hugs,