Showing posts with label Scrapbooking. Show all posts

Tuesday 12 July 2016

Guest DT Shilpi Gupta: Punchcraft Sunflower Tutorial

Hello Crafters, What's up? Today I'm so glad to Welcome a crafter on our blog who is known for her Punchcraft Projects. She makes amazing and innovative Punchcraft flowers. Your mind will be blown away seeing such a beauties. Without taking much time, Let me introduce to you Shilpi Gupta from Shilps Crafts - Unique Handmade Gifts 

Over to you Shilpi 

Hello,I am Shilpi gupta. I am a software engineer by profession and a crafter by heart. I am married and have a 3 month old daughter. I started crafting 4 years back when I used to make greeting cards for near and dear ones at birthdays and anniversaries. My husband saw those greeting cards and motivated me to take it seriously and to look at it from professional's view. And then I started taking it more seriously, looking for YouTube videos tutorials, following blogs to become aware that such crafting world exists too in this world :)
I started with handmade cards then gradually progressed to flower making and scrapbooks. That day forward i never looked back.

I am so excited to be a guest designer at Rainbow Craftykari. This blog is full of inspirations, tutorials, pictorials, demos and what not. You name it and this blog has it. You will find all the basic and advanced information about the new craft products.
Though I use different kind of techniques in my crafting such as mixed media, scrapbooking, card making, flower making but I love to make different kinds of flowers more. So today I will be sharing with you all a detailed pictorial on how to make real looking sunflowers in simple steps. Girls grab your cup of coffee and sit back as this post is picture heavy.

Let’s begin:
For this we will use Heartfelt creations Classic Sunflower die.


1st step:
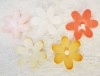
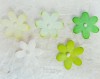
We will use 3 large, 3 medium and 1 small die cut outs as shown in picture to make one large size sunflower.


2nd step:
While distressing the die cut remember never apply or dab the blender directly on paper. Dab it lightly on the craft sheet near to the die cut and then in circular motion start moving the blender towards the die cut. Keep distressing the die cut in circular motion. This will ensure even spreading of ink without blotches or spots of ink.

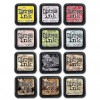
 I have used Mustard Seed and Wild Honey Distress Inks here, we will color the cutouts/petals. Color the whole petal using mustard seed distress ink and apply wild honey distress ink just on the pointed petals of each cutout.

3rd step:
Now we will start embossing and molding the petals to make them look real. Take the smallest pointed embossing tool and make 5-6 parallel lines from outward to inward direction as shown in the picture. This will help in curling the petals on their own. I have used Leather perforating pad underneath for embossing.


We will repeat this step with all the cutouts so that all our petals are ready. And it will look something like this. As you can clearly see in the picture, petals are slightly curled towards the center and the embossing has given depth to the petals.


4th step:
We are almost done and now we just need to arrange the cutouts to make a complete sunflower. We will glue down all the cutouts in offset position one upon another. Two petals should not be overlapping each other while arranging the cutouts. For gluing we will use Aleene’s Tacky glue. Its best glue to be used in punch craft and flower making.


After arrangement of all the cutouts, this should look like the below given picture.


5th step:
And the last step is to complete the center of the flower. I have used mustard seeds for the center as it gives that perfect natural look to the sunflower. You can also use brown glitter balls.

Note: Use transparent adhesive to stick the glitter balls to the center. I have used Inkessentials glossy accent. It is strongest and transparent in nature.

And here is your completed sunflower. Isn’t it beautiful? Blooming as if just now plucked from the garden.


It is rightly said flower is not complete without a leaf. Here we will also see how to make leaves for this flower.

6th step:
We will take punch cutouts using lily punch. You can use 100- 120 gsm colored cardstock available easily in Rainbow Craftykari Store. I have used 100 gsm dark green colored cardstock. You can also use 150gsm white iris sheet and then distress it using desired color.


7th step:
We will emboss these leaves in the same way as we have embossed flower cutouts creating vertical lines.


Are these sunflowers and leaves super easy to make? So our flower and leaves are all ready to be assembled on a card. And here we have our finished card.


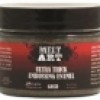
 I have used RTV Clear silicon glue to adhere flowers and leaves to the card base. This glue is my first choice because it gives me ample time to arrange my leaves and flowers. It takes around 30 mins to set permanent. Unlike hot glue gun which dries as soon as it comes out of the gun which makes it impossible to rearrange the flowers and leaves in case one does not find it pleasing to the eyes.


Hope you all liked the tutorial as much I do. You can leave your queries in the comments section and we shall get back to you.

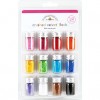
List of materials used:

Heartfelt Creations Sunflower Die
Distress inks Mustard Seed and Wild Honey.
Embossing tool.
Leather perforating pad.
150 gsm iris paper
100 gsm dark green colored cardstock
Inkessentials Glossy Accent
Aleen’s tacky glue
RTV Clear silicone glue

You can find these products at www.rainbowcraftykari.in

Thursday 16 June 2016

Guest DT Mansi Gupta: Mini Accordion Fold Album Tutorial

Hello Crafters, We're back with totally fresh batch of craft posts and we will make sure that you will going to learn and experiment new techniques through our DT's. Today we have came up with informative post on Mini Accordion Fold Album. Let me introduce to you a crafter who is Crafter by Heart, loves to Travel and Relish adventurous sports. She's into Scarpbooks, Decoupage, Volume Decoupage, Paper Craft, ceramic work, Collage clay and much much more. She is Mansi Gupta from Glitzern
Over to you Mansi
Hello Crafters,
Hope you all are doing well!!
Sharing a small tutorial on Super mini album in Accordion fold style. You can use this for anniversaries, birthdays, showers or any simple photo album. It is easy and cost effective to make. It measures 3.5 * 3.5 inches. Hope you will enjoy making it.


Material Required:
1) Chipboard/ Cardboard- 3.5* 3.5 iches- 2 pcs
3.5* ¾ inch- 1 pc.
2) Designer pattern paper- 3*3 inches- 11 pcs
3.25* 3.25 inches- 2 pcs
3.25* 1.5 inch- 1 pc
3) Black cardstock- 3.25* 19.5 inches- 1 pc.
4) Ribbon
5) Stamps and embellishments. 


First Step:
Score the black cardstock at the interval of 3.25 inches, and fan fold it. Our base of folded album will be ready.


Second Step:
Place the chipboard pcs on black cardstock and fold the ends making book like structure. Don’t forget to leave a little space (approx. 2mm) between the 3 panels. This space helps in folding the flaps. Stick the patterned paper inside the book, and keep it aside.


Third Step:
Now take the Fan fold strip and stick pattern paper pcs on it randomly using Aleene tacky glue or your favorite glue. (You can always increase the number of panels by sticking another black cardstock to it). Cover all the sides, front and back, except for the panel on the top.


Forth Step:
Now Paste the ribbon and the 3.25 inch sized pattern paper on top of book, paste the small pattern paper on spine to finalize the base of your album. Now with blank side at bottom, paste the album panels inside the album and yippee, your album is ready. 


Fifth Step:
Now this is my favorite step. Embellishments.
Use Sentiments, flowers, or any other decoration. I like to create a layer and keep it Simple. Here is the final look. Hope you enjoyed and understood this step to step process! Good luck and keep making more!!


List of Materials Used:
Papericious Paper Pack - Littel Star
Black Cardstock - 220 GSM
Chipboard
Ribbons
Mulberry Flowers
Embellishments
Aleene Tacky Glue

Monday 7 April 2014

Guest DT Indira - Recycle your Cardboard materials into Home Decor elements

Heya Everyone, we came up with an exciting and inspiring post today. This month, We have invited an crafter who is MBA by Profession and work for an IT MNC. She resides in Mumbai with her Husband. Crafting is her hobby and she loves transforming waste material into usable stuff and her love for recycling can easily be shown in her craft projects. She delved into many paper crafts such as Card Making, Quilling, Punch crafts, She is Indira Tanwar from Arty Sorts 

Welcome Indira at Rainbow Craftykari blog. Over to you now :)

Hi friends. This is Indira here from Arty Sorts blog. Few days back, Maninder got in touch with me and invited me to showcase some projects on the blog. It really does feel great when you can make use of stuff lying around in the house to create some beautiful art work.

This is the gorgeous kit that she sent me to use. Few of the things in the kit were totally new to me and had it not been for Maninder, I would have never tried these things out. I must say I really enjoyed playing with my new craft goodies. 

My post here today is something related to cardboard's that i have used from packaging material  to create projects. I hope you like my creations. Let me talk about them one by one. Since there are a lot of pics, I will keep the text short.


Project 1: Door Hanger
I have given a vintage look to the door hanger. For the base, I have recycled the cardboard from PaperMania Chipboard album packaging and covered it using MME - Oxford Lane Plaid Pattern paper from Rainbow Craftykari Store.


I have used lots of embellishments decorated using UTEE. The pictorial below will show you the step-by-step procedure on how I used UTEE.

1. Take a stamp of your choice and ink using Versamark ink.


2. I have re-used a thick packing paper to stamp ink on. A 220 gsm card stock can also be used. Covered the inked area with UTEE.

3. Remove the Excess. Melt UTEE using a heat tool. I'm using griddle(tava) for it. Fussy Cut the Image.


Now time to play with Petaloo Flowers, Wooden Embellies and Charms:

1. Choose embellishments of your choice, For my project i have use Color Me Crazy Petaloo flower, Wooden tag, MDF die-cuts, Corner metal charm, Bronze Flower metal charm, Heart Shape metal charm and  Metal key from the Kit. Melt UTEE, I have heated it on gas burner in a regular steel utensil.


2. Dip the Metal flower and Heart embellishment in Melted UTEE and Coat Well.


3. Repeat the above step and dip the MDF die-cut and Petaloo flower in UTEE. Coat Well.


Time for another pictorial for using flocking powder which I have used to cover the plain White Color me Crazy Petaloo flower from the kit.

1. Coat a flower with glue and cover generously with flocking powder. Press down the powder firmly and remove the excess.


2. To get a dark background, ink the flower before sticking flocking powder to it.

3. You can see the effect of flocking powder on the white flower, with and without inking.


Than I compiled the embellishments and flocked flower on the door-hanger base using Red pearl string from the kit and blings from my stash. Distressed the edges with Broken china and Vintage photo. Here is my result:


Project 2: Wall hanging/Desk Keepsake

Pictorial on Embellishing the Bezel:
1. Choose the Glitters and Bezel of your choice. Here I've used Chunky glitters and Glitter balls, Some blings from my stash and Square Bezel from the kit. Melt and pour the black UTEE onto the bezel with the help popsicle or spatula . Whilst still hot, add the bigger blings or embellishments onto it.


2.Add other things over it while UTEE is still hot. If its start cooling down, Use heat tool to melt it. I've used chunky glitter and some beads. Color the edges with Gold Perfect Pearl Powder.


For this project, I used a sturdy cardboard base, covered it using MME - My Girl - Bouquet pattern paper from the kit and distressed the edges with Worn lipstick ink. The sentiment is stamped on a price tag.


I've used the lovely flowers and circle metal charm from the kit and lot of blings here and there. The tiny wooden clothespin is colored in blue using a normal sketch pen.


Here is my Result:


Hope you enjoyed this post and will get inspired. If you have any questions feel free to ask me. Thank you Maninder for this opportunity and inviting me over your blog.

Thanks
Indira

Craft Supplies:


Thanks so much Indira for the sharing fabulous techniques and projects with us.