Friday, 13 October 2017

Photo frame Tutorial by DT Anila

Hello, Friends!


I am back on the blog again with a tutorial post. 
This time I have a tutorial for a DIY photo frame.


I have explained it with complete details and lots of pictures making it easier for you to recreate the same.


With Diwali around the corner, I am sure this will be an awesome gift for your loved ones. I feel there is no other gift more personalized than photographs. Gifting memories in the form of photos are the best gift ever. But it is also necessary that your memorable photograph is framed in an equally beautiful photo-frame.


Let's learn how to make this frame with minimal supplies at hand.


Over to my Tutorial.


Cut 2 pieces of 7"x9" cardboard from a sheet.(This frame is for a 4 x 6 photo. The size of the cardboard pieces should be 1 and 1/2" more than the photo size from all 4 sides)


Mark the photo size - 4" x 6" in the centre of the cardboard. 


Cut the central rectangle window a little smaller than the actual photo size. (Approx. 3.75" x 5.75")


Cover the cardboard with a pattern paper by folding in the paper from all sides.


Mark and cut the smaller rectangle shown in the picture and again fold in the sides. 


The frame looks like this. 


Take the other cardboard and stick it on a solid cardstock of size 8" x 10". Cut 3 strips of craft foam (any colour) Stick them as shown on the 3 sides leaving one long side open. 


Fold the sides over the foam strip so it is not visible on the outside and stick them.


Cut and stick an acetate sheet to cover the window in the centre.


Apply glue tape/glue to the three sides with foam of the base cardboard and stick the top cardboard 


Like this...


Now to create a support stand for the frame. Take a piece of cardboard of size 2.5" x 4.5". Cover it completely (as shown in the picture) with the solid cardstock.


Take a piece of the same cardstock of sizes 2.5" x 1" and fold it in half. Take another piece of size 2" x 4.5", fold it in half and twist the two ends to form a half-inch step (refer picture). Stick one fold of these 2 pieces at the back of the stand as shown. (The 1" piece at the top and the other piece little away from the bottom.) 


Adhere the entire stand at the back of the frame by sticking the remaining two folds to it. 


The frame is now ready for decoration.


TIP: While inserting a photograph, stick a strip of paper at the backside... This helps easy sliding of the photo in/out of the frame. This strip can be folded at the back of the frame. (Refer Picture)


Final look of the frame


Picture Credit - Pixabay


Materials used 

  • Cardboard
  • Pattern Papers
  • Coloured CS
  • Acetate sheet
  • Craft foam/Foam Tape
  • Embellishments/Flowers/Laces/Chipboard


I would love to see if you make any. Do not forget to tag me :-)Do leave your lovely feedback in the comments below.

All the above-listed Materials are available at Rainbow Craftykari store or can be pre-ordered.

Love,
Anila Dikay 

Monday, 9 October 2017

Diwali Decor Ideas Tutorial by DT Mounika

Hi Everyone,


I am here on the blog with some Diwali decoration projects inspired by our ongoing challenge Celebrations and Lights.


Diwali is all about lights, sweets and celebrations. So I have a tutorial of slab Diya holders, a flower lantern and a hexagon tray. Yep, you guessed it right it's a long post ;)!


Here's a look at the final projects together:


Let's begin with the Slab Diya holders

  • For this, I have used white cement.
  • Take a plastic cup for mixing white cement with water and desired acrylic paint
  • Pour this mixture in a ziplock bag- I took ziplock bags of size 4*6" and 5*6"
  • Place a Diya at centre with some weight on it.
  • Allow it to dry overnight.


Next, Flower lantern
  • Cut cardstock in different sizes of petals to use as templates
  • Trace down each petal 6 times on White Papericous Sigma Cardstock
  • Cut all the petals
  • Take 2 bowls of water- add orange and red Indian Inks. Dip the 2 smallest size petals in orange ink and the remaining petals in red ink and let it soak for some time. You can also use distress inks to colour the petals.
  • Let all petals dry
  • For base take disposable small cup, cut down the base make holes and use a binding wire with some pearls for the handle
  • Using glue gun start attaching petals smallest to biggest
  • Take a thick cardstock and attach it at the bottom
  • Finish it off by adjusting petals and place tea light led candle


Lastly, Hexagonal tray
  • For this, using a thick cardstock make a hexagonal template. Using the template cut chipboard in hexagonal shape for the base.
  • Cut 4 pieces of 6.5" x 2" and  2 pieces of 6" x 2" each on cardstock and chipboard. Cut 12 pieces of 2 x 2" on cardstock.
  • Use the longer cardstock pieces as hinges to stick the chipboard pieces to the hexagonal chipboard base and the 2" x 2" pieces to connect all sides to form a tray with depth.
  • Finish the tray with pattern papers and decorate. I have used quilling decoration in this one. 


Here are some close ups:


Materials used Slab Diya holders
  • White cement
  • Ziplock covers
  • Plastic cup
  • Acrylic colours
  • Tea light candles
  • Ice-cream sticks
 

Flower lantern
  • Papericous sigma cardstock
  • scissors
  • Indian inks scarlet and magenta
  • Glue gun
  • Binding wire
  • Disposable cup
  • Small pieces of heavy cardstock
 

Hexagonal tray
  • Chipboard
  • Cardstock
  • Pattern papers
  • Quilling strips
  • Flowers
  • Flower bead chain
  • Pearls
  • Glue gun

All the above-mentioned products are available at Rainbow Craftykari store or you can preorder them by sending an e-mail to rainbowcraftykari@gmail.com

Hope you're inspired by my projects!
Don't forget to link your projects to our current challenge.

Happy Crafting!

Mounika

Saturday, 7 October 2017

Winners Challenge #5- Tropical Moodboard

Hello Everyone,

Today we're here to announce are September Challenge Winners. 

We've had many entries, and we love how you'll interpreted the tropical moodboard and came up with unique creations. Unfortunately, a lot of great entries did not follow the challenge guidelines, especially using the challenge banner/graphic in their post and hence had to be disqualified.  Please go through the guidelines so that we don't have to skip such beautiful projects.

Let's move on to the announcement...

The top three in no particular order are

1. Shilpa Nagaonkar

We love the simplicity and elegance of this tag! 


2. Sindhu's Color Crafts

This creations is an interesting alteration and a great take on the moodboard!


3. Arpita's Creative Journey

A very unique take on the moodboard with some great elements!

Top three, do grab your badges from the blog and flaunt them!

Now onto our winner....

We love how the elements come together on this card- with a unique concept. Another factor is that she has clearly used elements from the moodboard and her creations reflects it! 

Kindly grab your badge from the blog and flaunt it. Do email us at rainbowcraftykari@gmail.com with the subject Challenge #5 Tropical Moodboard Winner to claim your voucher. 


We look forward to all your participation in our current challenge. Do check out various inspirations are member have for you over the month.


Friday, 6 October 2017

Ganesha Diwali Home Decor Piece Tutorial by GDT Vinita Jain

Hello Everyone!

Happy October!

This is a month of the festive season and Diwali is my most favorite festival, so there is no question about what I love to create with the Mixed Media projects!

You can surprise your guests and visitor this Diwali with your own handmade creation, no need to buy from the market now!

Today I want to show you my new MM project on coming festive occasion
And to inspire for this month challenge "Lights & Celebrations".


And here it goes.............!!!!!!

I converted a piece of plywood into a magical wall decor art. I coated it with Plaster of Paris with the textured look.


Give a new life to Lord Ganesha by using any kind of pearl colors.


Happy with the results using Fevicryl Pearl colors, Terracotta and Old gold Inka Gold!


Now time to create a background scene for Lord Ganesha.


Using air dry clay and a mould I made some embellishments to decorate and let it dry them for a full day.


Now given a coat of gesso to all of them. Don't worry about some cracks because they are very delicate, it will hide with some embellishments:) Fixed metal holders to hang the decor piece.


Applied fevicol and sealant to paste them all.


Die cut lots of different flowers and leaves out of Iris paper, perfect for flower making using Iris sheet.


Soak the flowers and leaves in the water bowl for a minute and inked them using distress inks.


Shaped them using golf groove tool and embossing pad as shown in the pic, perfect for textures and details.


Now time to create the background. Misted the piece with different color splashes. Firstly I started with turquoise color mist bottle at all 4 corners with the height of 4 or 4.5" gap. Then misted with midnight blue, not on the middle part because I wanted the Ganesha to highlighted in sunbursts color effect! Then misted with dirty pink near the pillars. After that misted with chalk ultramarine and golden canary. You will easily achieve the same results as shown in the pic.


Now rubbed all the white part using old gold and turquoise Inka gold to highlight the detailing work as shown in the pic. And applied a little bit at the surface and chippies too!


Here are some close-ups for the detailing work:


Rub some Inka gold on the metal charm OM word. Paste it on the tea holder and embellished it with some gemstones.


Now embellished the whole piece with my own handmade flowers and few rhinestones, gems. See the details in close-ups clearly!


And covered the backside with the corrugated sheet attached a heart-shaped border at the bottom.

Here is the finished project and ready to hang on the wall. I am really happy that this time I will decorate my Pooja place with my own wall decor piece!!! 😊


Isn't it gorgeous at all!!!

Hope you all enjoyed this project and try to make for yours one too to decorate your home this Diwali! Love to see what you come up with our new challenge here.


Supply list:

Plywood piece

Iris paper

Dies: Flower 2 from Joy crafts; Sunflower from Cheery Lynn; Small tattered florals from Sizzix Thinlits;

Chipboard: Papericious- patterns

Distress inks: fossilized amber, carved pumpkin, fired brick, candied apple, mermaid lagoon, twisted citron, mowed lawn, lucky clover,

Air clay dry from Sculpt Dry

Moulds: Baroque 6- Vintage art mould from IOD Prima

Gesso: Camel

Inka Gold: Turquoise, old gold

13 arts Ayeeda Mist: pastel turquoise, chalk dirty pink, chalk ultramarine

Gold alcohol splash: midnight blue, golden canary

Moda color- terracotta

Fevicryl pearl colors: pearl lemon, sparkling pearl golden green

Groove golf tool

Aleen's tacky glue

Other materials: Fevicol, Silicon glue, Different sizes and shaped rhinestones, Golden heart bead lace, A candle stand, OM metal charm, Glass pollens, colorful pollens, some mulberry flowers

All the above-used materials you can pre-order at the Rainbowcraftykari store and some are already available there!


Happy crafting!

Vinita Jain


Thursday, 5 October 2017

RCS Challenge #6 - Lights & Celebration

Hello Everyone,


A very happy October to you all! With the dawn of a new month we are back with another fun challenge for you all!


This time we have a theme with an additional twist.


(Image Credits Vecteezy and Partially Designed by Maninder Kaur)

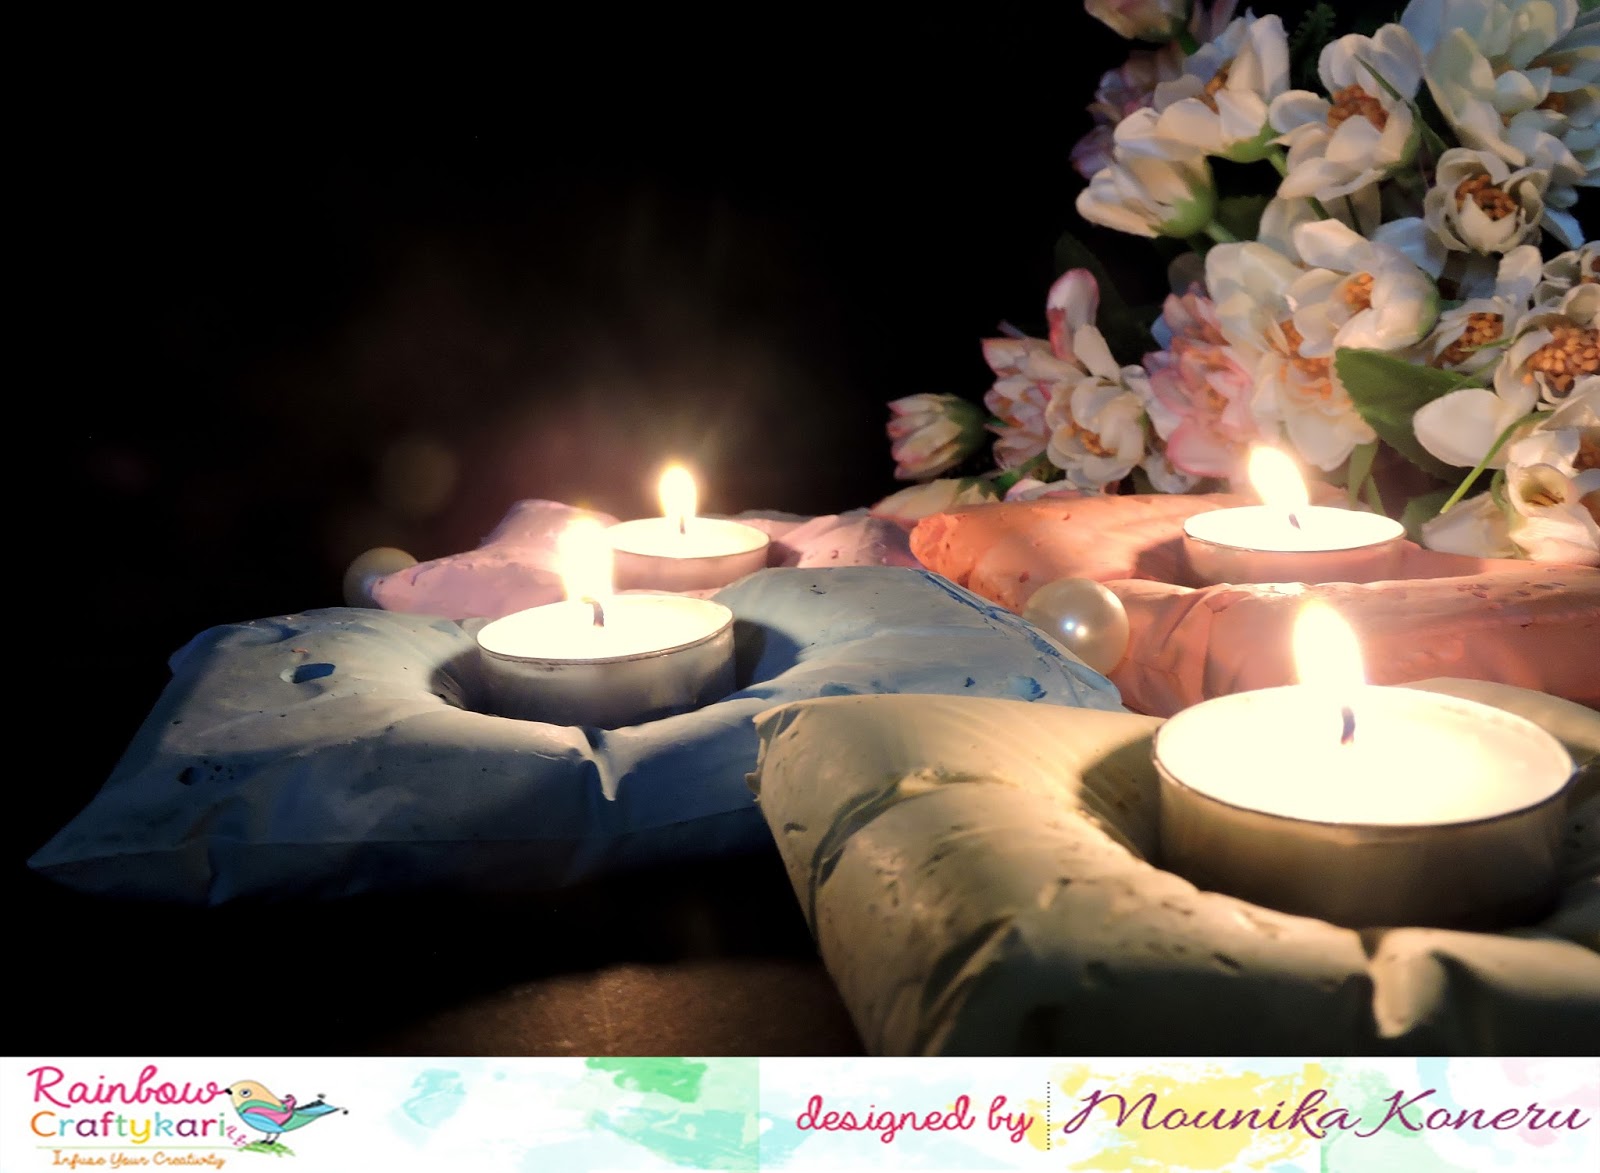
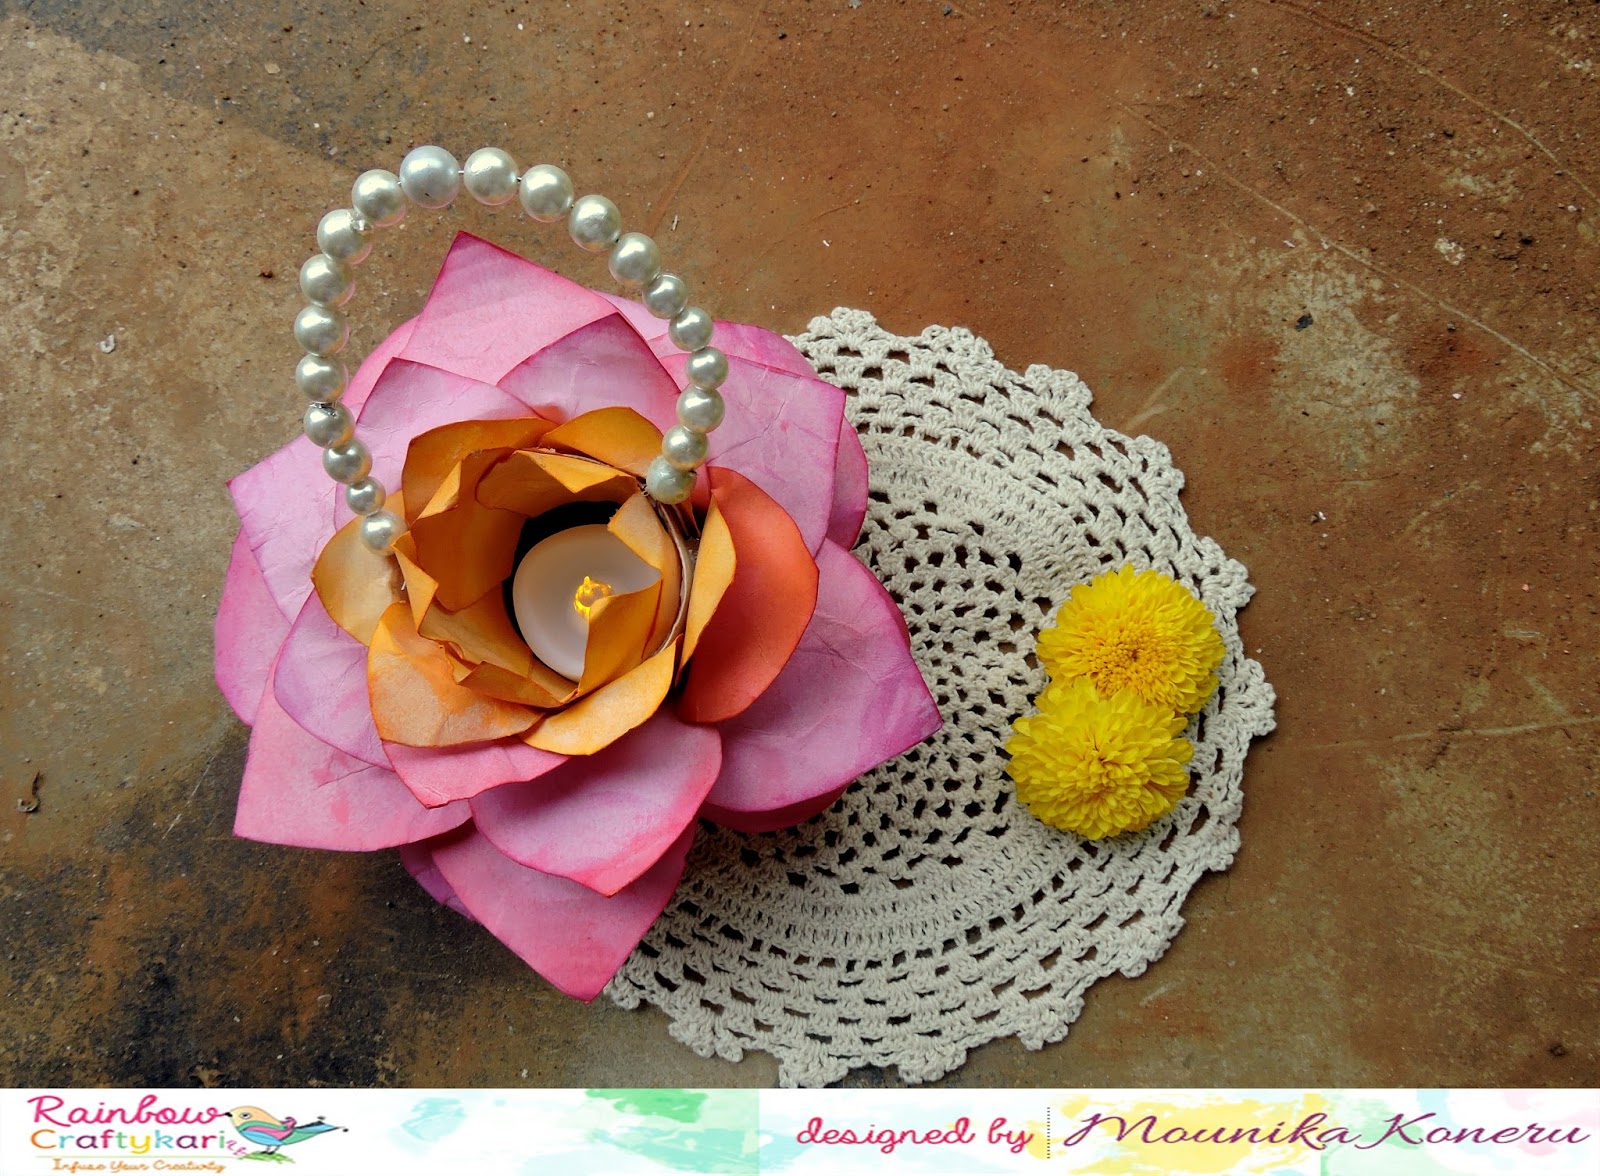
The theme is CELEBRATION and the twist is LIGHTS. By Celebration we mean any form of celebration- Birthday, Anniversary, Festivals and anything you can think of! With the twist of Lights we want to see any form of light either the word, the interpretation, the subject or the object in your project. Let us know how you interpreted the challenge and also make sure to use the challenge banner in your post. 

One winner will receive a 12" x 12" Papericious Paper Pack as well as the winners badge to flaunt on the blog. Top three entries will get to flaunt a badge on their blogs.

Feel free to create any crafty project be it a card, a layout, altered piece, tag, home decor art, album and anything art/craft related. Last date to submit entries is 30th Oct'17


Please go through General Guidelines and Rules HERE. Any entry which doesn't follow the guidelines will be disqualified and will be removed from the participation entries.


Here's an inspiration by our Blog Coordinator Aditi for the challenge


For more information on how to make these click here

Link your entries below to participate in the challenge.