Monday 6 November 2017

Shabby Chic Jewelry Box by DT Priya Mishra

Hello Crafty Friends,

A very good morning to all of you. I'm Priya again with a photo inspiration post. This time I transformed a boring box into an interesting shabby chic jewelry box. 


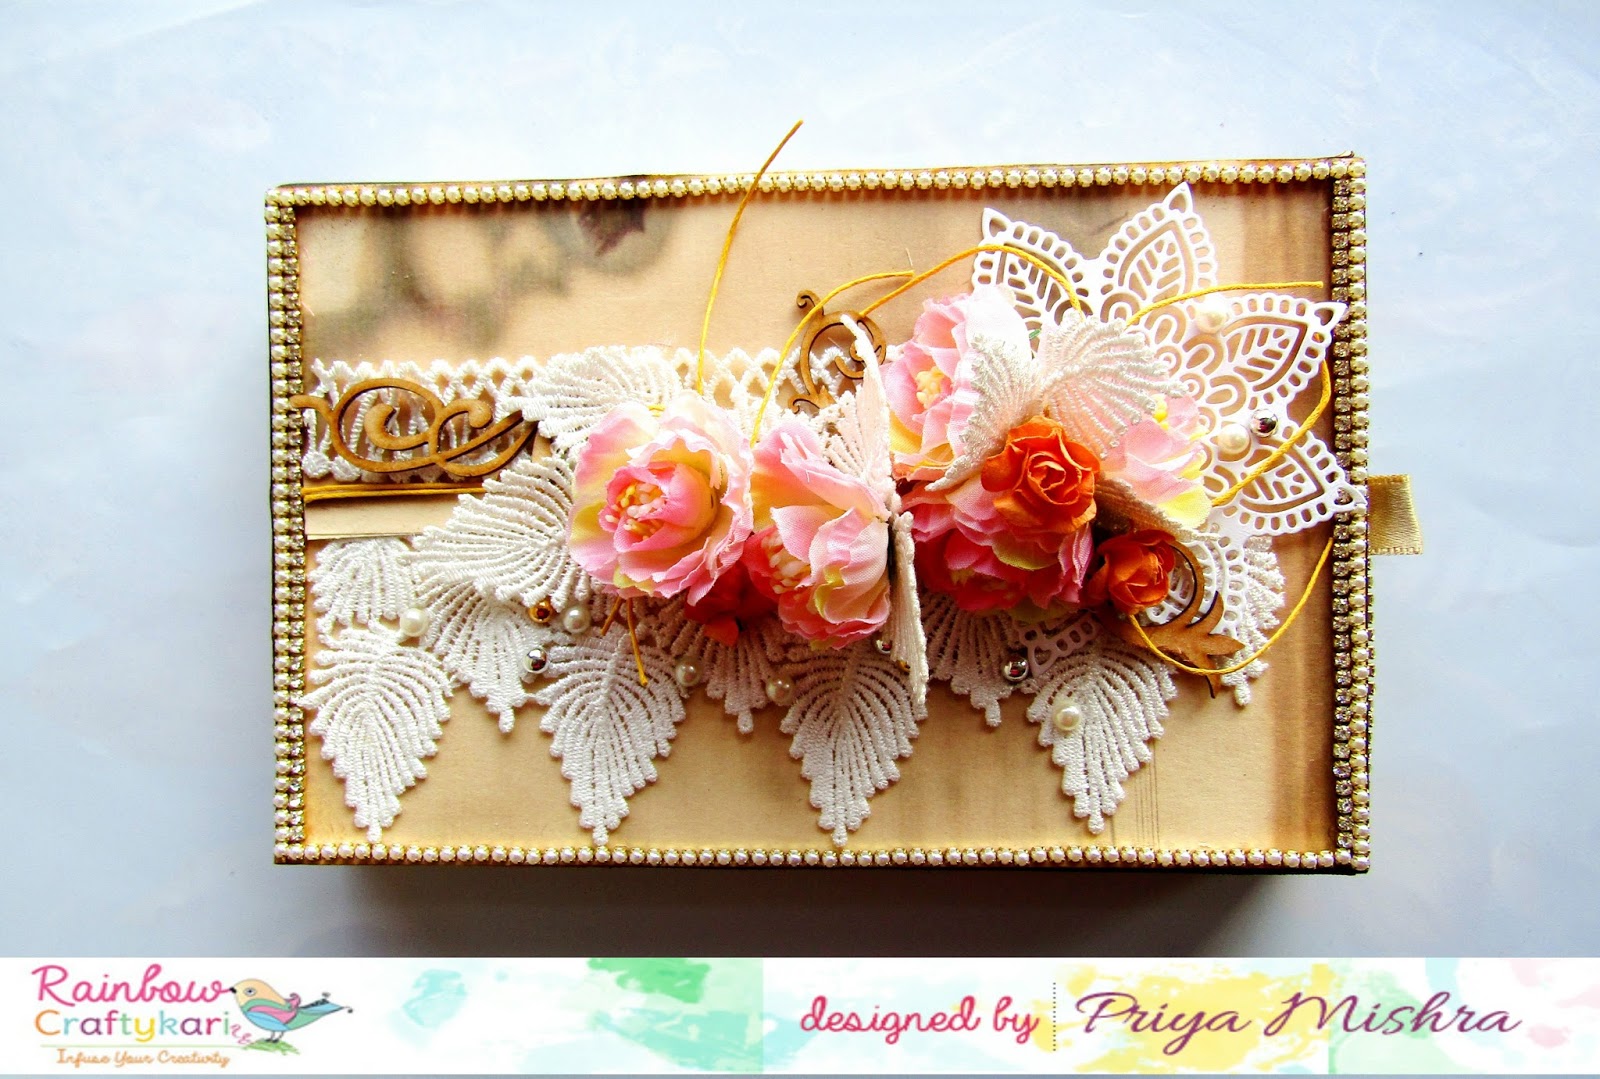
The box I used is a drawer box and is beautiful inside. I just cut some pattern paper according to the dimensions and glued on it. So, here's the box I altered...


I cut the pattern papers according to desired measurements, distresssed the edges and glued on all sides of the box. Then I adhered some pearl string and rhinestone string on the top cover of the box. also some strings on the front opening of it. Then I adhered a beautiful leaf pattern lace on the top cover and attached a mandala die cut, some flowers, pearl stickers, twines and some more lace to decorate it.


Supplies Used:

Cardboard Box
Martha Stewart Score Board
Guillotine Paper Trimmer
Scissors
Eno greeting Pattern Paper
Papericious Lace
Twines
Tacky Glue
Distress Ink
Double sided Foam Tape
Chipboards
Flowers
Paper Flowers
Diecut
Pearl String
Rhinestone String
Pearl Stickers

Hope you are inspired. 
You can find all the above mentioned products from Rainbow Craftykari Store or you can pre-order the same by writing to rainbowcraftykari@gmail.com. 
Also do not forget to play along with us at our monthly challenge here.

Hugs,
Priya


Saturday 4 November 2017

Vintage Style Love Card by GDT Vinita Jain

Hello Everyone!

Another month has started so another fun inspiration creation for the challenge!


This time, I tried a new concept for me, made a vintage style Love card with my own handmade flowers. My base is a textured white CS.


I added lots of layers of old textbook papers and adhered them on a distressed white piece. Distressed them with hickory smoke ink and applied fossilized amber Distress paint in the centre. Now added some white linen ink spray splatters too and applied some of the gesso at the edges! Die cut some rose flowers, distress and shape them. 


After that, I die cut some Hearts out of textured and vellum sheets. Die cut some clustered leaves, distress them too. Added lace trims and finally decorated my card using lots of flowers with some Thank phrase and few green transparent dew drops and lots of splatters!


Here is the inside view:  You can add a personal message too!


Hoping you are inspired by my creation and will play along.


Supply list:

  • White textured CS, cream color textures CS, vellum sheet
  • Old book text papers
  • Stamps: Love notes from Avery Elle and Polaroid from Kaisercraft
  • Dies: MFD 022 Heart from Nellie's; Mini and large royal rose from Die-namics; Clustered leaves from SSS
  • Distress inks: hickory smoke, mowed lawn, fossilized amber
  • Distress paint: Fossilized amber
  • Finger daubers
  • Camel Artists Gesso
  • Jet black archival ink
  • Clear gel tacky glue
  • White linen Dylusion Spray
  • Double colour jute string
  • Circle flourish Lace trim from Papericious
  • Green colour dew drops


All the above materials mentioned here are available at the store or you can preorder too at Rainbow Craftykari Store !

Happy crafting!
Vinita

Friday 3 November 2017

Innovative Mailbox Tutorial By DT Anila Dikay

Hi Everyone!

Anila Here, I am back again, at the Rainbow Craftykari blog today with a tutorial and walk-through video. 

This is a mailbox shaped box for gifting.

Let's begin with a tutorial.
(This is a picture heavy post.... I wanted to include as many pictures as possible so when you try to recreate this you will have no problem at all)

Materials needed are:
Black CS
Pattern papers
Laces/ribbons
A Brad and a handle
Decorative material.

Method:
  • Take a CS measuring 12" x 7". Score the 12" side at 1/2" and 11 1/2". (Sheet 1)
  • Take a sheet of the same CS measuring 7" x 4". (Sheet 2) Stick the scored lines of sheet 1 to sheet 2 from the lower side. The box structure is ready.


  • Take a CS measuring 8" x 5" and score it at 1/2" from all the 4 sides. 


  • Trim the corners as shown and fold up the edges to form a tray.


  • Cut 2 pieces of the CS, little larger from all sides than the arch shape.


  • Make small cuts along the extra edge of the cutout and fold them inwards. Cover the folded edge with a strip of paper.


  • Take the other cutout, follow similar steps and stick it to the tray made.


  • Now cover the box with colourful patterned paper over the arch. 


  • Cover the side panel with colourful paper too (cutting the paper little larger and folding the sides inwards to cover the edges) Attach it to the box and stick it in place. This seals one end of the box completely. 


  • Similarly cover arched portion of the tray. Stick pattern paper from the inner side of the tray (as shown)


  • Adhere lace to the edge of the arch.


  • Cut a Flag shaped CS, cover it with pattern paper. Using a single hole punch make a hole. Attach this to the box using a brad. 


  • Attach a handle to the arch of the tray. Decorate the mailbox.


The Mailbox is now ready to hold any gifts inside.

Here are some final pictures with gifts inside.


That's all for today. Hope enjoyed making this mailbox with me. Would love to see if you create anything like this. Remember to tag us!

Here is the Walkthrough Video of Mailbox


Don't forget to participate in our ongoing this month challenge "Vintage"


All the above-mentioned materials are available at Rainbow Craftykari store.

Thank you!

Anila

Wednesday 1 November 2017

Vintage Card Video Tutorial by Blog Coordinator Aditi

Hello everyone,

A very happy November to you all! We have an interesting challenge this month and we also have a collaboration with Paru's Card Making Blog. Check all the details regarding this here

For the challenge, I have created a Tri-Fold Vintage theme card! I have a video tutorial for you all. 

Here's a look at the card, with some close-ups:


Here's the supply list with the basic measurements, before you proceed to the video:
  • White Cardstock- 12" x 5.5"  for the card and 1" x 12" for the belly band
  • Pattern Paper Kaisercraft Be-You-tiful Pack- cut to the following sizes- 5 3/8" x 1 5/8" (2pieces first flap); 5 3/8" x 2 7/8" (2 pieces second flap); 5 3/8" x 4 1/8" (1 piece last flap); 7/8" x 3 3/8", 7/8" x 4 3/8", 7/8" x 3 7/8" (Belly band)
  • Sizzix Thinlits Flower Die- 661806
  • Old book page
  • Altenew Painted Butterflies Stamp Set
  • Gold Stickles
  • Staz On Black Ink
  • Distress Ink- Vintage photo
All the mentioned materials are available at the Rainbow Craftykari store or can be pre-ordered by sending an e-mail to rainbowcraftykari@gmail.com

Hop on over to see the video tutorial...