Good morning Crafters!!
Today I am here to bring you some more inspiration for our ongoing challenge “Exploding Surprise”. Do check out the rules and guidelines for the challenge here.
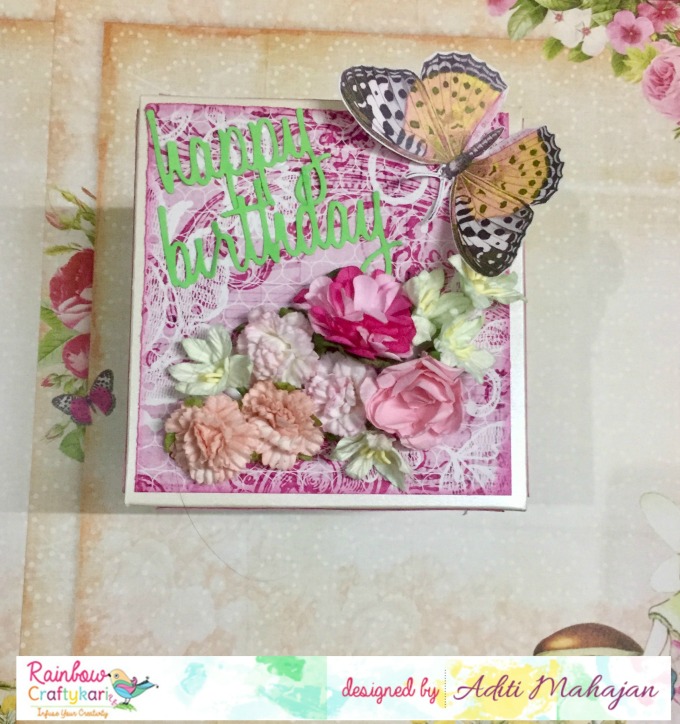
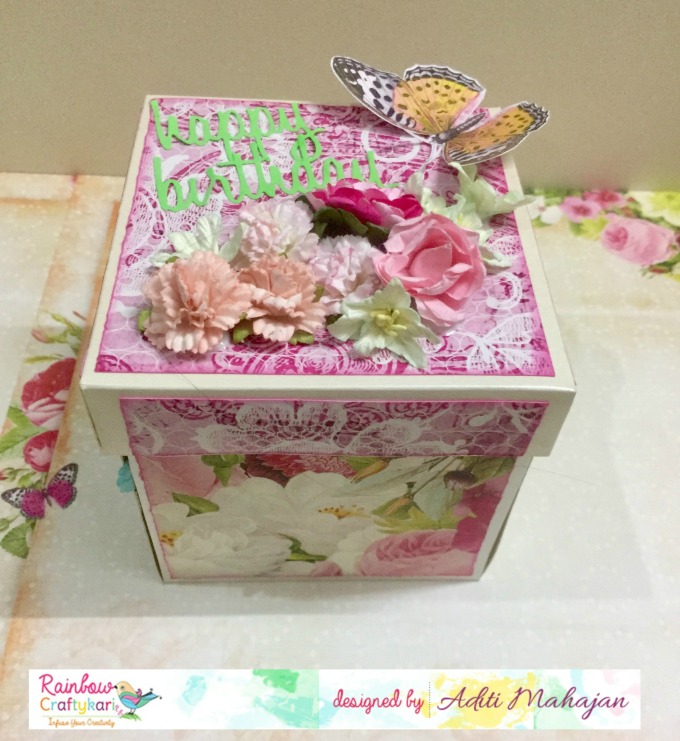
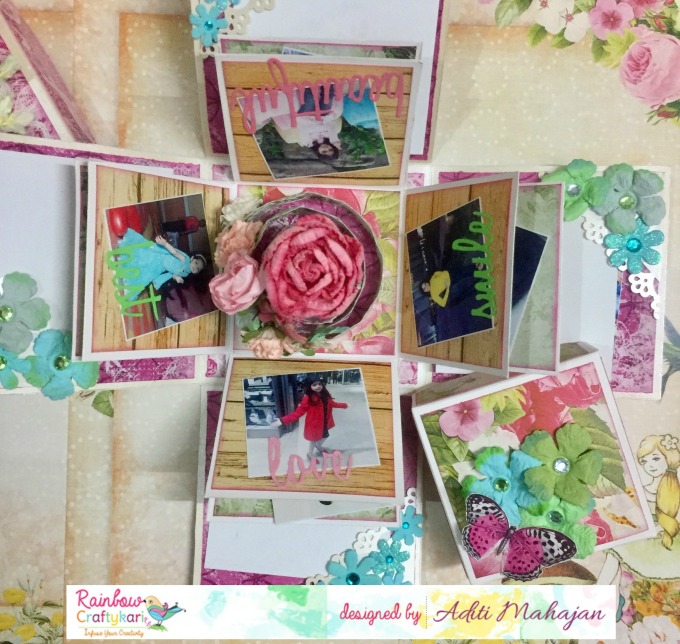
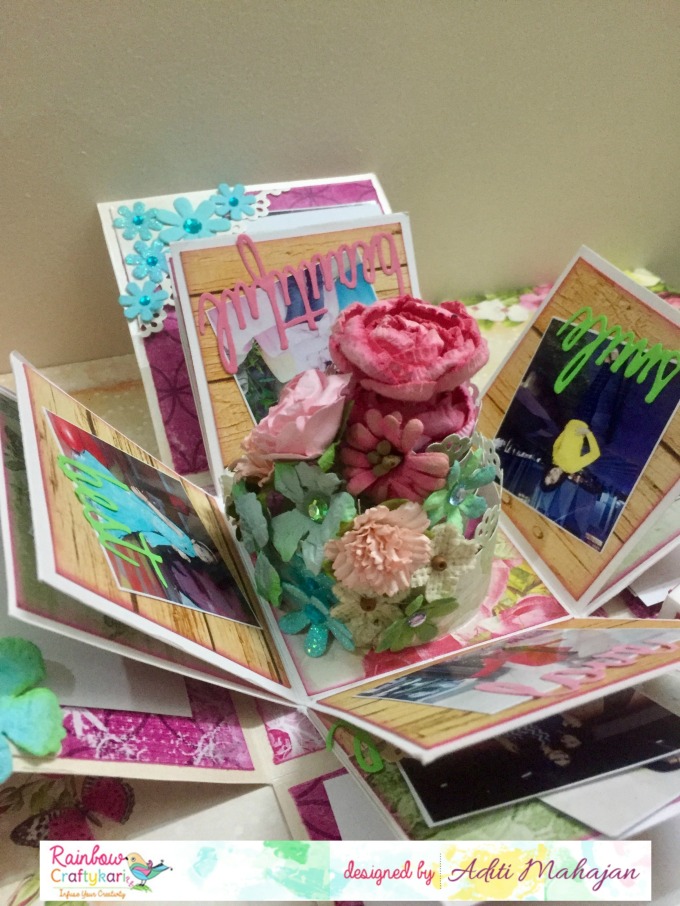
I created this explosion box using Papericious “If Only” Collection. This explosion box can be a present for anyone you love. I have kept the theme floral and have added lots of flowers and butterflies.
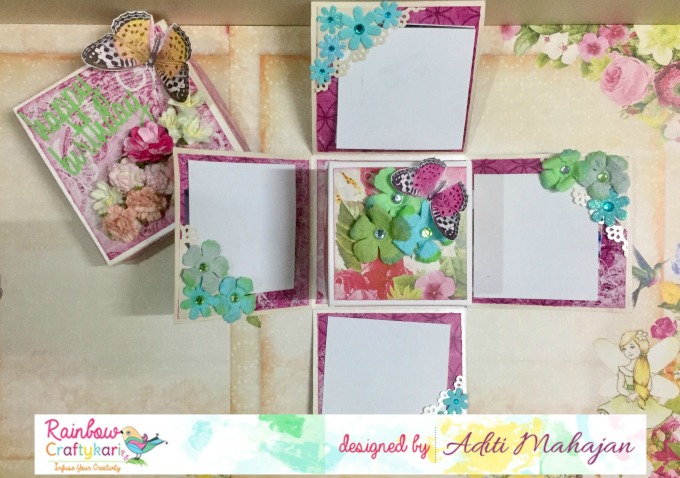
First I created two layers and added pattern papers with distressed edges according to the color palette of the challenge.
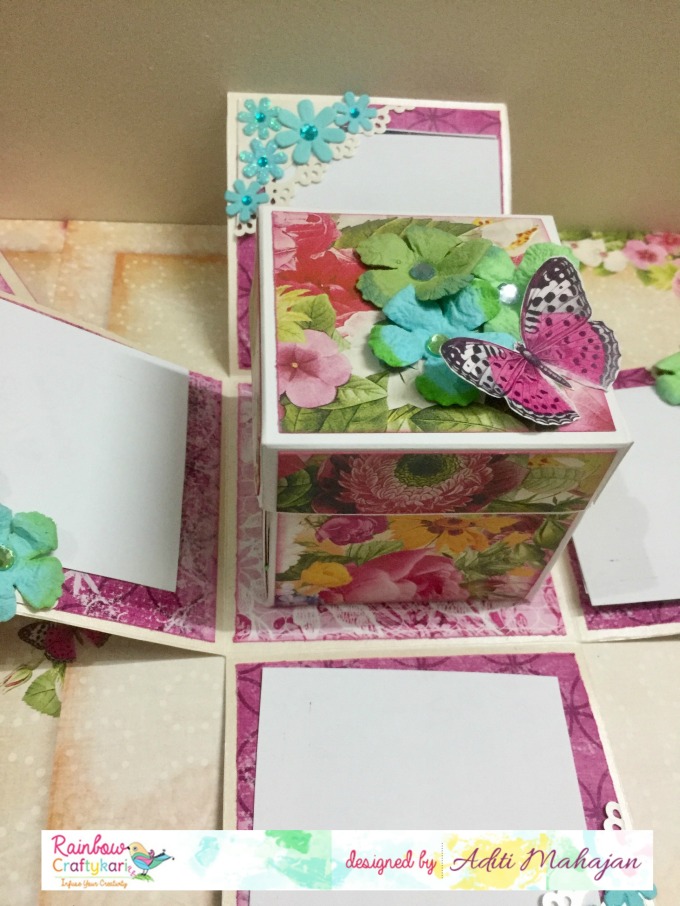
On the first layer, I have added paper doilies and some simple punched out flowers. Photos can be added later. On the inner layers, I have added Scalloped circles from same paper pack and have stamped some love sentiments. Finally I have decorated these with some roses and leaves.
For the central 3D piece, I created a bed of handmade roses with butterflies popping out. The butterflies have been stamped on blue colored paper, fuzzy cut and attached using acetate strips. The bed has been created using a used-up tape roll covered with green glittery tape and decorated with leaves and pearls. Finally,I have added some diamond dust to give the blooms some sparkle.
On the lid, I have added a shaker element over a distressed paper doily and have decorated it with flowers and butterflies.


Materials Used:
Black Cardstock
Papericious If Only Paper Pack
Large Flower Punch-for making the roses
Paper Doilies
Acetate sheet
Butterfly stamp
Distress Inks
Diamond Dust
Craft scissors
White Glue
Double sided tape
All the materials listed above are available at Rainbow Craftykari Store or you can pre order them by sending an email at rainbowcraftykari@gmail.com.
Hope you got inspired to create one yourself. Do join us in the ongoing challenge. Looking forward to see your entries. Happy Crafting!!
Regards,
Richa Maurya
http://apaper-palette.blogsot.in
Today I am here to bring you some more inspiration for our ongoing challenge “Exploding Surprise”. Do check out the rules and guidelines for the challenge here.
I created this explosion box using Papericious “If Only” Collection. This explosion box can be a present for anyone you love. I have kept the theme floral and have added lots of flowers and butterflies.
First I created two layers and added pattern papers with distressed edges according to the color palette of the challenge.
On the first layer, I have added paper doilies and some simple punched out flowers. Photos can be added later. On the inner layers, I have added Scalloped circles from same paper pack and have stamped some love sentiments. Finally I have decorated these with some roses and leaves.
For the central 3D piece, I created a bed of handmade roses with butterflies popping out. The butterflies have been stamped on blue colored paper, fuzzy cut and attached using acetate strips. The bed has been created using a used-up tape roll covered with green glittery tape and decorated with leaves and pearls. Finally,I have added some diamond dust to give the blooms some sparkle.
On the lid, I have added a shaker element over a distressed paper doily and have decorated it with flowers and butterflies.


Materials Used:
Black Cardstock
Papericious If Only Paper Pack
Large Flower Punch-for making the roses
Paper Doilies
Acetate sheet
Butterfly stamp
Distress Inks
Diamond Dust
Craft scissors
White Glue
Double sided tape
All the materials listed above are available at Rainbow Craftykari Store or you can pre order them by sending an email at rainbowcraftykari@gmail.com.
Hope you got inspired to create one yourself. Do join us in the ongoing challenge. Looking forward to see your entries. Happy Crafting!!
Regards,
Richa Maurya
http://apaper-palette.blogsot.in