Hello Crafty Folks,
A very good morning to all of you.I'm back with a Picture Tutorial for a Mixed media Wooden Piece. Here I have explained how I have made this piece totally out of scrap. Except for colouring and glueing you don't need any supplies to make this kind of a project.
Here is what I made....
So let's Start...
Step 1:
I had this wooden plank which is about 2.5 feet in length. You can take any base be it wooden or canvas, Procedure will be the same. I used some masking tape on corners and sides to fill the uneven parts. Also attached a hook at the back so that I can hang it on my wall.
Step 2:
I gave it a coat of white gesso.
Step3:
Here you can see the things I have used on the base to create textures. Some negative of chippies, Gauze cloth, Twine, some nails, buttons, tissue paper, pista shells, broken pencils, tags, broken toys etc.
I cut and glued the negative chippies on the base as shown in the picture below and also tied some twine on desired spaces.
Step 4:
Then I arranged some gauze around the chippies and adhered some corrugated sheet here and there and also attached lace at few places.
Step 5:
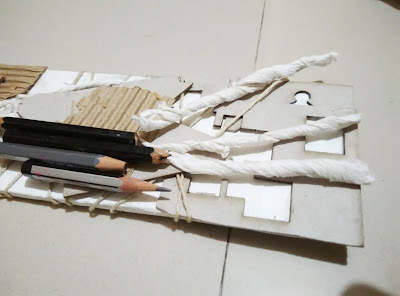
Then I arranged tissue rolls, some chipboards, metal charms, tags, broken pencils and other embellishments using 3d matte gel.
Here are some close-ups of the arrangements in case you are interested.
Step 6:
Then I gave a coat of white gesso on it after all things dried up. Also used a light coat of Decoart crackle texture paste here and there.
As you can see I arranged some broken jewellery pieces on it to add more textures and finally added a butterfly chipboard to give some height.
Step 7:
Then I started colouring this after it is fully dried. Firstly I gave a coat of Chalk paint Sailing sky and Mint green Patina Paste. Then I started dry brushing with Rust and Brass Patina paste mixed together. Also rubbed blue patina paste here and there for the effect.

Supplies Used:
Wooden PlankPapericious White gessoFinnabair Patina Effect Paste ( Mint Green, Blue, Rust, Brass)
Deco Art Crackle Paste
Rangers 3D Matte Gel
Acrylic paint Rust
Papericious ChipBoards
Corrugated sheets
LacesGauze
You can get all the above-mentioned products from Rainbow Craftykari Shop or can pre-order by sending an email to rainbowcraftykari@gmail.com.
Also, do not forget to participate in our ongoing challenge here and check out other gorgeous projects and tutorials from our awesome Design Team.
Hope you like my project.
Hugs,
Hello Everyone, :)
I am at Rainbow Craftykari Blog today to share my very first inspiration post as the DT member for Rainbow Craftykari. I am Elated..!! and I hope to stand up to the expectations laid down on me.
Today I have an Altered MDF wooden box to share as a part of my inspiration project.
Altered MDF projects have been my favorites since forever & no wonder I begin my term with one of these.
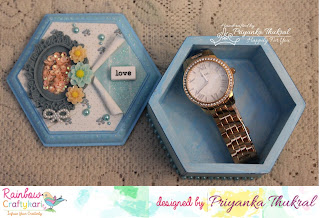
Here is the complete picture of my project
For this project, I picked up a hexagonal MDF box (another current favourite of mine.. :P ) I began with painting the base with gesso which works as a primer (tip: Gesso creates a coat on the base of the wooden material that holds the paint otherwise the wood absorbs the colour).
Next, I painted the box with blue acrylic colour. I chose coordinating patterned papers from Eno Greetings paper pack, cut them to the desired size & distressed them on the edges. For the cover, I cut the paper from one end to the centre point & rolled the two sides on the opposite sides.
On the exposed part of the base, I added glitter using stickles in the coordinating colour & a word tile over it. On the other part, I added a resin oval frame & sequins in the middle of it & adorned it with the resin flowers & bows.
On the sides, I again used stickles in the same colour to give an embossed look (I love how they look like tiny droplets resting on the edge) & added rhinestones to lift up the whole look.
and tada..!! the box is done... :)
The box is perfect to gift a watch to someone or keep it on your dresser as a jewellery box, can be used in multipurpose ways.
Check out some more close up pictures
Supplies Used:
- Blue Acrylic paint by Fevicryl
- Eno Greetings- Pattern Papers
Above-mentioned products are available at Rainbow Craftykari store or you can also pre-order by sending an email at rainbowcraftykari@gmail.com
Don't forget to participate in our ongoing challenge Rainbow Friendship. Link your projects here.
Hope you liked my project!


